Configuring IPsec IKEv2 Remote Access VPN Clients on Windows
Tip
The ipsec-profile-wizard package on pfSense Plus software generates a set of files which can automatically import VPN settings into Apple macOS and iOS (VPN > IPsec Export: Apple Profile) as well as Windows clients (VPN > IPsec Export: Windows).
This feature allows much greater flexibility in settings as it will configure clients to match what is set on the server specifically rather than making the server accommodate the default settings on various operating systems.
This package is exclusive to pfSense Plus software and is not available on the community edition.
If the package is not already installed, add it using the Package Manager.
Windows 8 and newer can easily connect to IKEv2 VPNs. The procedure in this section was performed on Windows 10 20H2 but earlier versions are similar.
Import the CA to the Client (All EAP types)
This step is necessary for all EAP types (EAP-MSCHAPv2, EAP-RADIUS, EAP-TLS).
Export the CA Certificate from the pfSense® software GUI and download or copy it to the client PC:
Navigate to System > Certificates, Certificate Authorities tab on the firewall
Click
 by the CA to download only the certificate
Locate the downloaded file on the client PC (e.g.
VPNCA.crt) as seen in Figure Downloaded CA Certificate

Downloaded CA Certificate
Double-click the CA file
Click Install Certificate… as shown in Certificate Properties
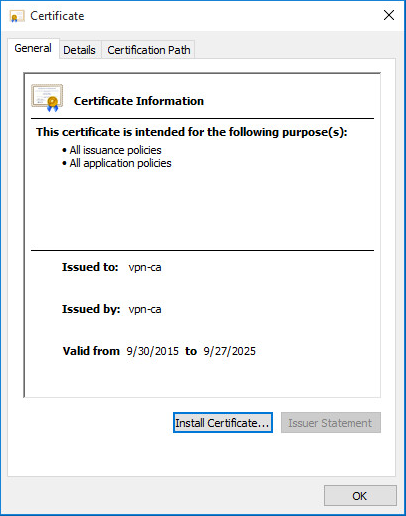
Certificate Properties
Select Local Machine as shown in Certificate Import Wizard - Store Location
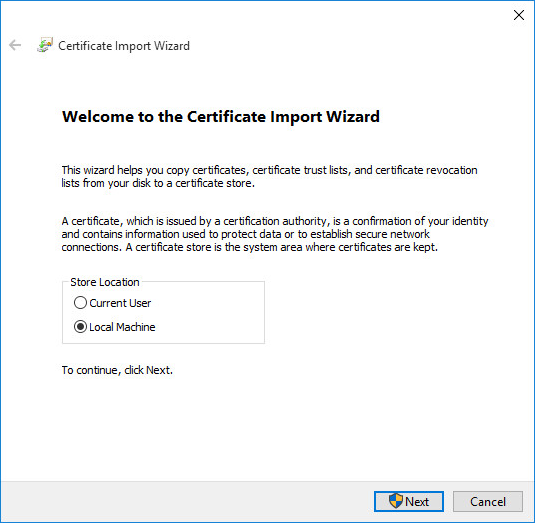
Certificate Import Wizard - Store Location
Click Next
Click Yes at the UAC prompt if it appears
Select Place all Certificates in the following store as shown in Figure Certificate Import Wizard - Browse for the Store
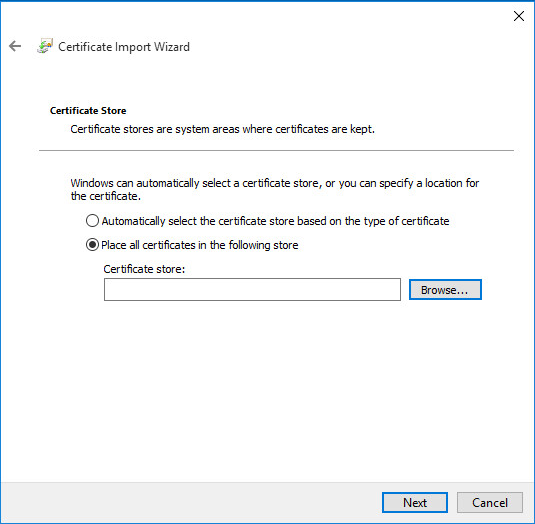
Certificate Import Wizard - Browse for the Store
Click Browse
Click Trusted Root Certification Authorities as shown in Figure Select Certificate Store
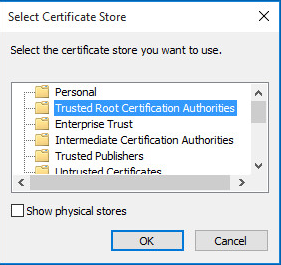
Select Certificate Store
Click Next
Review the details, they should match those in Figure Completing the Certificate Import Wizard
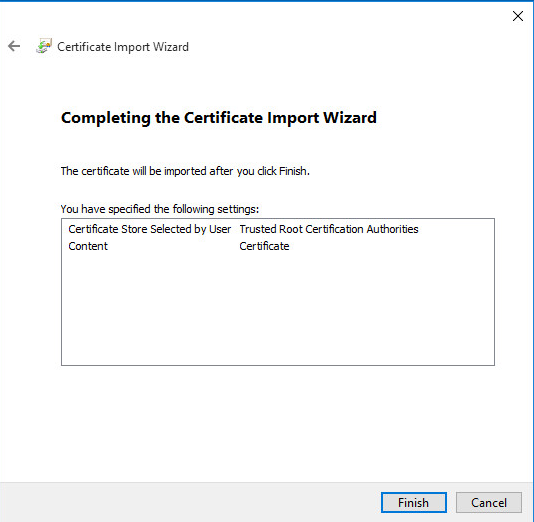
Completing the Certificate Import Wizard
Click Finish
Click OK (2x)
Import the CA and Client Certificate to the Client (EAP-TLS Only)
This process is only required for EAP-TLS which uses per-user client certificates. For EAP-MSCHAPv2 or EAP-RADIUS, skip to the next section.
Export client certificate from the firewall and download it to the client PC
Navigate to System > Certificates, Certificates tab
 to edit the user certificate
Enter an Export Password known to the end user which will encrypt the sensitive contents of the archive file
Click
 Export PKCS#12 to download a
 .p12file containing the client certificate and key
Locate the downloaded file on the client PC (e.g.
client1.p12)Double-click client certificate
.p12fileSelect Current User
Click Next
Click Yes at the UAC prompt if it appears
Confirm the proper file is selected
Click Next
Enter the same Password used when exporting the
.p12fileClick Next (2x)
Click Finish
Click Yes to confirm adding the certificate data
Click OK
Set up the VPN Connection
Once the certificate has been properly imported it is time to create the client VPN connection. The exact steps will vary depending on the version of Windows being used by the client, but will be close to the following procedure:
Open Network & Internet Settings on the client PC
Click VPN on the left side
Click + Add a VPN connection
Set the fields as follows:
Example values are shown in Figure Windows IKEv2 VPN Connection Setup Screen:
- VPN Provider:
Windows (built-in)
- Connection Name:
ExampleCo Mobile VPN- Server Name or Address:
vpn.example.comWarning
This value must match the contents of the server certificate!
- VPN type:
IKEv2
- Type of sign-in info:
Username and password for EAP-MSCHAPv2 or EAP-RADIUS
Certificate for EAP-TLS
- Username, Password:
Fill in values for this client when using EAP-MSCHAPv2 or EAP-RADIUS. Leave blank to be prompted by Windows.
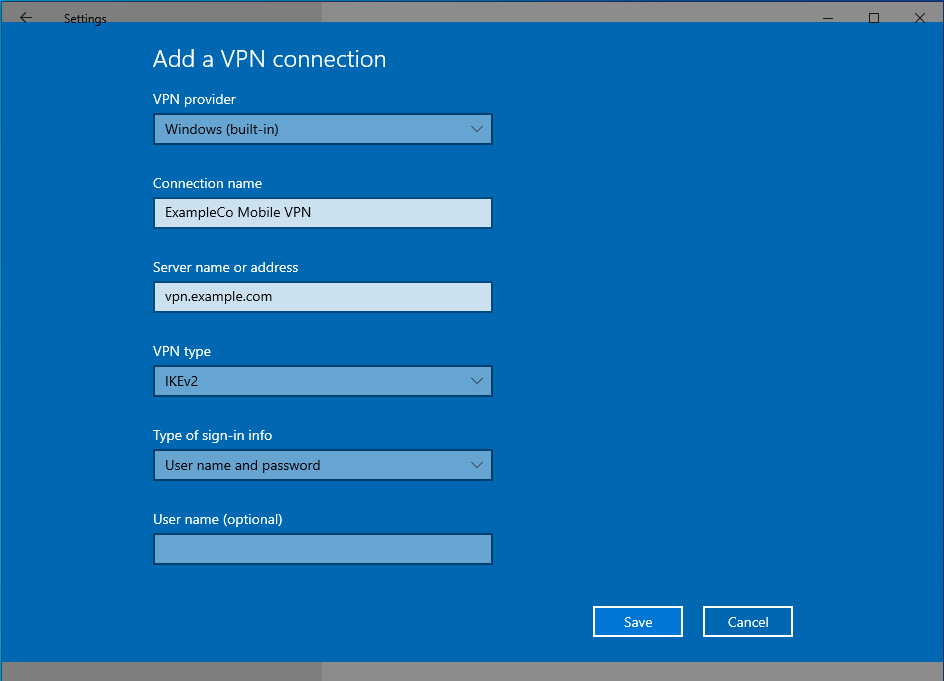
Windows IKEv2 VPN Connection Setup Screen
Click Save
The connection is now ready to use.
Note
When making the first connection Windows may prompt to approve the server certificate. Check the certificate and then choose to proceed when prompted.
Disable EKU Check
Windows expects IKEv2 server certificates to contain the IKE intermediate
extended key usage attribute (1.3.6.1.5.5.8.2.2), among others. Creating a
CA and a server certificate in the Certificate Manager will add the correct set
of attributes for this usage (Certificate Settings).
If the server certificate is created with the wrong settings, or the certificate is generated elsewhere (e.g. via ACME), the certificate may lack these attributes and clients will fail to connect.
To accommodate such certificates, the Extended Key Usage check can be disabled on Windows.
Warning
Disabling this check also disables validation of the certificate common name and SAN fields, so it is potentially dangerous. Any certificate from the same CA could be used for the server when this is disabled, so proceed with caution.
To disable the extended key usage checks:
Open up Registry Editor on the Windows client
Navigate to the following location in the client registry:
HKEY_LOCAL_MACHINE\SYSTEM\CurrentControlSet\services\RasMan\Parameters\Add a new DWORD entry with the following attributes:
- Name:
DisableIKENameEkuCheck- Value:
1
Reboot the client PC to ensure the new setting is activated
Advanced Windows IPsec settings
With Windows 10 PowerShell Cmdlets it is possible to change various advanced settings. The available commands are explained on the Microsoft PowerShell VpnClient module reference.
Routes
Enable split tunneling so that the client does not send all of its traffic across the VPN:
PS> Set-VPNconnection -name "ExampleCo Mobile VPN" -SplitTunneling $true
Add a VPN connection route to send a specific subnet through the VPN, use:
PS> Add-VpnConnectionRoute -ConnectionName "ExampleCo Mobile VPN" -DestinationPrefix 10.4.0.0/24
Replace ExampleCo Mobile VPN with the actual connection name, and replace
10.4.0.0/24 with the desired destination network. Repeat the add command for
each network to route over the VPN.
See also
For more information, see PowerShell VpnClient module reference