Virtualizing pfSense Software with VMware vSphere / ESXi
This article is about building a pfSense® virtual machine on vSphere / ESXi. Article explains how to install any major pfSense software version on VMware vSphere.
Warning
Depending on the version of pfSense software in use, there may be specific vSphere / ESX version requirements as well. For example, versions of pfSense software based on FreeBSD 12.x require ESX 6.7 or later while versions based on FreeBSD 14.x require ESX 7.0 or later. Typically, the VM hardware version must also be at that level or greater. While older versions may work, they may be unstable.
Refer to both Versions of pfSense software and FreeBSD and the VMware Guest OS Compatibility Guide to find the base OS and requirements for each version.
The article does not cover how to install vSphere or how to configure pfSense software to do any of the many amazing things it can. A basic, working, virtual machine running pfSense software will exist by the end of this document.
Note
If the pfSense software instance will be running as a perimeter firewall for an organization and the “attack surface” should be minimized, many will say it is preferable to run it on stand-alone hardware without virtualization. That is a decision for the user and/or organization to make, however.
This guide starts at the point with a vanilla ESXi install connected using the vSphere client. If other VMs are already running on ESXi, then it is not likely necessary to follow the networking steps too closely. However, skim through it to see what is suggested before building the pfSense software virtual machine.
Assumptions
vSphere host is running, and the user can log into the web interface through its management network adapter.
The reader has an understanding of network addressing.
vSphere host has a working datastore.
The pfSense software installation
.isoimage is present in a datastore.
The following steps include the necessary vSphere web client configuration required to get a VM for pfSense software running.
Basic vSphere web client networking setup
Before creating a new VM in vSphere web client, create two virtual switches and two port groups. First, create Virtual switches for WAN and LAN and after that two port groups for the WAN and LAN. If there are existing virtual switches in the environment which can be used for this VM, skip this step.
Open the vSphere web interface
Click Networking, Virtual switches tab
Click Add standard virtual switch

Configure the vSwitch as follows:
- vSwitch Name:
WAN- Uplink 1:
vmnic1
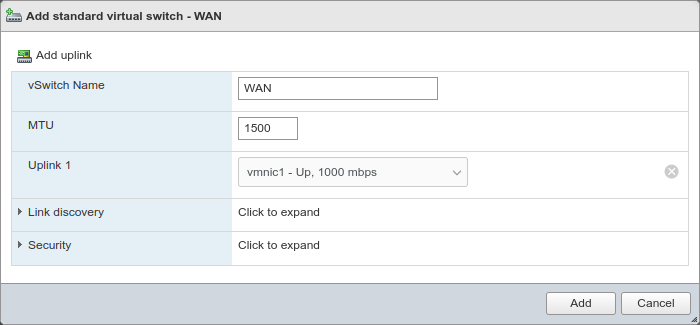
Click Add
Repeat the process and add another vSwitch named
LANfor vmnic2
Creating port groups
After creating Virtual switches, now create port groups. If there are existing port groups in the environment which can be used for this VM, skip this step.
Click Networking, Port groups tab
Click Add port group
Configure the port group as follows:
- Name:
WAN- Virtual switch:
WAN
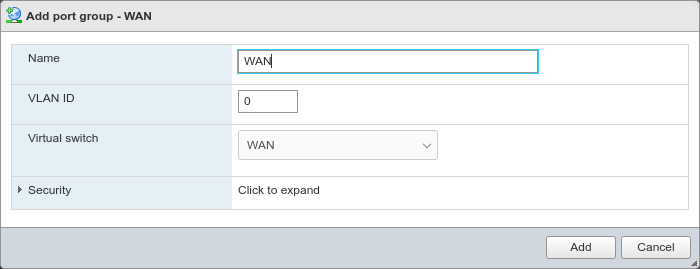
Click Add
Repeat the process and add another port group named
LANfor the LAN vSwitch.
Creating a Virtual Machine
With the required networking configured, the next step is to create a virtual machine.
Click Virtual Machines on the left Navigator pane
Click Create/Register VM

Select Create a new virtual machine on the first wizard
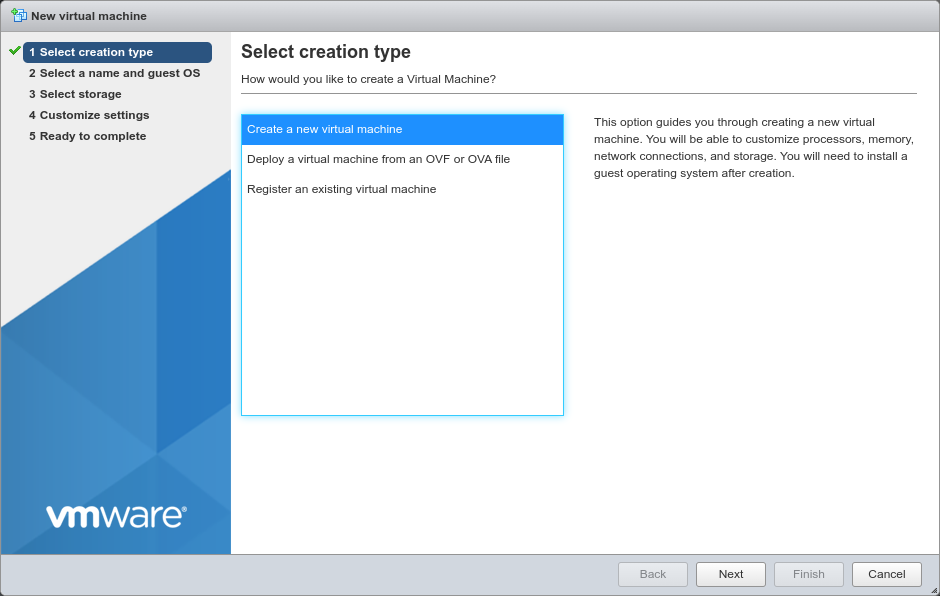
Click Next
Configure the Select a name and guest OS screen of the wizard as follows:
- Name:
pfSenseor another meaningful name, such asfirewall.- Compatibility:
The latest version available (e.g. ESXi 7.0 U2 virtual machine)
- Guest OS Family:
Other
- Guest OS Version:
FreeBSD 12 (64-bit) or whichever version best matches the version of FreeBSD used by the chosen version of pfSense software. See Versions of pfSense software and FreeBSD for a list.
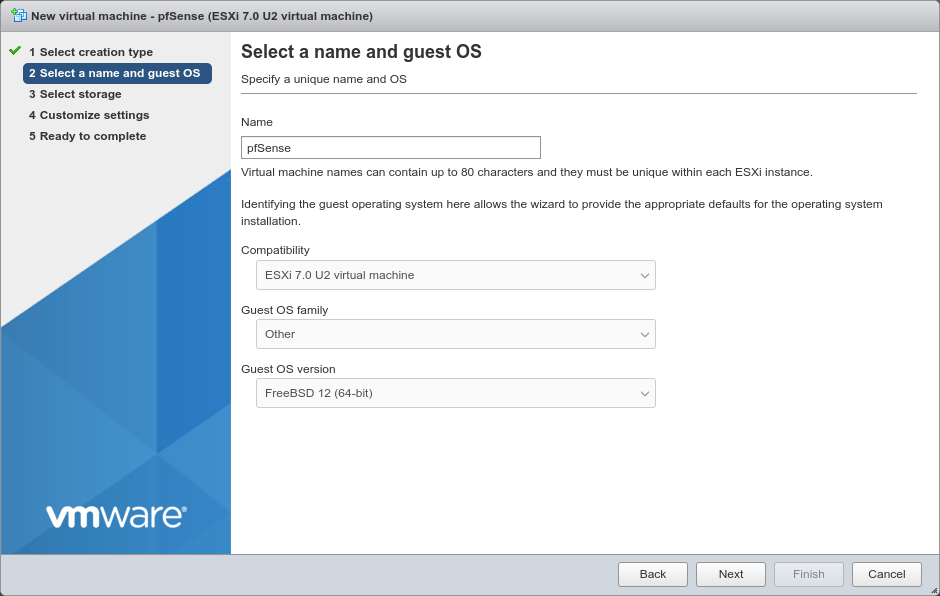
Click Next
Select the datastore where the VM disk will live
This is where ESX will allocate storage to hold the configuration and operating files for the virtual machine. There may be multiple datastores available to ESX, local or even remote NFS volumes.
Local disks are faster and more reliable, but pfSense software does not require a fast disk in most use cases, so in those environments it can run off an NFS disk if necessary.
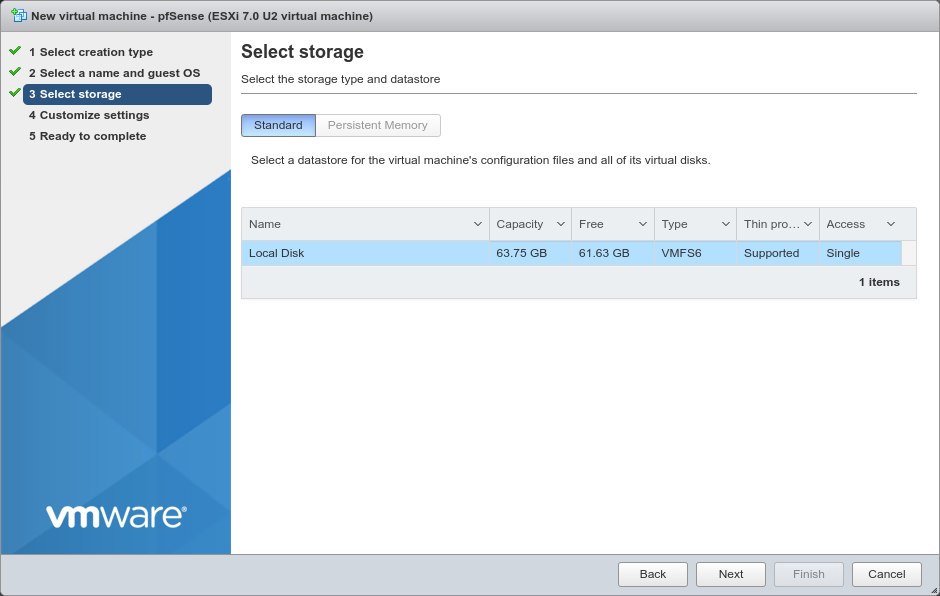
Click Next
Click Add network adapter to create a second NIC
Configure the items on the Customize settings screen as follows:
- CPU:
Use a single CPU socket.
If the hypervisor host has sufficient cores available, click to expand the CPU options and set a higher value for Cores per socket.
- Memory:
Depending on the number and type of packages that will be installed on the pfSense software, a basic firewall VM should run comfortably in 1024MB of RAM. For deployments which require more or larger packages, increase the RAM as needed.
- Hard Disk 1:
Give the VM at least
16GB of space, more for larger packages.- SCSI Controller 0:
The default LSI Logic SAS is compatible, leave it as-is.
- Network Adapter 1:
Select the WAN port group.
For best performance, use VMXNET 3 type of adapters which is the current default in vSphere 7.x. Click to expand the interface options and ensure it’s set to VMXNET 3.
- New Network Adapter:
Select the LAN port group.
Click to expand the interface options and ensure it’s set to VMXNET 3.
- CD/DVD Drive 1:
Select Datastore ISO file* and then browse to and pick the pfSense software installer ISO.
The remaining options can remain at their default values, or change to suit the needs of the environment.
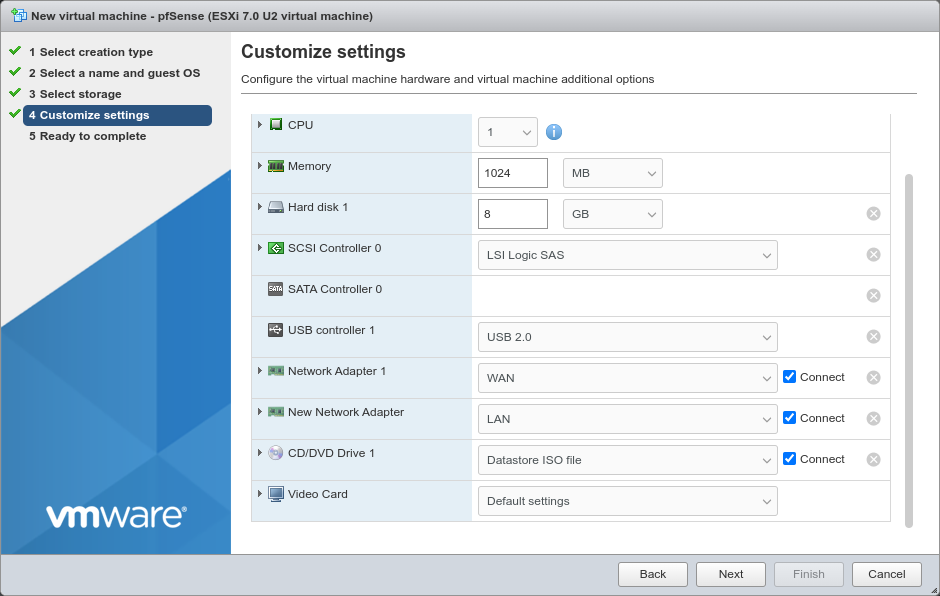
Click Next
Review the settings for the VM
If anything is incorrect, go back to the previous screens and correct it.
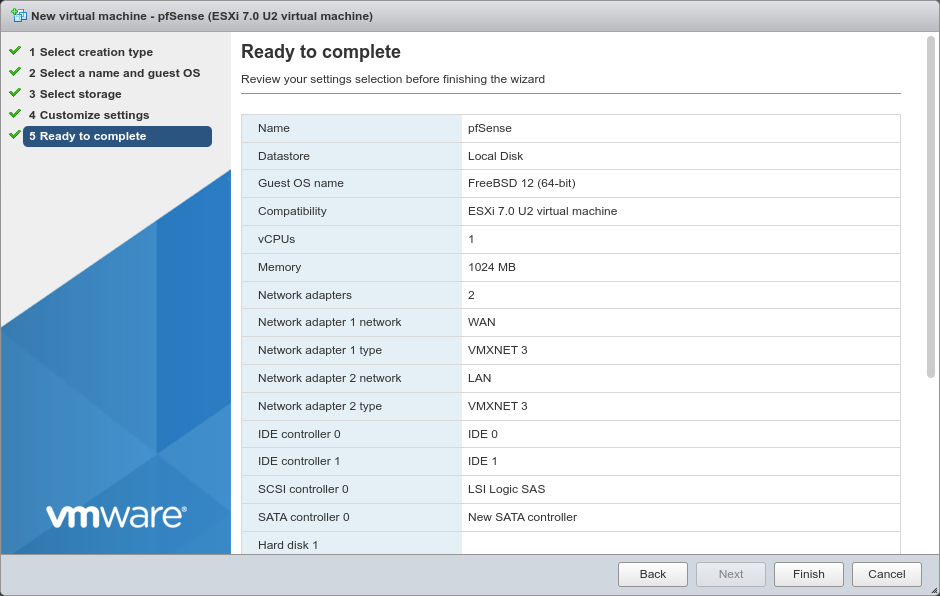
Click Finish
pfSense software installation
The vSphere web interface will now have an entry for the new VM.
Click Virtual Machines in the Navigator panel on the left

Click the name of the VM in the list to open it
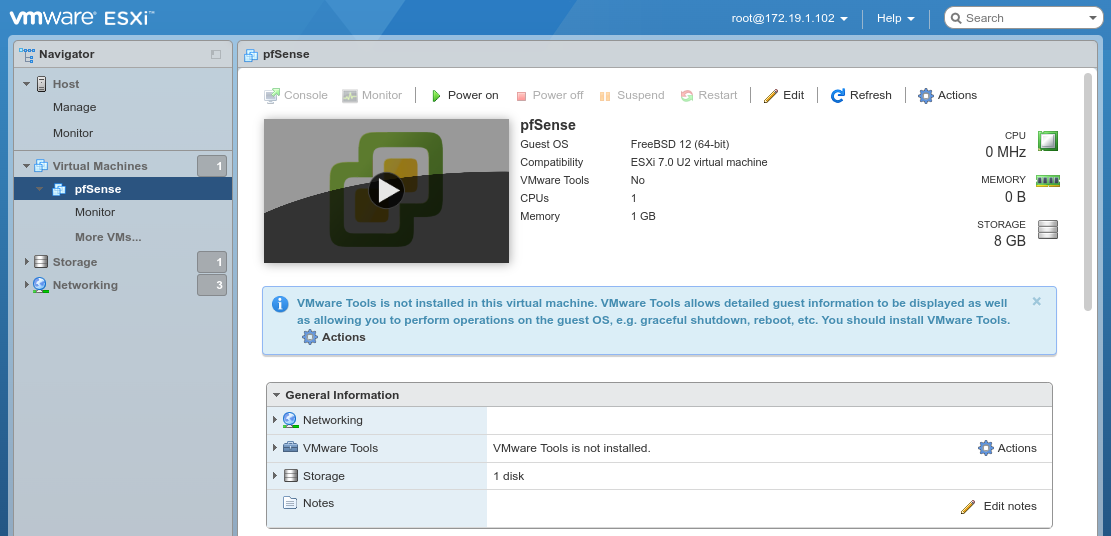
Click Power on to start the VM
Click inside the console window to open the console view to continue the installation.
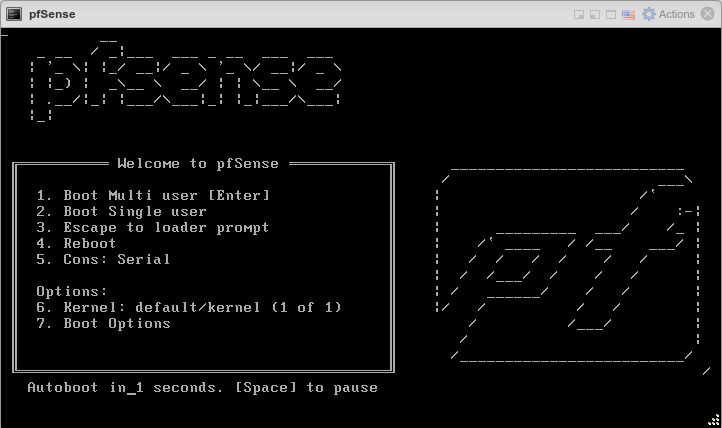
When the VM starts it will boot into the installer automatically. From there, follow the installation steps as usual, and reboot when finished.
See also
See Installation Walkthrough for a detailed walkthrough of the installation process.
After the virtual machine boots back up, the console will stop at a prompt to assign interfaces.
Type
nand pressEnterto skip VLAN configurationEnter
vmx0for WANEnter
vmx1for LANPress
Enterif prompted for additional interfacesType
yand pressEnterto complete the interface assignment
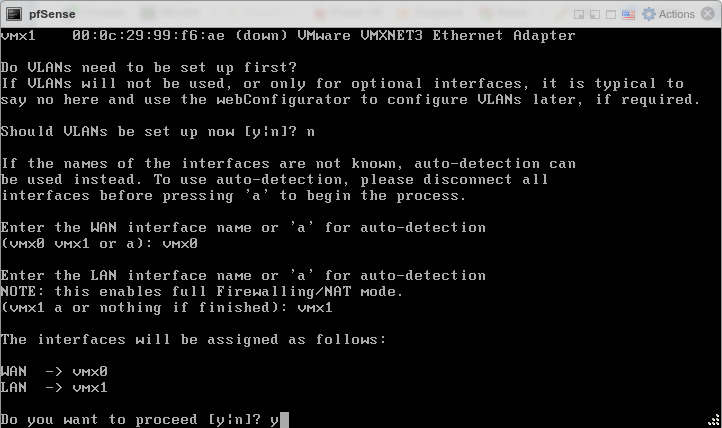
After assigning the interfaces the VM will complete the boot process. It is now ready to configure like any other firewall running pfSense software.
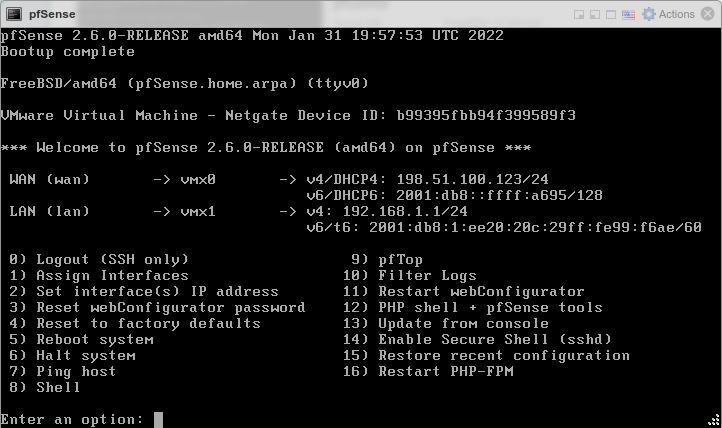
Installing Open-VM-Tools
Once the pfSense software installation is complete, upon first boot install the Open-VM-Tools.
Navigate to System > Packages, Available Packages tab
Find Open-VM-Tools in the list or search for it
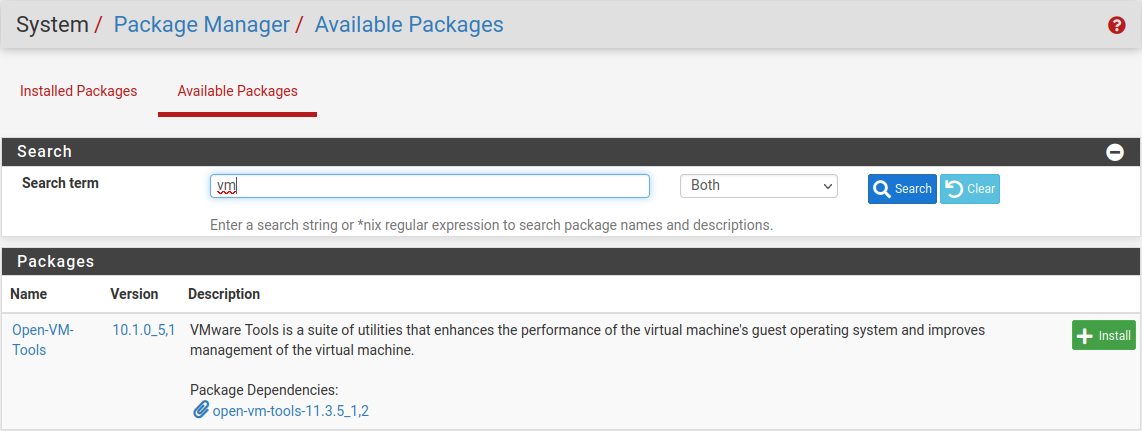
Click
 Install
Confirm the installation
Make sure the Open-VM-Tools service is running under Status > Services.

Congratulations, the installation of pfSense software on ESXi is complete!
Additional Information and Tips
Dedicated Management Network
The best practice is to separate the ESXi Management network from other networks. The example in this recipe uses a dedicated management network, which is common in well-designed networks. Separation can be accomplished using VLANs or an additional NIC on the ESXi host dedicated only for ESXi management. The vSphere client PC may need additional routing or networking connections to reach the dedicated management network.
Identifying Interfaces
If multiple physical interfaces are available in the ESXi host, it can be a bit
of a struggle to work out which one has been identified as vmnic1,
vmnic2 and so on. If the MAC address of each NIC is noted down along with
the slot it occupied when it was installed in the machine, look at the Network
Adapters screen under the Configuration tab to match up the MAC addresses.
However, having that foresight is rare, so lacking that information the easiest
way to match physical NICs to vmnic entries is to plug a PC or switch into
them, one at a time. The speed and duplex on the Networking or Network Adapters
screens should change as the interface comes up. Click Refresh to update the
list.