Managing Widgets
Each widget follows basic conventions for controlling its position, size, settings, and so on.
Adding and Removing Widgets
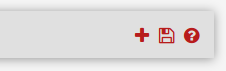
To add widgets, click the  button in the Dashboard controls area of the
breadcrumb bar (Dashboard Controls in the Breadcrumb Bar.) This button
displays the list of available widgets.
button in the Dashboard controls area of the
breadcrumb bar (Dashboard Controls in the Breadcrumb Bar.) This button
displays the list of available widgets.
Dashboard Controls in the Breadcrumb Bar
Inside the Available Widgets panel, click the name of a widget to add it to the Dashboard (See Available Widgets List). The dashboard will reload with the new widget displayed in one of its columns.
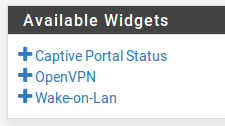
Available Widgets List
To close and remove a widget from the Dashboard, click the  button in its title bar (Widget Title Bar), then click
  in the dashboard controls.

Widget Title Bar
Rearranging Widgets
Widgets can be rearranged and moved between columns.
To move a widget, click and drag its title bar (Figure Widget Title Bar), move the mouse to the desired position, and then release. The widget will “snap” into its new position as it moves, so the new location may be previewed before releasing the mouse button.
After positioning a widget, click in the dashboard controls to store
its new location (Dashboard Controls in the Breadcrumb Bar).
Minimizing Widgets
To minimize a widget so it hides its content and only shows up as its title bar,
click the  button in its title bar
(Widget Title Bar).
button in its title bar
(Widget Title Bar).
To restore the widget to its normal display, click the  button.
After changing the widget status, click in the dashboard controls.
Changing Widget Settings
Some widgets have customizable settings which control how they display and update their content.
If a widget is capable of using custom settings, the  button will
show up in its title bar as seen in Figure Widget Title Bar. Click
that button and the settings for the widget will appear. Once the settings have
been adjusted, click the Save button inside the widget settings panel.
button will
show up in its title bar as seen in Figure Widget Title Bar. Click
that button and the settings for the widget will appear. Once the settings have
been adjusted, click the Save button inside the widget settings panel.