Using the Wizard
Gather the AWS Access Key ID and Secret Key.
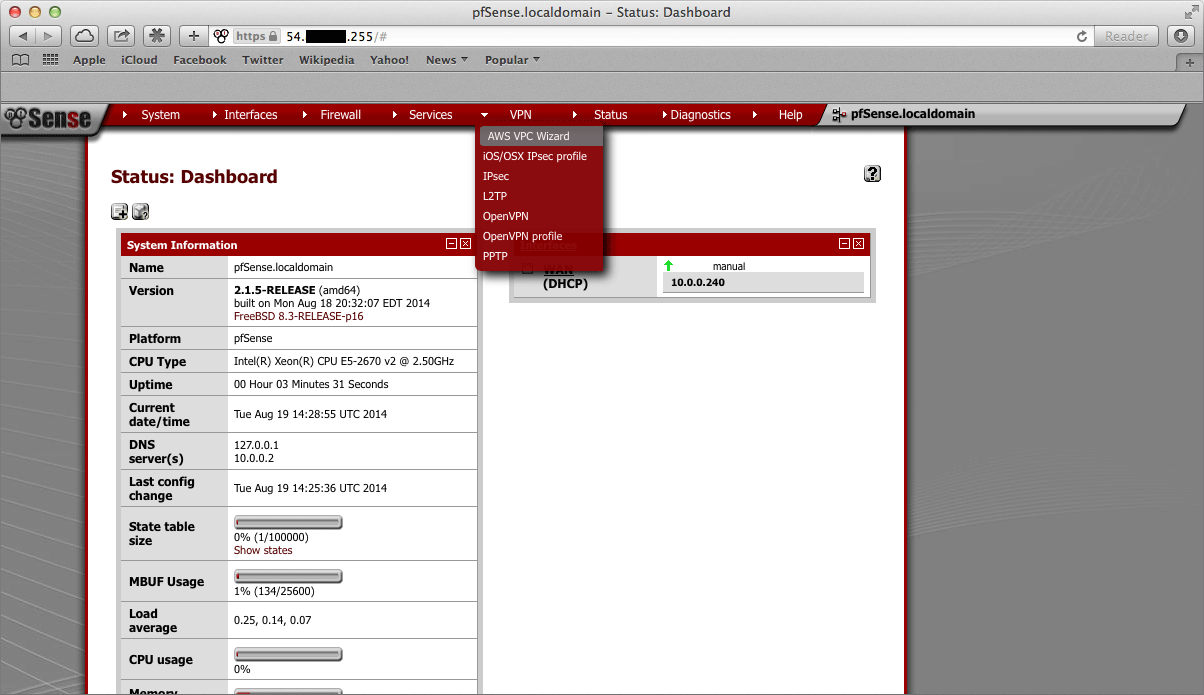
Navigate to VPN > AWS VPC Wizard in the main menu in the Netgate® pfSense Plus GUI.
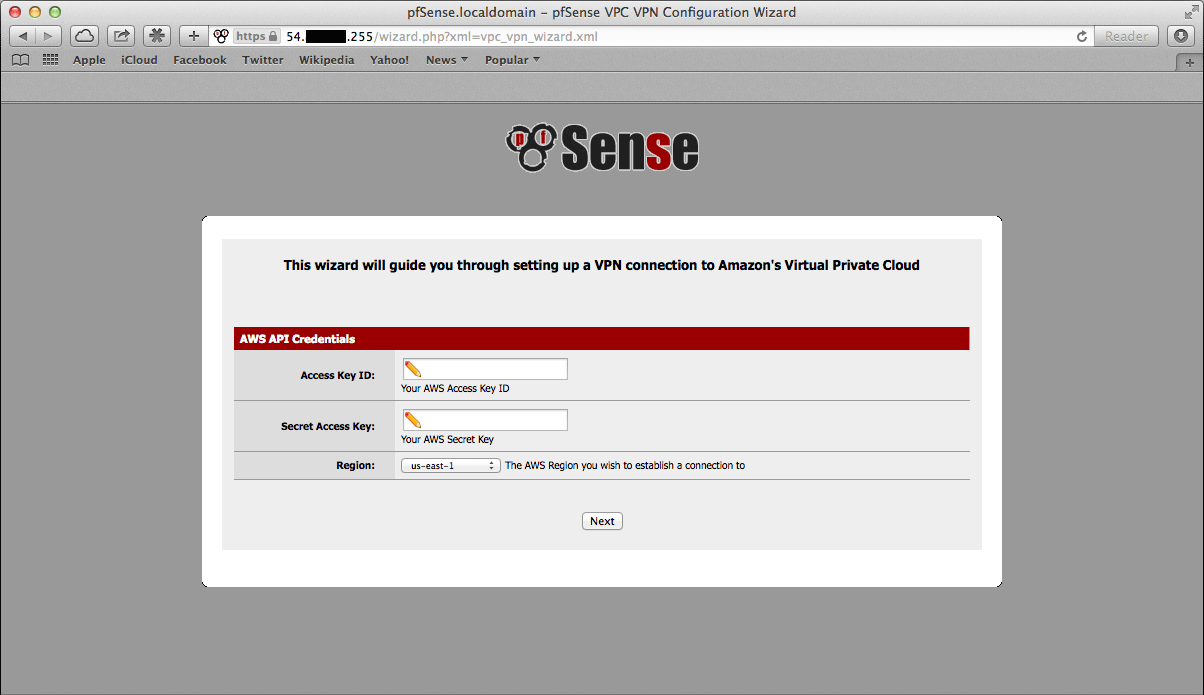
The first screen of the wizard prompts for the AWS Credentials. Enter the Access Key ID and Secret Access Key in the appropriate text fields and select the Region to connect to in the dropdown menu, then click Next.
The wizard will then query the AWS API using those credentials to find which VPCs exist in the selected region. If the credentials were rejected, an error message will be displayed and return to the first screen.
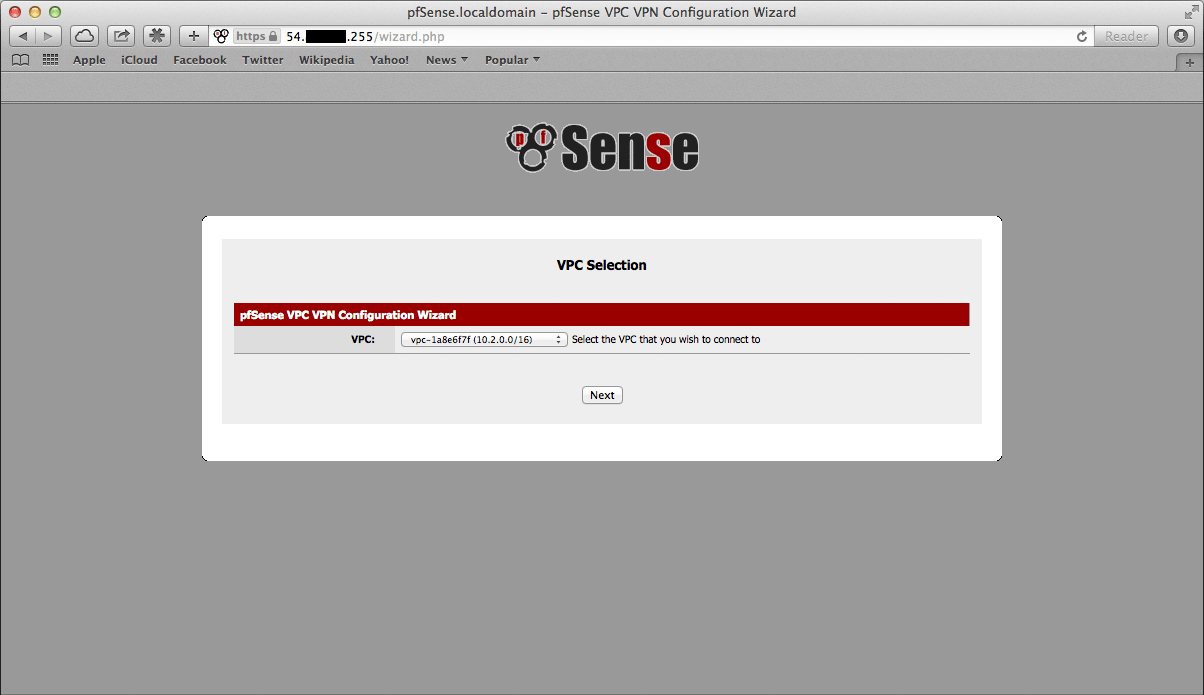
The next screen will prompt to select from the available VPC’s in the selected region. Select the one to connect to from the dropdown menu. The wizard will not create a new VPC, it will only connect to an existing VPC.
Click Next after selecting the desired VPC.
Note
If the desired VPC’s to connect to isn’t available, create one via the AWS Management Console and try again.
The wizard will then query the AWS API to check whether there is a VPN Gateway attached to the selected VPC. If none exists, one will be created via the API. Then the next screen will be displayed.
On the next screen, specify routing and network data.
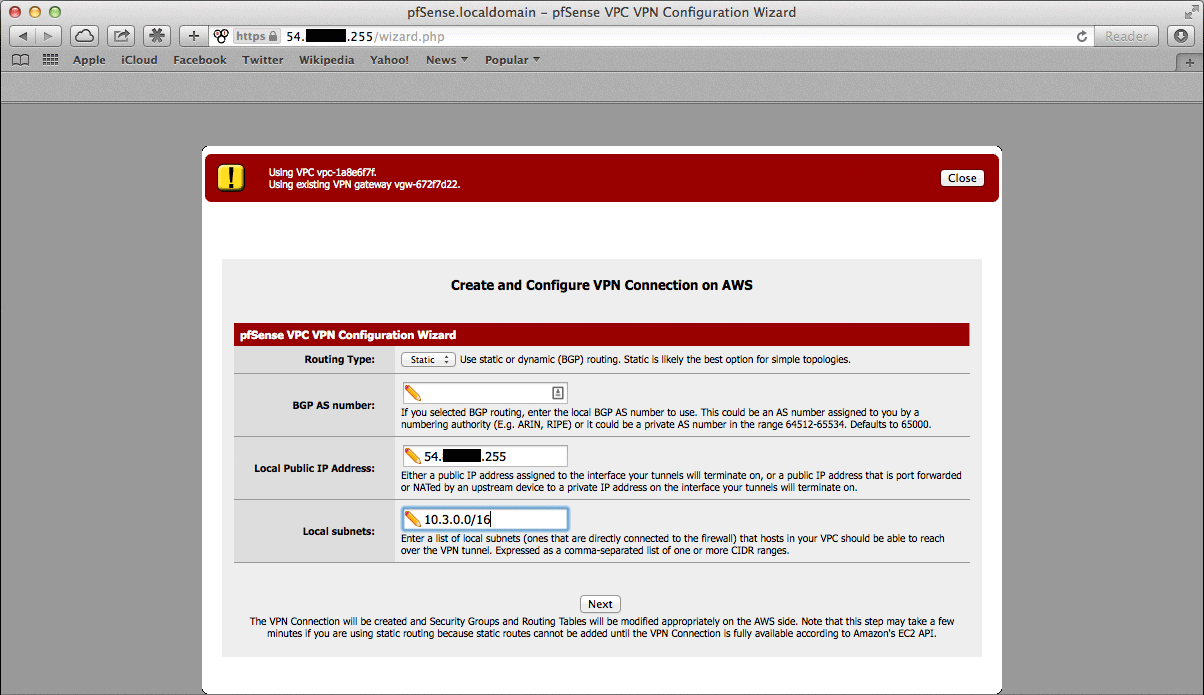
A description of what should be entered for each of these fields follows.
- Routing Type:
AWS offers either static routing or BGP routing. Select the appropriate type from the dropdown menu. If unsure, static routing is likely to be adequate.
- BGP AS Number:
If static routing was chosen, leave this field blank. Otherwise, it is possible to specify an AS number to use. If left blank, the value will default to
65000.- Local Public IP Address:
On an AWS Netgate appliance instance, this should be the public IP address of the Elastic IP associated with the instance. If configuring a hardware device running pfSense Plus, this could be the public address assigned to the WAN (or other) interface of the device.
- Local subnets:
The subnets connected to the pfSense Plus instance that should be routed over the tunnel from hosts in the remote VPC. As an example, if connecting a pfSense Plus instance to a remote VPC in the AWS us-east-1 region, enter the subnets (or a single subnet) that are local to the pfSense Plus instance and when hosts in your VPC in us-east-1 attempted to reach addresses within those subnets, the traffic will be sent through the VPN tunnel that is being configured.
Note
When selecting static routing as the routing type, there will be a delay that is typically between 2-5 minutes before the next screen is displayed. This is because static routes must be added to the VPN Connection via the AWS API. This operation fails until the VPN Connection reaches the “available” state. This can take a few minutes to occur.
Click Next when done.
The wizard will then query the AWS API to find whether a Customer Gateway is configured with the selected Public IP Address. If none exists, one will be created. If one already exists, the ID will be retrieved, and it will be used.
The wizard will then query the AWS API to see if a VPC Connection already exists that matches the data entered. If one exists, it will be used. Otherwise, one will be created.
If static routing was selected, static routes will be added to the VPN Connection for the Local subnets entered.
Route propagation will be enabled for the VPN Gateway in each of the Route Tables that are associated with the VPC. All of these configurations are carried out in the AWS API, nothing has been changed in the pfSense Plus VPN configurations yet.
Warning
Important Note on Billing: Once this step is carried out and the VPN Connection is created, AWS will start billing the AWS account the hourly rate for a VPN Connection. This is $0.05 as of this writing, and that is a charge that goes entirely to AWS itself. They will do this until the VPN Connection is deleted via the VPC Management Console.
Nothing in pfSense Plus will ever cause AWS to stop billing for this VPN Connection. Whether it works or not, whether the pfSense Plus instance is up or down, whether the IPsec tunnels have been deleted or reconfigured, AWS will continue to bill the hourly fee for a VPN Connection if the creation of it succeeds until it is deleted through their web interface.
The wizard helps establish an initial configuration that works and configures the appropriate elements in AWS’s API to facilitate this.
The account holder is responsible for understanding billable charges and disabling any functions, including VPN Connections, that are no longer necessary.
If the operations of the previous step succeeded, the next screen will appear.
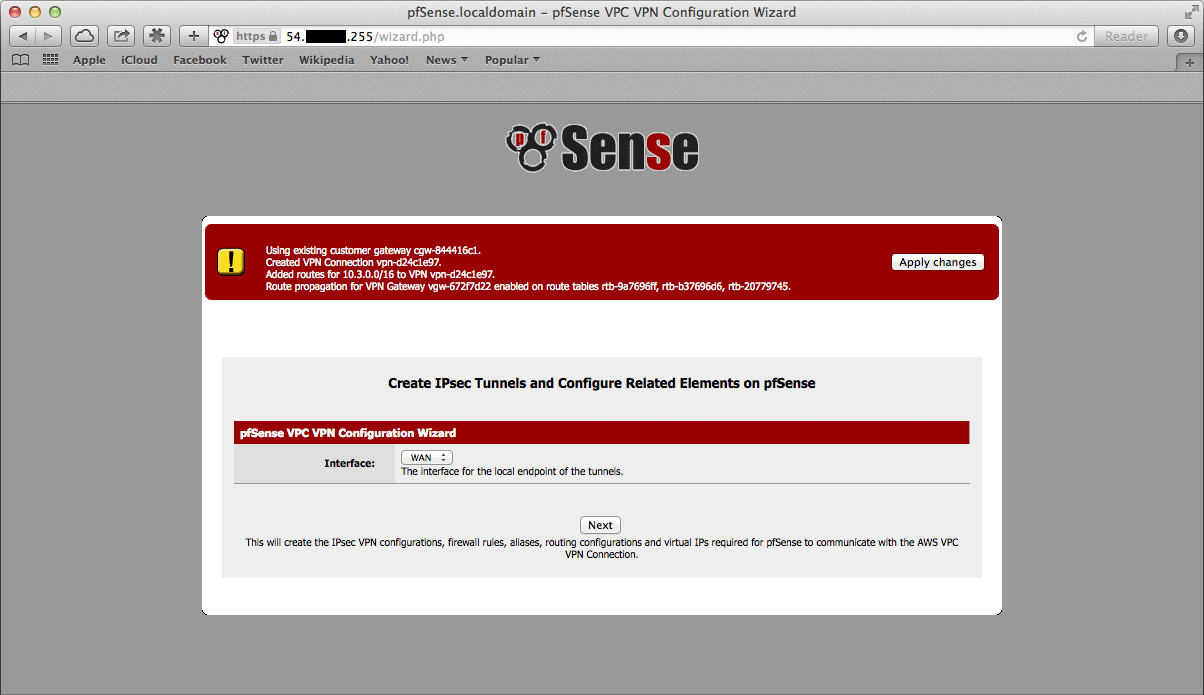
Select an Interface to act as the local endpoint of the VPN tunnels that will be created. In most cases, this should be the WAN interface. It should generally be whatever interface is associated with the Local Public IP Address entered in the previous step.
On an AWS Netgate pfSense Plus instance, this will be whatever interface the Elastic IP is associated with. On a hardware device running pfSense Plus that has the Local Public IP Address directly configured on an interface, this will be the interface that the Local Public IP Address is configured on.
After clicking Next, the wizard will configure the VPN and associated settings within pfSense Plus itself using data returned by the AWS API in the previous step.
It will configure 2 IPsec tunnels, a firewall rule, 2 Aliases (referenced by the firewall rule), and 2 Virtual IP Addresses. If BGP was selected as the Routing Type in the previous step, it will install the FRR package automatically and configure it appropriately.
The next screen will appear and prompt to apply the configuration changes that have been made.
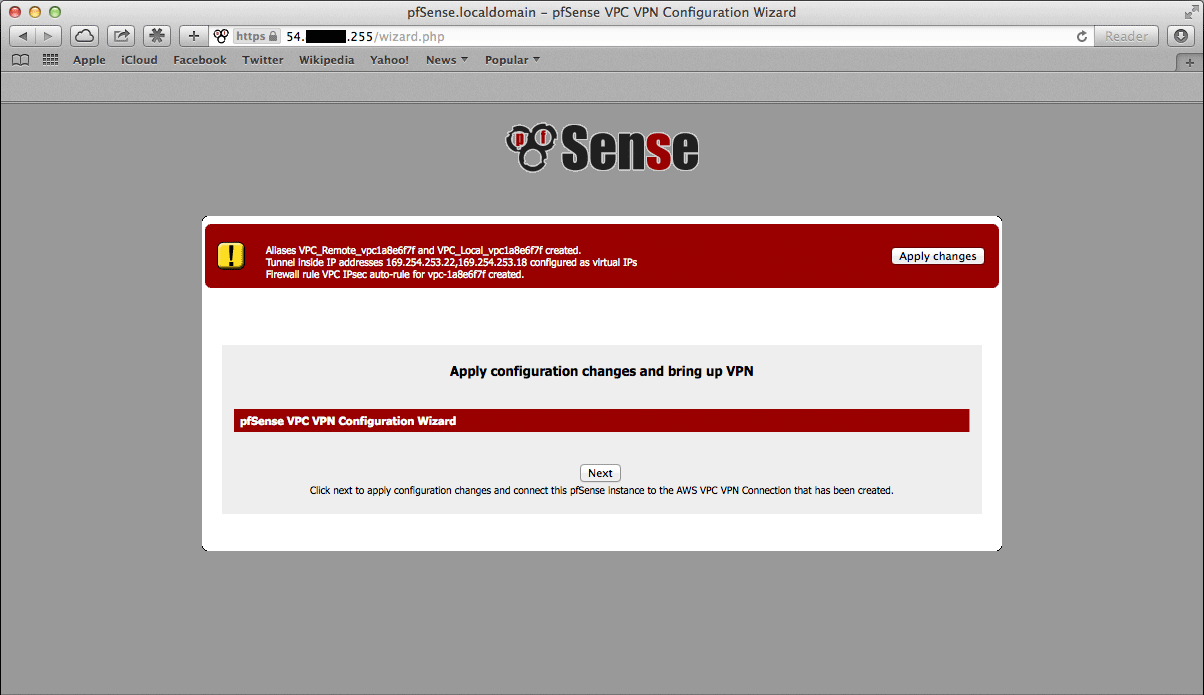
After clicking Next, all the configuration changes that were made will be applied.
The wizard will be completed, and the browser will be redirected to the IPsec status page. The VPN to the VPC should now be fully configured.
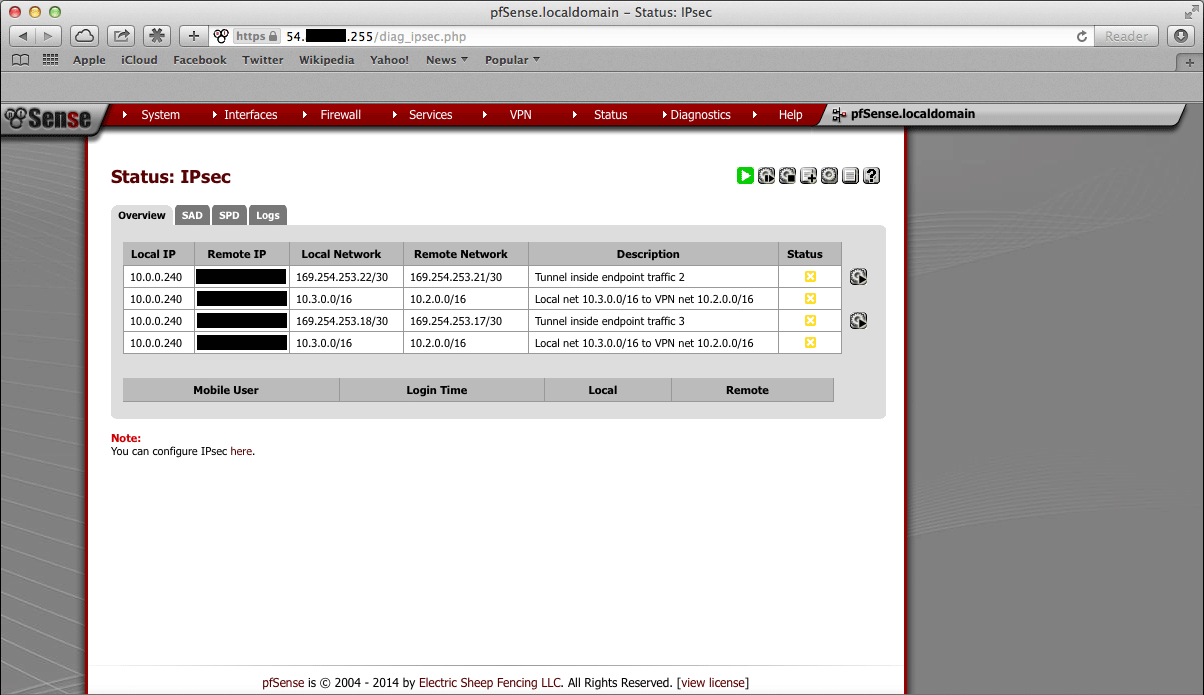
Note
Sometimes there is a delay of 5-10 minutes before the tunnels are fully functional and passing traffic. This has been observed particularly often during the setup of tunnels using BGP routing.