RCC-VE ESXi 6.0/6.5 Guide
This guide will cover two ways to install and use ESXi on RCC-VE devices. This guide was written for the RCC-VE 4860, but applies to any RCC-VE device. The same instructions work for ESXi 6.0.x and 6.5.
Prerequisites:
Update the BIOS on the RCC Series unit to version 12 or later
See also
The most recent ESXi installer .ISO image downloaded from VMware, such as the VMware vSphere Hypervisor 6.5.0a ESXi ISO Image.
USB memstick with a capacity of 4 to 8 GB.
Windows or OS X system from which to write the image and connect to the console.
Connect a network cable that is attached to the local LAN to the RCC Series unit. On 6-port models, use port labeled eth2, 4-port models use eth0.
Warning
By default, on systems using ADI-based hardware with 6 ports, ESXi initializes the two i211 network interfaces on the left side after the four i354 ports on the right. The first port as seen by ESXi (
vmnic0) is the third port from the left, markedeth2. If the two i211 ports on the left do not appear as usable interfaces in ESXi, update the system BIOS to version 12 and/or use a newer version of ESXi such as 6.5.x.Connect to the console port of the RCC-VE using a mini-USB cable attached to another system.
See also
- Connecting to Console Port
Connecting to the console port. Cable is required.
Preparing the installation
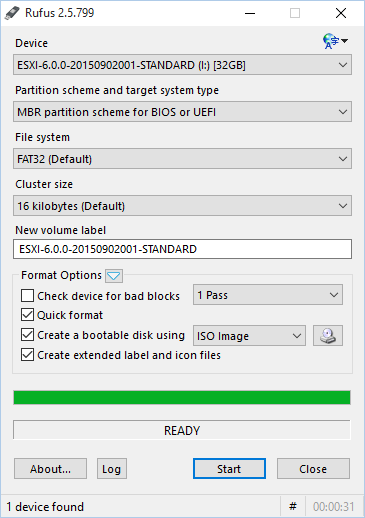
Write the ESXi installer .iso file to a USB memstick. Rufus on Windows is
the recommended utility, and it is shown below.
Note
If Rufus displays a dialog stating that it wants to update menu.c32,
allow it to do so.
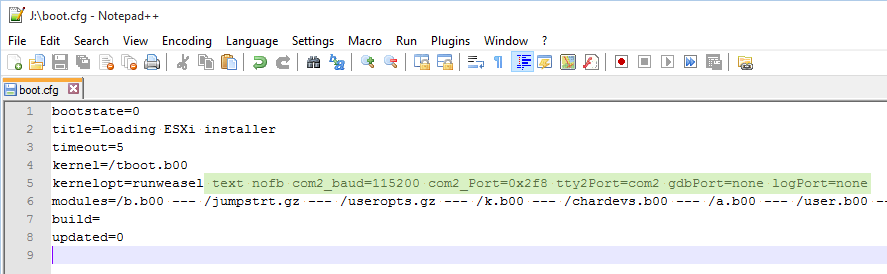
After the flashing process is complete, edit the file boot.cfg file in the
root directory of the ESXi installer with appropriate settings to boot USB on
RCC-VE. Notepad++ on Windows is shown below, however the same is possible
with any equivalent editor on Windows or other platforms such as Kate,
CotEditor, TextMate, UltraEdit, and so on.
Warning
Windows Notepad cannot be used. It does not properly handle UNIX line termination in the file, making it unreadable.
At the end of the line starting with kernelopt=runweasel, add the following:
text nofb com2_baud=115200 com2_Port=0x2f8 tty2Port=com2 gdbPort=none logPort=none
It will look like the following image:
Save the file and unplug the USB memstick.
Insert the USB memstick containing the ESX installer into the RCC Series unit.
If the installation target will be another USB memstick, insert it now.
Installing ESXi on RCC-VE
The screenshots in this part of guide were made using PuTTY on Windows.
See also
- Connecting to Console Port
Connecting to the console port. Cable is required.
With the USB memstick(s) in place and the serial console connected, apply power to the RCC Series unit.
By default, The RCC Series unit boots from USB first, so if boot.cfg was
edited correctly, the ESXi installer welcome screen will appear.
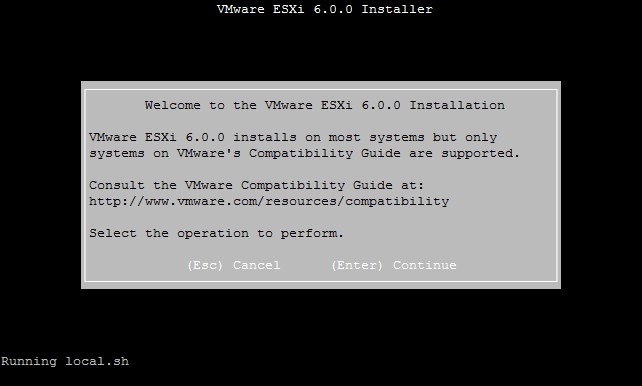
From here on it is a standard ESXi installation which is straightforward. Press
Enter to continue and start the installation process.
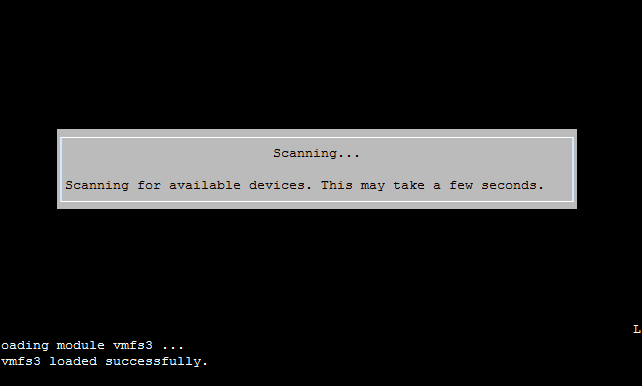
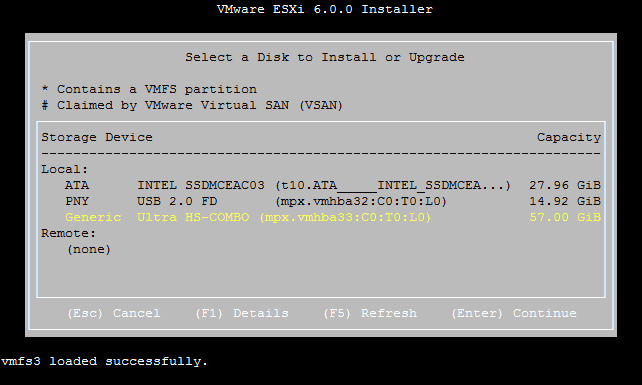
After the RCC-VE disks are scanned a list of available disks is presented.
On the screen Select a Disk to Install or Upgrade choose the installation target disk.
If installing to the eMMC, choose Generic Ultra HS-COMBO which represents the built-in eMMC drive.
If installing to another USB memstick, choose it from the list.
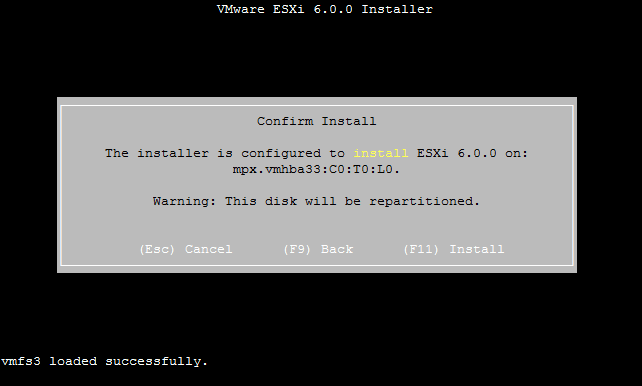
Next, select a keyboard layout, enter a new ESXi root password and finish the installation.


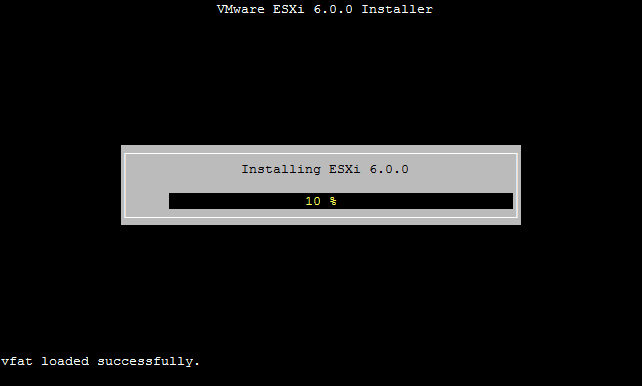
When the Installation Complete screen is reached, remove the USB memstick
containing the installer and press Enter.
At this point the ESX installation is complete, but the console will not function properly. To fully activate the console, continue on to the next document that best fits the installation type being performed.