Changing the Boot Order in AMI Firmware
Users can change the platform firmware (“firmware”) boot order for Netgate 4200 devices using AMI firmware in either a temporary way for a single boot or persistently.
Changing these settings requires local console access and downtime while making changes.
Temporary Boot Order Override
It is possible to temporarily override the AMI firmware boot order for a single boot. For example, to boot from a USB drive when installing or reinstalling pfSense® Plus software:
Reboot the device.
During the boot sequence, press either the
DelorEsckey when prompted to enter the firmware configuration.Navigate to the Save & Exit tab.
Use the arrow keys to highlight an option in the Boot Override section.
Press the
Enterkey to boot from the selected device.
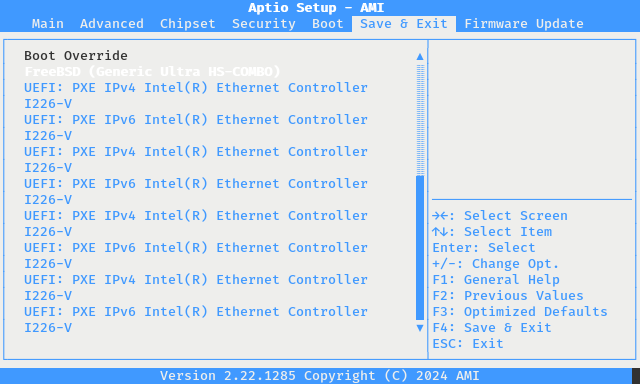
AMI firmware Boot Override Selection
Persistent Boot Order Change
Changing the boot order in the AMI firmware settings is relatively straightforward but requires rebooting the device and accessing the firmware configuration. The device will be offline during this time, so these actions must be performed from a local serial console either directly connected to a client system or by other means of out-of-band access.
To alter the boot order in this way, take the steps in the following sections.
Access the Firmware Boot Settings
The first task is to access the firmware configuration as follows:
Reboot the device.
Wait for the firmware prompt to appear.

AMI Firmware Prompt
Press either the
DelorEsckey to enter the firmware configuration.Navigate to the Boot tab.
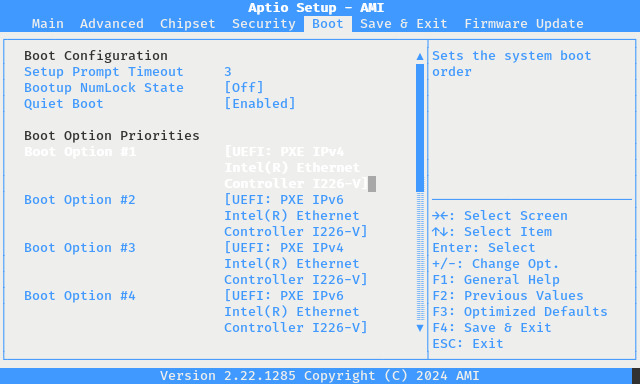
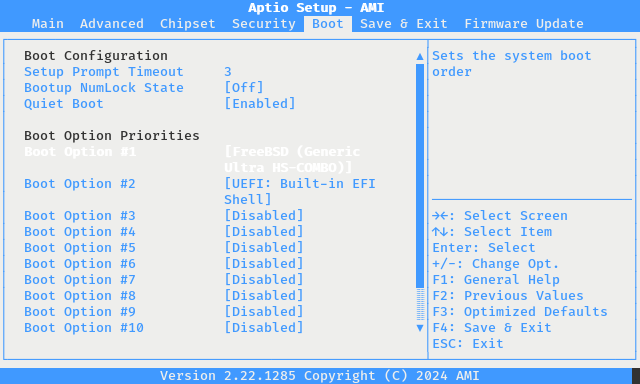
AMI Firmware Boot Option Priorities
From here, make any desired changes in the Boot Option Priorities section, such as those in the following sections.
Make pfSense® Plus software boot first
To give pfSense® Plus software top priority when booting, make the following changes:
Highlight Boot Option #1 with the up/down arrow keys.
Press the
Enterkey to open the device choice menu.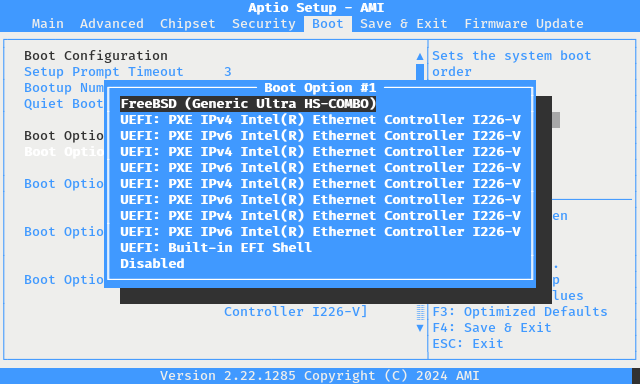
AMI Firmware Boot Device Selection
Select the entry which corresponds to pfSense® Plus software using the up/down arrow keys.
This entry may be labeled pfSense+, FreeBSD, or share the name of the disk, such as Ultra HS-COMBO.
Press the
Enterkey to select the device.
Disable Redundant/Unnecessary Entries
To disable unnecessary entries, such as for PXE or for operating system entries which are no longer present or needed, take the following steps:
Highlight the first unnecessary boot option in the list with the up/down arrow keys, for example a PXE boot option.
Press the
Enterkey to open the device choice menu.Select the
Disabledoption using the up/down arrow keys.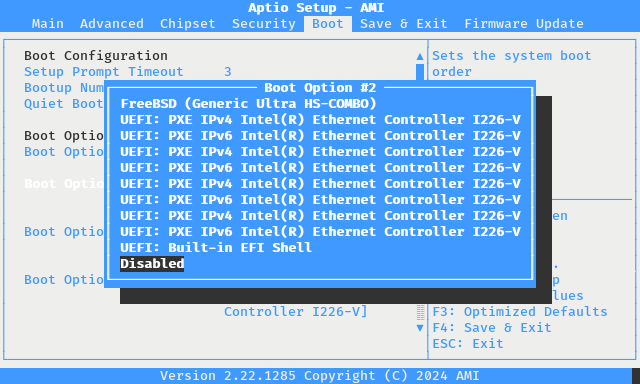
AMI Firmware Boot Device Disabled
Press the
Enterkey to select the option.Repeat these steps for all other PXE entries.
Note
As each option is disabled, the remaining options move up in the list, so it may appear as though the change is not having any effect until several of the ports are disabled.
AMI Firmware Boot Options with PXE Entries Disabled
Save and Exit the Firmware Configuration
Press the F4 key to save and exit or navigate to Save & Exit and
choose Save Changes and Exit.
After the system boots, reboot it again to confirm the boot order is correct.