Netgate 4200 Wall Mount
The Netgate 4200 has an optional Wall Mount Kit available. This page provides an overview for attaching the system to the wall using this kit.
Kit Contents
The Netgate 4200 Wall Mount Kit contains all components necessary to mount the 4200.
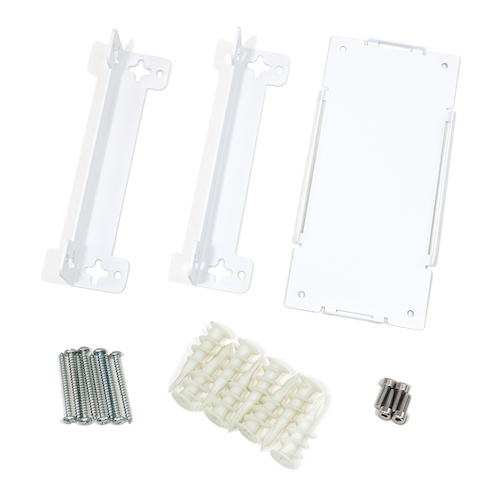
Netgate 4200 Wall Mount Kit Contents
The kit contains:
2x Device wall mount brackets which attach to the Netgate 4200
1x Power supply wall mount bracket
4x M4x12 socket head cap screws which attach the device wall mount brackets to the Netgate 4200
8x Drywall anchors and matching screws
Required Tools
The following tools are required for this procedure:
3mm hex key or driver for the M4x12 socket head cap screws
Phillips screwdriver for the drywall anchors and screws
Pencil to mark anchor positions on the wall
Wall Mount Orientation
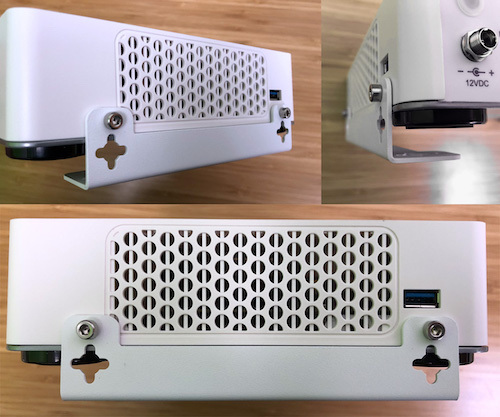
The Netgate 4200 Wall Mount can be attached using an inboard orientation, or an outboard orientation.
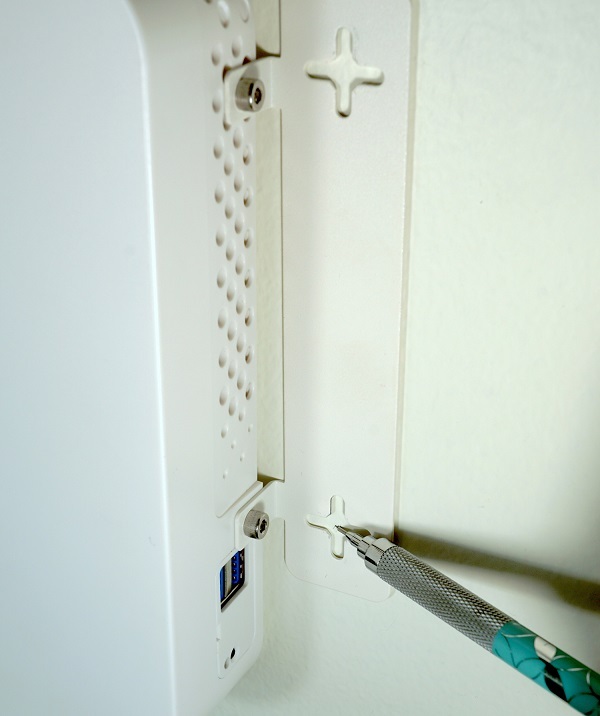
In either orientation, secure the bracket to the Netgate 4200 case with the four included M4x12 socket head cap screws (two per side) using a 3mm hex key or driver. Do not overtighten the screws. The brackets can be mounted to the case before hanging it on the wall.
Inboard Wall Mount Instructions
The inboard wall mount orientation has a narrower profile, with the brackets turning under the device. This method has a more compact and cleaner look, but can be trickier to mount as it requires using the template to mark and place the screws.
The Netgate 4200 Inboard Wall Mount Orientation
Click on the button below to download the Wall Mount Template.
Inboard Wall Mount Template PDF
Print the template out at 100% Scale for it to be accurate.
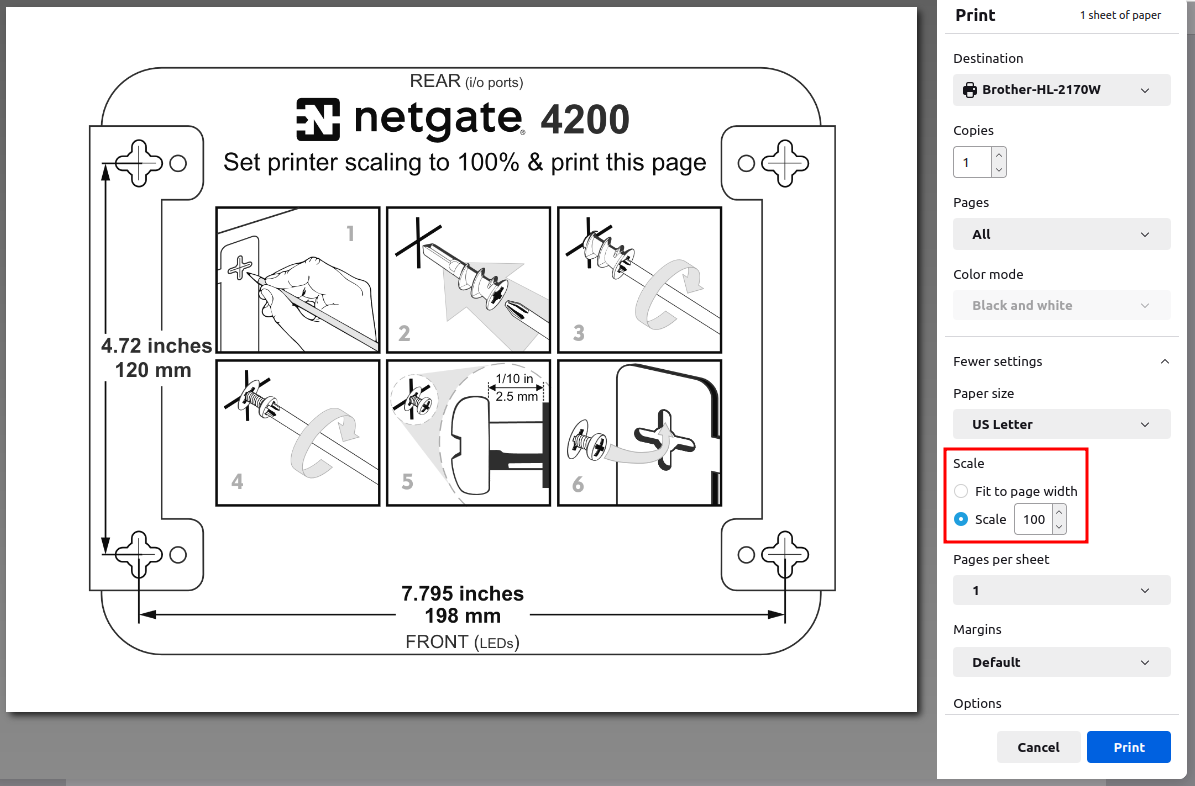
Note
The 100% Scale setting varies by PDF reader, printer manufacturer, and model.
Follow the pictured instructions on the PDF to complete the wall mount installation.
Outboard Wall Mount Instructions
The outboard wall mount orientation has a wider profile, with the brackets angled away from the device. This method takes more space, but is easier to mount as the brackets can be used to mark and place the screws.

The Netgate 4200 Outboard Wall Mount Orientation
Click on the button below to download the Wall Mount Template.
Outboard Wall Mount Template PDF
There are two options to use the template:
Print out the first page at 100% Scale on 8.5” x 17” paper for it to be accurate.
Print pages 2 and 3 at 100% scale on 8.5” x 11” paper.
Each page has a dotted line. Cut along the lines and verify the dimensions before using it.
Tip
The mounting brackets themselves can also be used to make the wall markings.
Using the Wall Mount Bracket to Mark the Screw Locations
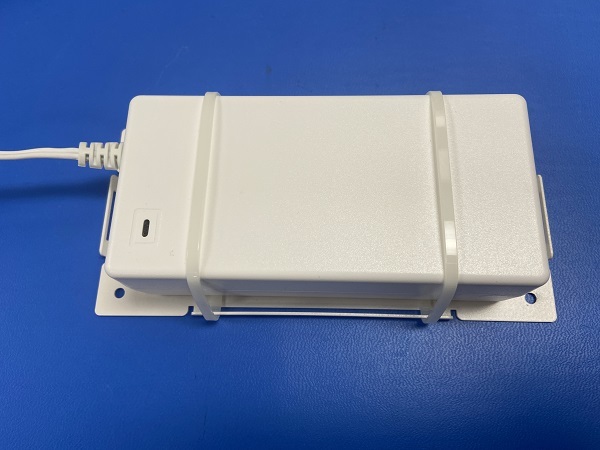
Mounting the Power Supply
The mounting bracket for the power supply uses two zip-ties to hold the power supply to the mounting bracket. There is no PDF for the Power Supply Bracket. Use the holes directly to mark the wall for mounting.