Configuring a Router on a Stick
This optional guide shows the steps required to configure all three VLANs on one port, such as the OPT port in this example. This allows the OPT port to act as a trunk port and connect to a VLAN aware switch so it can pass tagged VLAN traffic corresponding to the configured VLANs.
Note
Performing this configuration from the LAN port helps prevent being locked out. Also, the WAN and LAN ports will still work with untagged devices connected to them. The LAN port could be used as a management port. In normal operation, the switch would only need to be connected to OPT, with WAN and LAN disconnected.
Connect to the LAN port on the SG-1100.
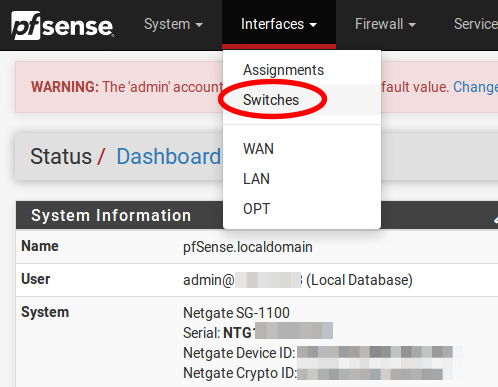
From the pfSense® Plus GUI menu, navigate to Interfaces > Switches.
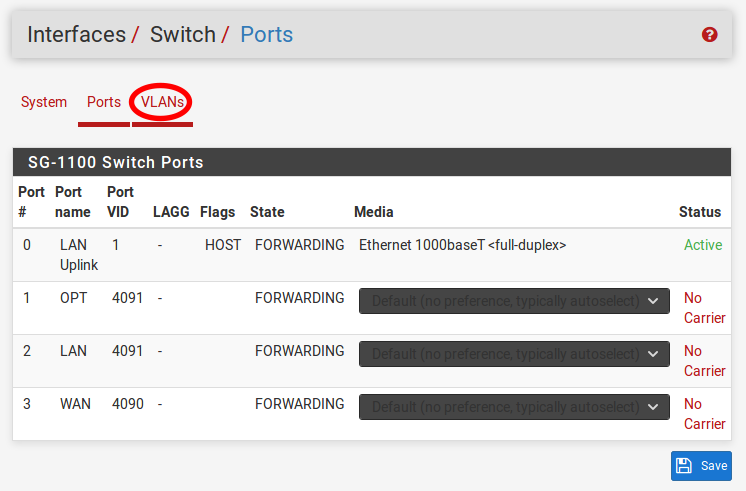
Go to the VLANs tab.
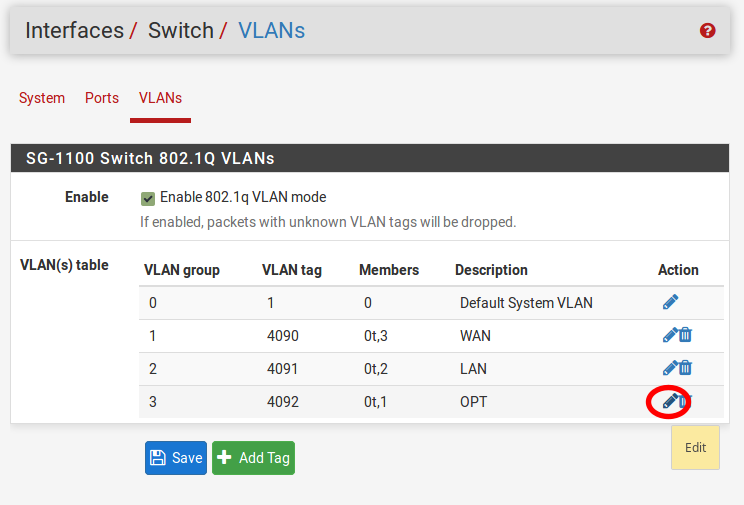
Click on the
 button for VLAN group 3.
Warning
VLAN group 0 must remain in place and VLAN groups 1-3 must include 0t as a member, in order to function properly.
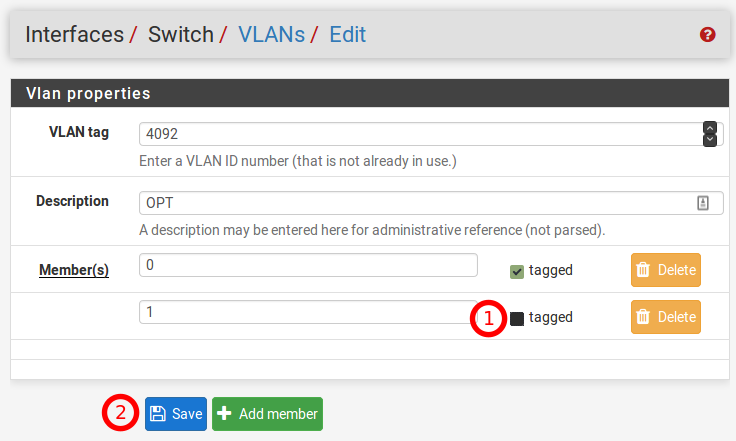
Check tagged for Member 1, then click Save.
Click on the
 button for VLAN group 2.
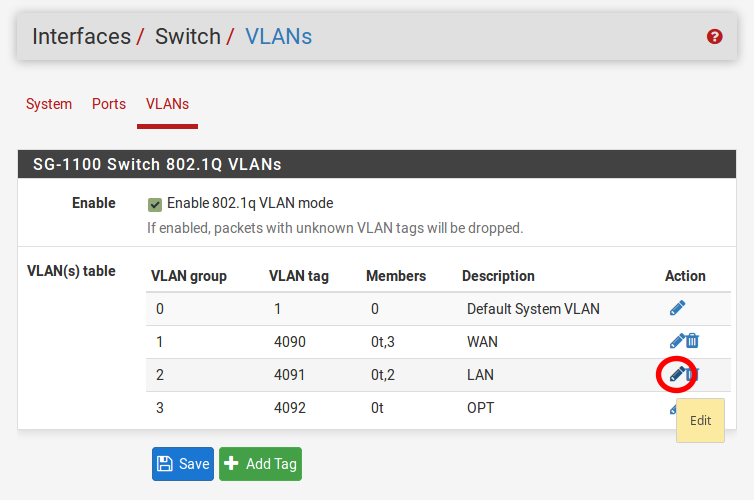
Click on the Add member button, Enter Member
1, check tagged and then click Save.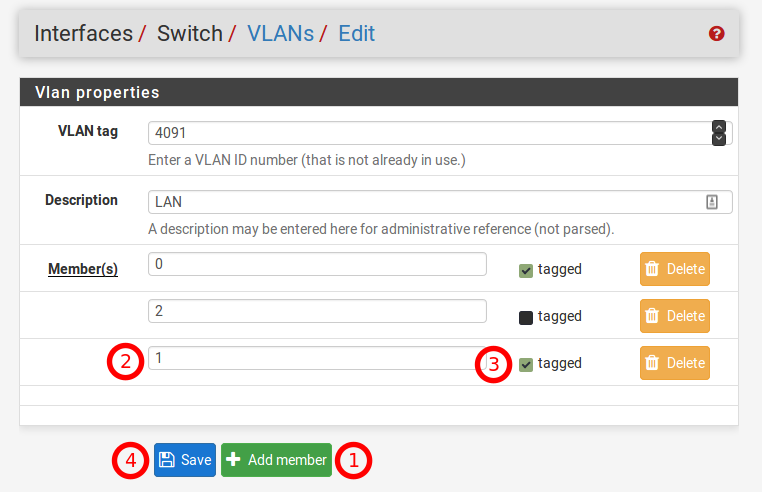
Click on the
 button for VLAN group 1.
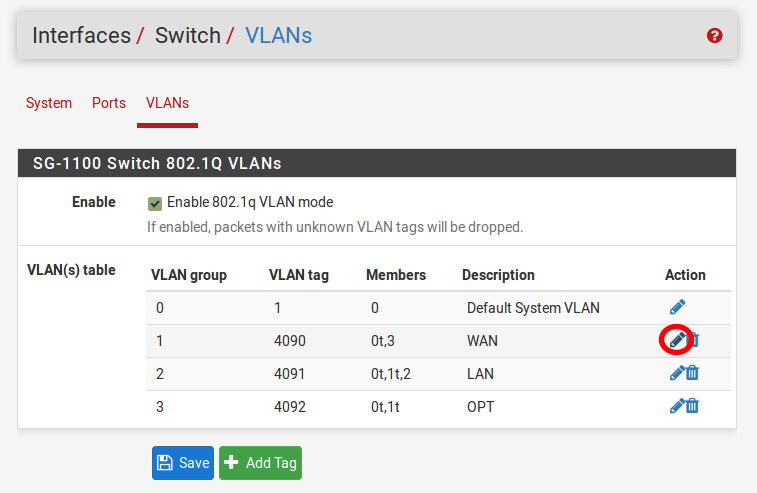
Click on the Add member button, Enter Member
1, check tagged and then click Save.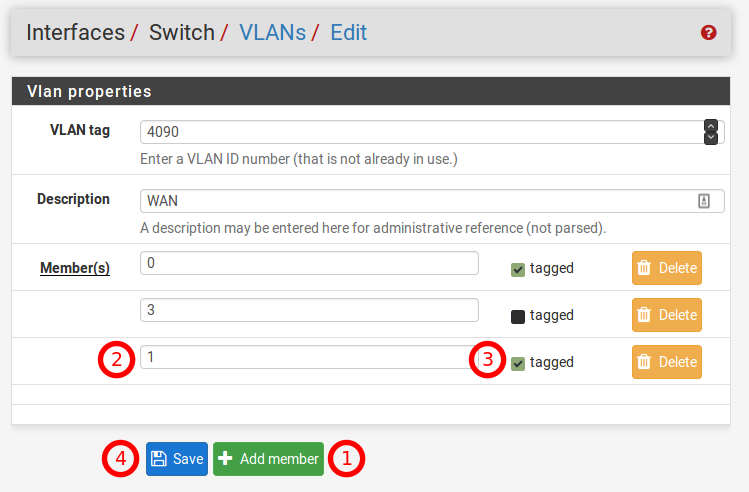
Click on the Ports tab.
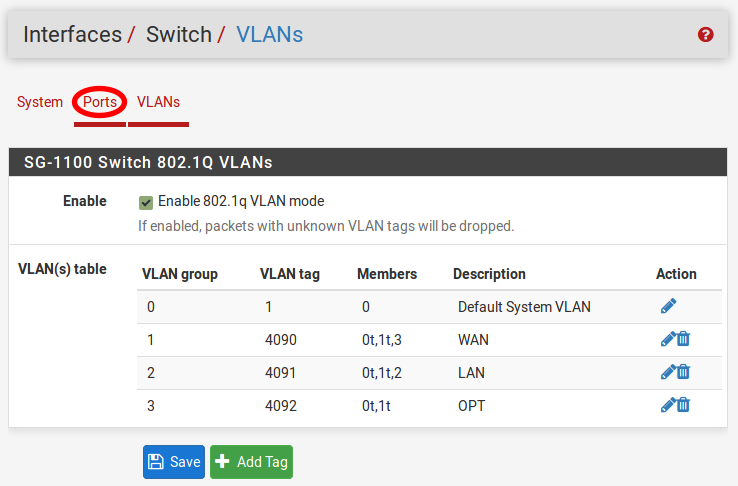
Click on the Port VID for OPT. Change the default value
4092to1. In the lower right-hand corner click Save.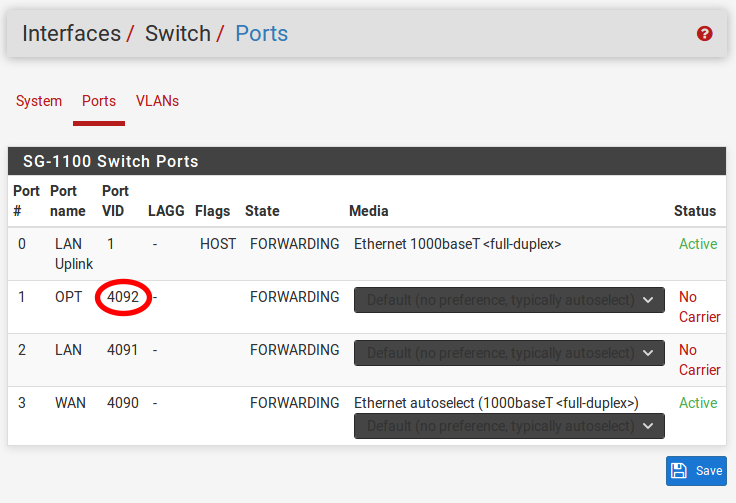
When completed the Ports and VLANs configuration should reflect the screenshots below:
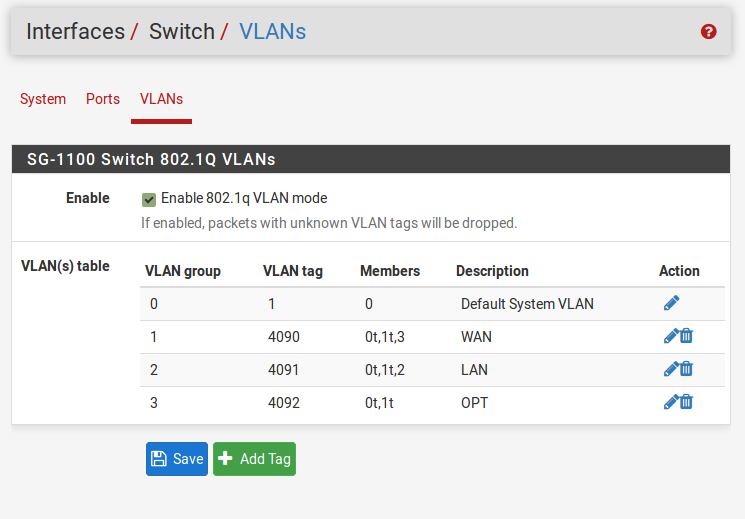
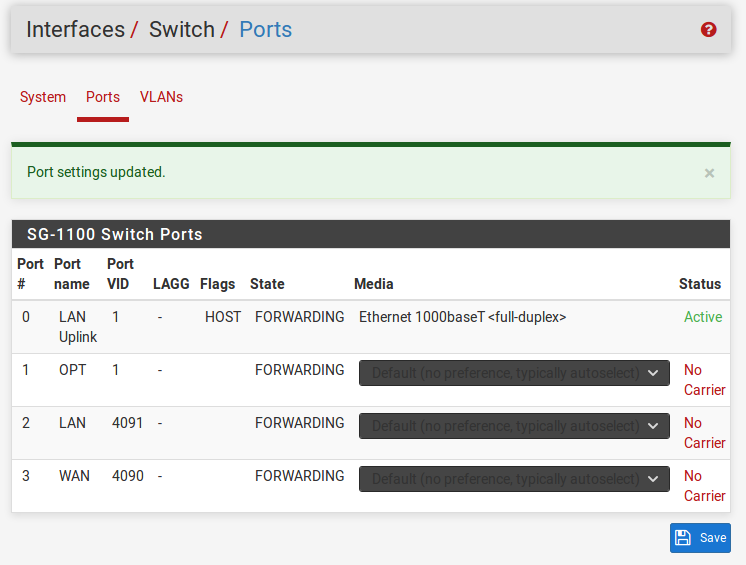
Now connect a managed switch (VLANs 4090-4092 must be trunked on the switchport of the managed switch) to OPT with VLANs 4090 (WAN), 4091 (LAN), and 4092 (OPT) tagged to it.
To access the GUI from the LAN, connect a laptop to LAN, and it should receive a DHCP lease (unless DHCP Server on LAN has been disabled). The GUI will also be accessible (unless the default Anti-Lockout Rule has been disabled) and internet (unless the Default rule to allow LAN traffic to any destination has been disabled).