Prepare a USB Memstick
Warning
Be extremely careful when writing pfSense® software installation images! If the client PC contains other hard drives it is possible to select the wrong drive and overwrite a portion of that drive with the installer disk. This renders the disk completely unreadable except to certain disk recovery programs, if at all.
Using Etcher
The easiest way to create bootable installation media is to use Etcher. Etcher is available on Windows, macOS, and Linux so the procedure to write an image is the same across each of those platforms. Etcher is simple to use, can read compressed image files, and has several features which help prevent users from making unintentional mistakes in the process such as selecting the wrong target drive. Additionally, unlike other methods there is no need to perform other steps before writing the image to prepare the image file or disk.
Download and install Etcher from https://www.balena.io/etcher/
Insert a USB flash drive into the client computer
Start Etcher
Etcher will display its main screen as shown in the following image:
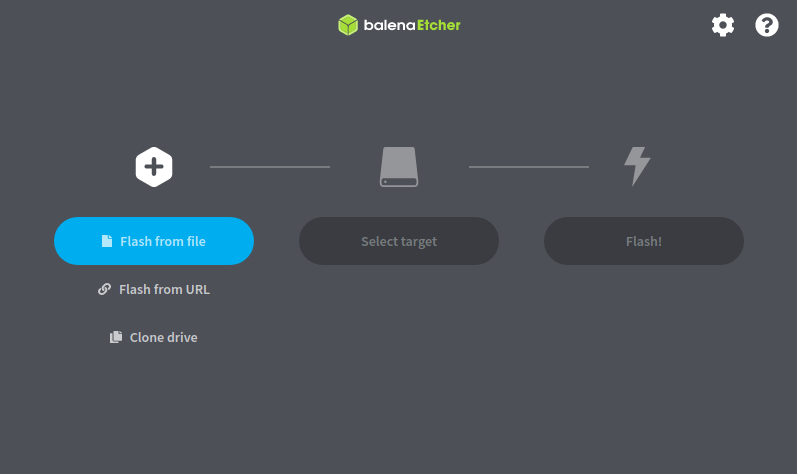
Click Flash from file
Locate and select the installation image file
Tip
Etcher can use compressed images directly, there is no need to manually decompress the image file first.
Click Select target
Click the USB flash drive to which Etcher should write the image
Note
Etcher attempts to hide and/or visibly mark potentially dangerous selections such as system drives, the drive containing the source image, and large drives. This makes it easier to identify the correct selection.
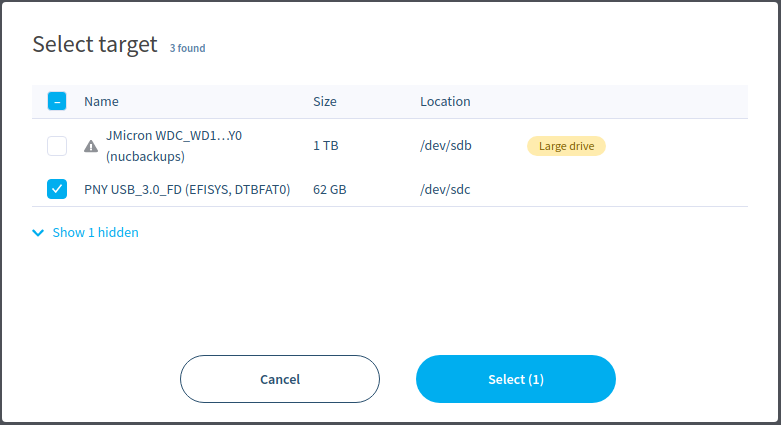
Click Select (1) to continue
Click Flash! to write the image to the target USB flash drive
At this point there may be an authentication or UAC prompt to continue.
Note
Etcher requires elevated privileges to write USB drives. In the majority of cases, Etcher will trigger an operating system prompt for additional privileges as needed. If it does not, re-run Etcher as an administrator explicitly.
Wait for the flash process to complete
If there is an error from Etcher, try another USB flash drive or follow the advice given within Etcher to resolve the problem.
Warning
After writing the drive, the installation media will contain partitions which cannot be read by most operating systems. Ignore any operating system warnings about failing to mount the drive or prompts to format the drive.
Close Etcher when complete
Remove the USB flash drive from the client system
The installation media is now ready to use. Proceed to the installation instructions for the operating system.
Alternate Methods
For other techniques and additional guidance on writing disk images, see the reference document Writing an Installation Image to Flash Media.