UFS
This section is a part of Installation Walkthrough and describes items specific to the UFS choices for partitioning.
When installing to UFS, the installer will prompt to select the target disk
where the installer will write out the pfSense® software, e.g. ada0. The
installer will show all compatible drives.
Note
Unlike ZFS, UFS can only utilize a single disk. Some setups, such as those using a RAID controller, may still use multiple disks, so long as they present a single virtual volume to the installer.
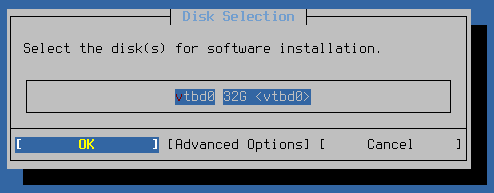
UFS Disk Selection
Note
If installer cannot find any drives, or if it shows incorrect drives, it is possible that the desired drive is attached to an incompatible controller or a controller set for an incompatible mode in the BIOS. See Troubleshooting Installation Issues for help.
See also
The Advanced Options entry on this screen loads another menu containing additional disk operations. For information on these options, see Advanced Disk Options.
Continue Install
Proceed to Final Confirmation.