M.2 SATA Installation
The XG-5100 Desktop has 8 GB of onboard eMMC storage. Optionally, an M.2 SATA drive can be installed as an upgrade or to bypass the onboard eMMC flash memory.
Warning
Before proceeding:
Backup the configuration file, if possible.
Unplug the system for at least 60 seconds to ensure all phantom power has dissipated.
Anti-static protection must be used throughout this procedure.
Any hardware damage incurred during this procedure is not covered by the hardware warranty.
Note
By default, the M.2 SATA drive will be the first drive recognized by the Netgate® device. pfSense® Plus must be reinstalled on the M.2 SATA drive.
Note
The SG-5100 is not compatible with NVMe drives.
Note
The standoff for the M.2 SATA drive is not populated with a screw. A Standard M3 x 0.5 4mm Long Pan Head Screw can be used to secure the M.2 SATA drive in place.
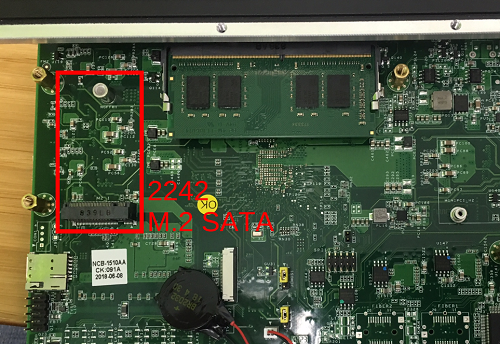
M.2 SATA Location
The M.2 SATA slot is located underneath a large heatsink/drive carrier, so the entire heatsink must be removed. The standoff is for the 2242 (22mm x 42mm) M.2 SATA drive.
Remove the three (3) screws from both sides of the SG-5100 (6 screws total) as shown below.
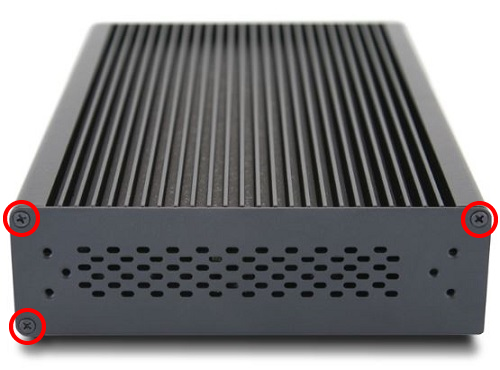
Remove Three (3) Case Screws from Both Sides
Turn the system over carefully to avoid scratching the top of the appliance. Remove the two (2) screws as indicated below.
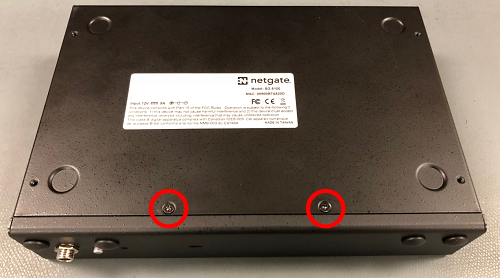
Remove the Bottom Screws
Remove the cover.
Remove the four (4) heatsink screws as indicated.
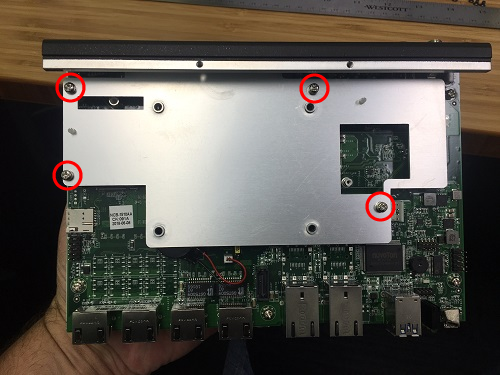
Remove the heat sink Screws
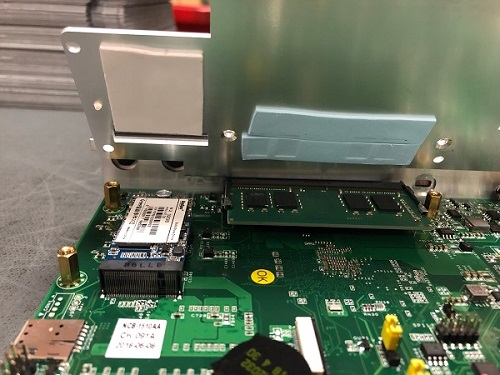
Gently lift the heatsink away from the memory as shown and remove it. Be careful of the thermal transfer pad above the memory and connecting the heatsink to the chassis
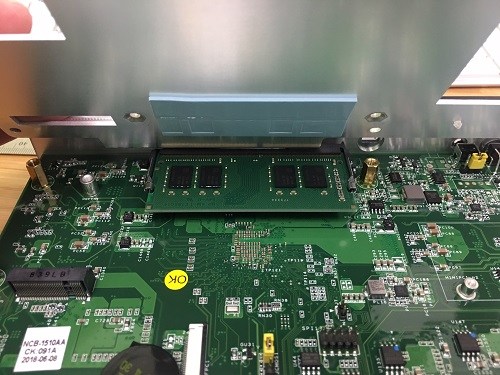
Note the Memory Thermal Transfer Pad
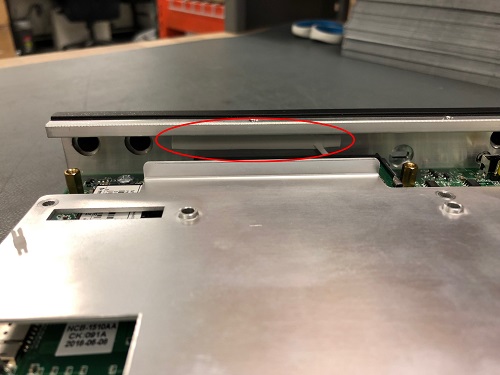
Note the Chassis Thermal Transfer Pad
Warning
Be sure to replace these thermal pads if they come off during the upgrade process.
Insert the M.2 SATA drive into the slot at about a 30° angle.
Warning
The M.2 SATA card is keyed. Do not force it into the slot.
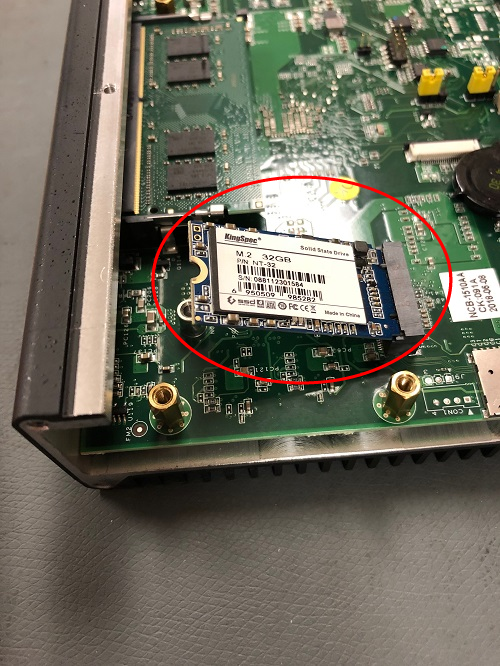
Insert the M.2 SATA Drive at about a 30° Angle
Gently push down the M.2 SATA card and place the screw into the standoff.
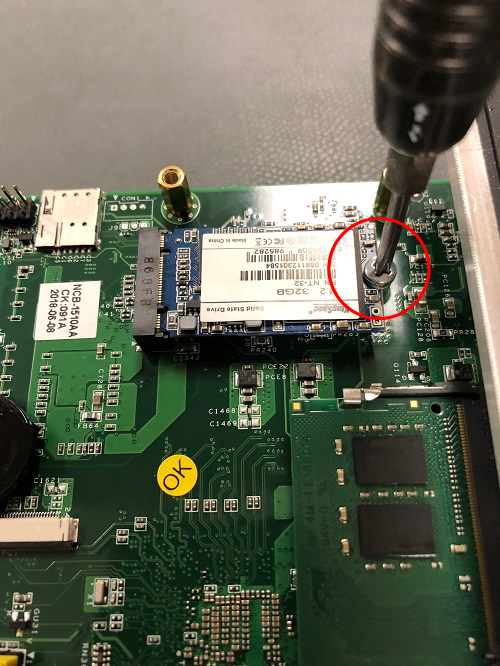
Secure the M.2 SATA Drive
Locate the Thermal Pads that came with the SG-5100. There will be two (2) in a plastic bag. This procedure uses the larger of the two pads.
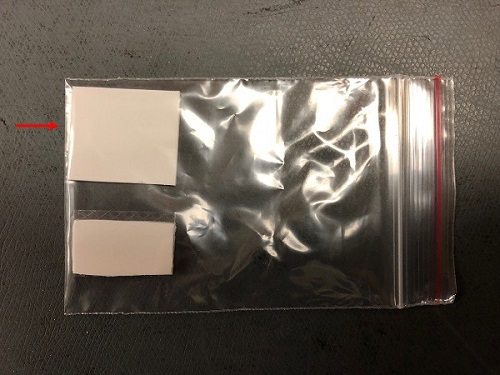
Thermal Pads that come with the SG-5100
The Thermal Pad has film on both sides. One side is shiny and is sticky. The shiny side will stick the heatsink. The non-shiny side is “tacky”, but not sticky. The tacky side will go to the M.2 SATA drive.
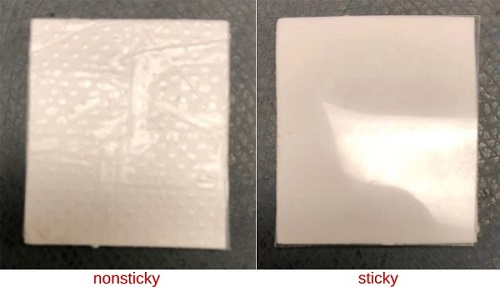
Both Sides of the Thermal Pads
The Thermal Pad will attach to the large aluminum heatsink.
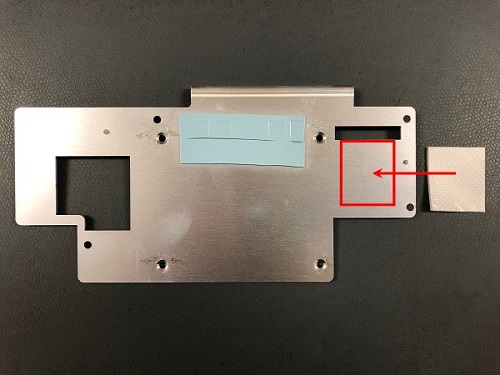
Thermal Pads that come with the SG-5100
Remove the shiny film from the Thermal Pad and stick it to the heatsink as shown. Try to center it on the cutout, but it doesn’t need to be exact.
Stick the Thermal Pad to the heat sink
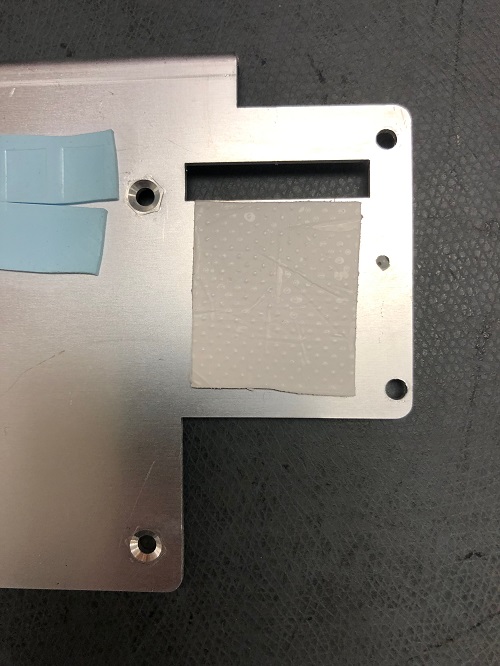
Remove the film from the non-sticky side of the Thermal Pad.
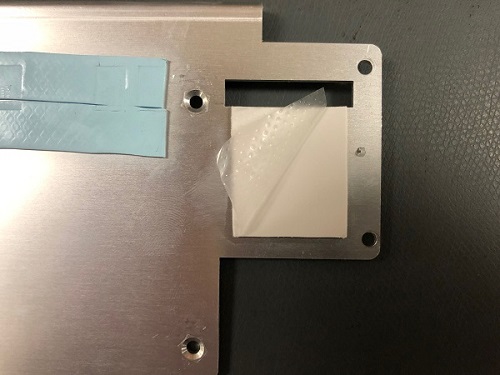
Stick the Thermal Pad to the heat sink
Replace the heatsink as shown. Replace the four (4) screws securing the heatsink in place.
Replace the heat sink
Replace the system cover and screws.
Reinstall the pfSense® Plus software on the new M.2 SATA drive.
See also
Restore the configuration backup if one is available.
See also
For information on restoring from a previously saved configuration, see Backup and Restore.
Tip
If the new drive is compatible with S.M.A.R.T. it may be possible to view detailed drive status information and run tests from Diagnostics > S.M.A.R.T. Status.
See S.M.A.R.T. Hard Disk Status for details.