Configuring Cellular Modems
To configure a cellular modem in pfSense® software, plug in a Known Working Modem and log into the firewall GUI to begin configuration.
See also
Example Cellular Configuration
Navigate to Interfaces > Assignments, PPPs tab
Click + to create a new entry
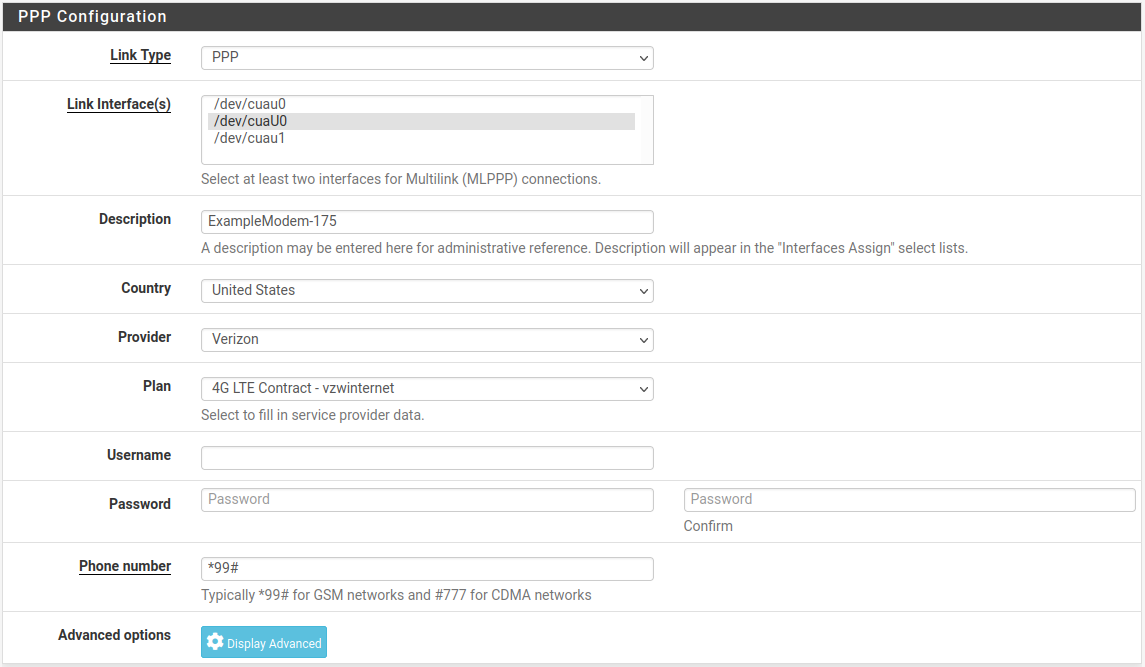
Configure the settings as follows:
- Link Type:
PPP
- Link Interface(s):
Select the port for the modem from the list. The list contains all available serial ports on the firewall.
Note
A modem may list several serial ports. Typically, the correct choice is the last entry, but may require trial and error to identify.
- Description:
Text used to reference this PPP configuration in other parts of the GUI. For example, it could contain the service provider and/or modem model.
- Country:
Select the country in which this modem is operating.
The firewall populates the Provider list based on the value of this field.
- Provider:
Select the cellular network provider for the modem.
The firewall populates the Plan list based on the value of this field.
- Plan:
Select the cellular plan used by this modem. Check with the cellular provider to determine which choice is correct.
This populates the remaining fields where possible with values specific to the Plan.
- Username / Password:
Enter login credentials if the provider requires authentication.
The remaining settings can typically be left at their automatic or existing values. For more information on the available settings, see PPP (Cellular Modem).
Click Save.

Example modem configuration
The GUI lists the newly created PPP interface on the PPPs tab:

PPP list entry for a modem
Assigning the PPP Interface
Next, assign the PPP instance to an interface.
Navigate to Interfaces > Assignments
Set the Available network ports field to the newly created PPP interface
Click
 Add
Add
The firewall will assign the PPP interface as the next available OPTx interface, for example, OPT1.

Assign the PPP interface
Enable the PPP Interface
Navigate to the menu entry for the new interface name, e.g. Interfaces > OPT1
Check Enable Interface
Enter a new name for the interface in the Description field, e.g.
CellModemClick Save
Click Apply changes
Check the interface status
Navigate to Status > Interfaces and locate the entry for the new PPP interface in the list.
If the interface does not show connected, check the logs under Status > System logs, PPP tab to see if the firewall has log messages indicating why the connection is failing.
Note
Some connection problems are a lack of signal. If the cellular modem is in a location with poor reception, such as an equipment room, datacenter, rack, etc., then use an antenna and/or longer USB cable to achieve a better signal.