Managing the Configuration of the Instance
Once the instance is launched, monitor its status using the Instances page of the EC2 Management Console. The EC2 Management Console will display whether the instance is up and reachable and will also display its current public IP address and the hostname that resolves to the public IP address. Find the hostname and public IP address in the EC2 console by clicking on the Instances heading on the left, finding the instance and checking the checkbox next to it and looking at the details at the bottom of the page.
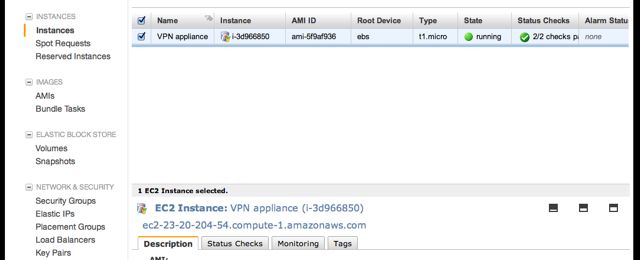
In the example above, the hostname of the instance is
ec2-23-20-204-54.compute-1.amazonaws.com. The public IP address is available
by putting together the 4 numbers included in the hostname – 23.30.204.54.
It is also possible to obtain the IP address by using a popular DNS lookup tool
such as host, dig, or nslookup to resolve the hostname to its IP
address.
Note
The hostname and IP address used in this and other examples in this guide are associated at the time of writing with a test instance. This address/hostname will not be the same values used to access the instance, and they will not even be associated with the same test instance by the time this guide is available to the public.
In order to manage the configuration of the instance, connect to it via HTTPS or
SSH. To connect via SSH, use the key pair chosen while creating the instance to
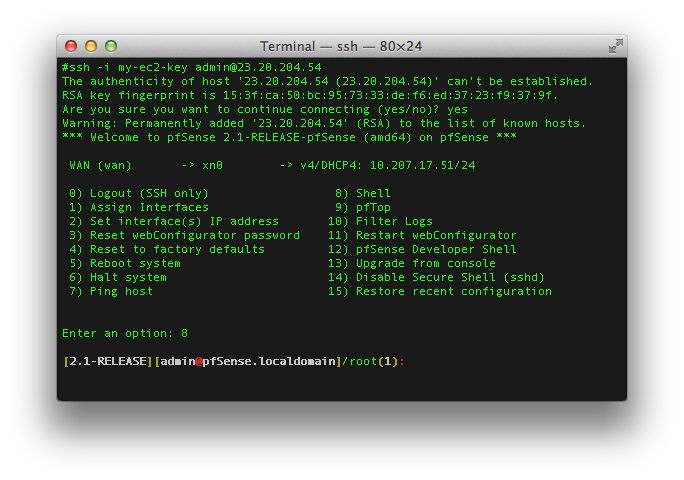
connect to the admin account. From the command line on a Unix/Linux host,
use a command similar to ssh -i my_key_file admin@public_IP, where the
appropriate private key file and public IP address or hostname are substituted.
In the example below, the client uses the key file my_ec2_key connect to the
IP address 23.20.204.54.
Note
The first time logging into the instance, the SSH key for the instance will
not be cached locally, type yes when asked whether to continue
connecting. This should not be necessary on subsequent sessions.
A limited set of configurations is possible through SSH. The preferred method
for managing most of the configurations or viewing data on the status of the
Netgate® pfSense® Plus instance is through the HTTPS GUI. To connect via HTTPS,
enter an https:// URL containing the public IP address or hostname of the
instance into a web browser. For example, https://23.20.204.54.
There will likely be a browser warning indicating that the security certificate of the site is not trusted, because the instance uses a self-signed certificate for HTTPS communication. Click on the option to proceed to the site anyway and a login screen with the Netgate logo should appear.
The username to log in with is admin. The password to use is either a value
set in the User Data during the creation of the instance or a random
password. If a specific password was not set, The value of the random password
can be found through one of two different means:
Log in over SSH with the key pair selected when the instance was created and examine the contents of the file located at
/etc/motd-passwd. Select option 8 (Shell) from the console menu that is presented after log in and executecat /etc/motd-passwdfrom the shell.Alternatively, view the System Log for the instance in the EC2 Management Console. After the messages that are displayed that show the status of the boot process, a message should appear that indicates the value of the administrative password.
Note
The System Log output in the EC2 Management Console is not updated in real time and may take a few minutes to show up. It is preferable to explicitly set a password by passing a value in with the User Data field, so the password will be known in advance. To allow a random password to be set, connect via SSH and find the value of the password after the instance is up without any delay.
The message, using either of the methods mentioned, will look like this
***
***
*** Admin password changed to: abcdefg
***
***
In this example, the password was changed to abcdefg.
Once the password has been determined and entered into the login form, the pfSense® Plus GUI should be available.