Getting Started
The basic firewall configuration begins with connecting the Netgate® appliance to the Internet. The Netgate appliance should be unplugged at this time.
Remove Protective Wrap
The Netgate 8300 ships with clear plastic overwrap on the top and bottom of the unit to protect the panels from scratches before installation. Remove this overwrap before continuing the setup process.
Warning
The plastic overwrap must be removed from both the top and bottom of the unit before installing the device in a rack.
Rack Installation
The Netgate 8300 is intended to be rack mounted. The best practice is to mount the unit in a rack before connecting it to the network or power.
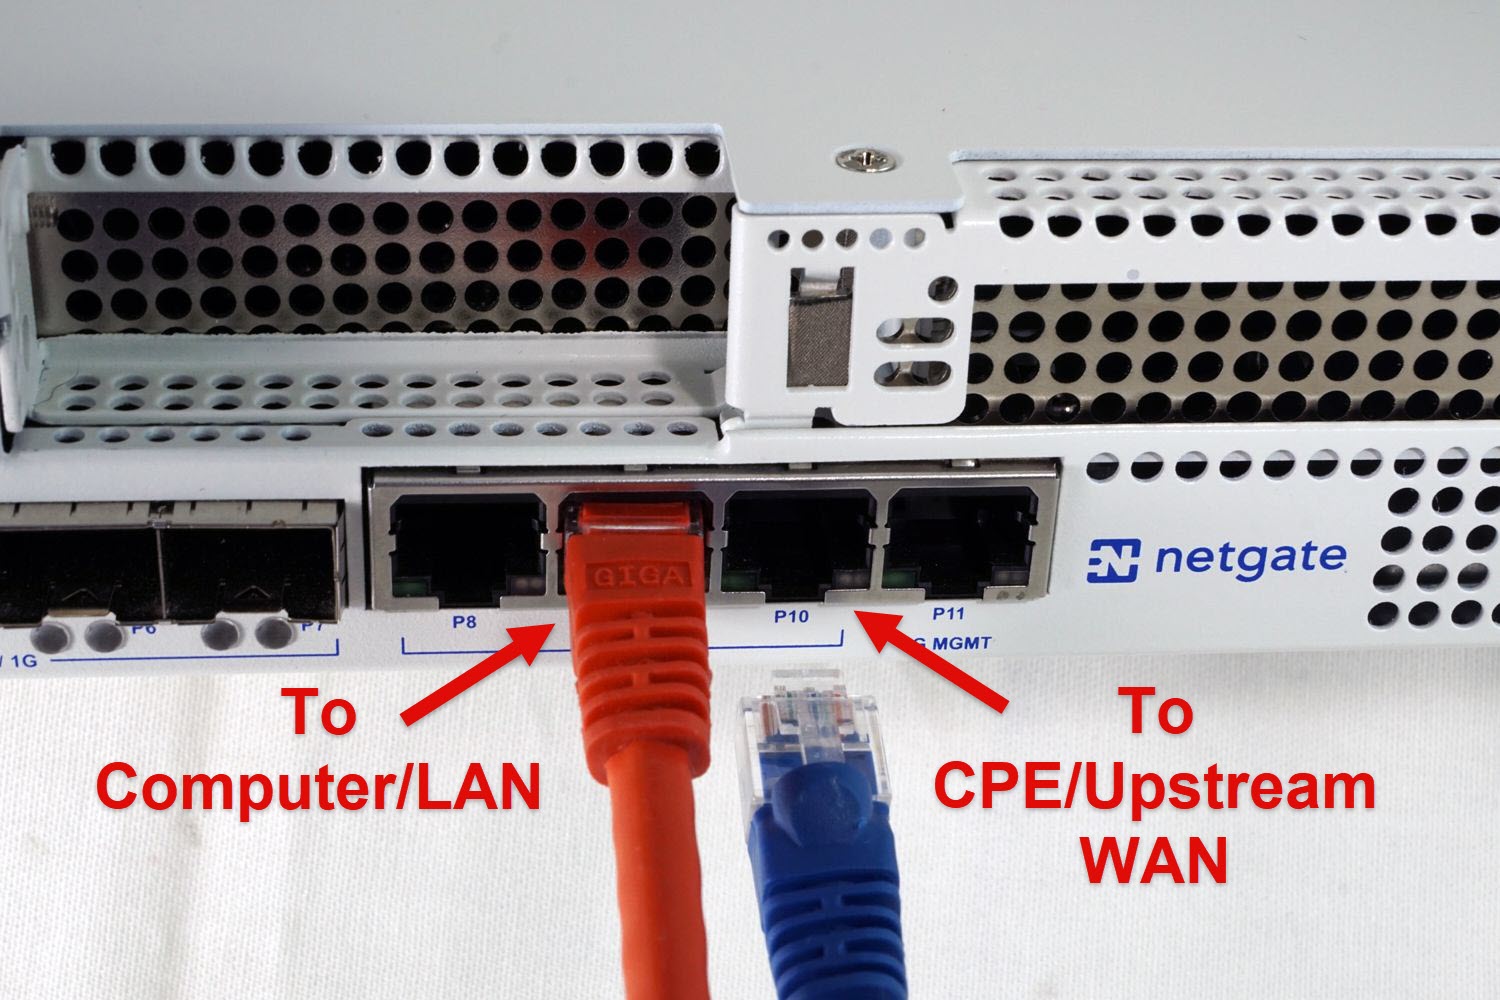
Connect Network Cables
Connect one end of an Ethernet cable to the P10 port (shown in the Input and Output Ports section) of the Netgate appliance. Insert the other end of the same cable into the upstream network connection. For example this might be an ISP Customer Premise Equipment (CPE) device, such as a cable or fiber router, or an external switch, such as one connecting to a datacenter WAN.
Note
If the CPE device provided by the ISP has multiple LAN ports, any LAN port should work in most circumstances.
Next, connect one end of a second Ethernet cable to the P9 port (shown in the Input and Output Ports section) of the Netgate appliance. Connect the other end to the computer or a downstream LAN switch.
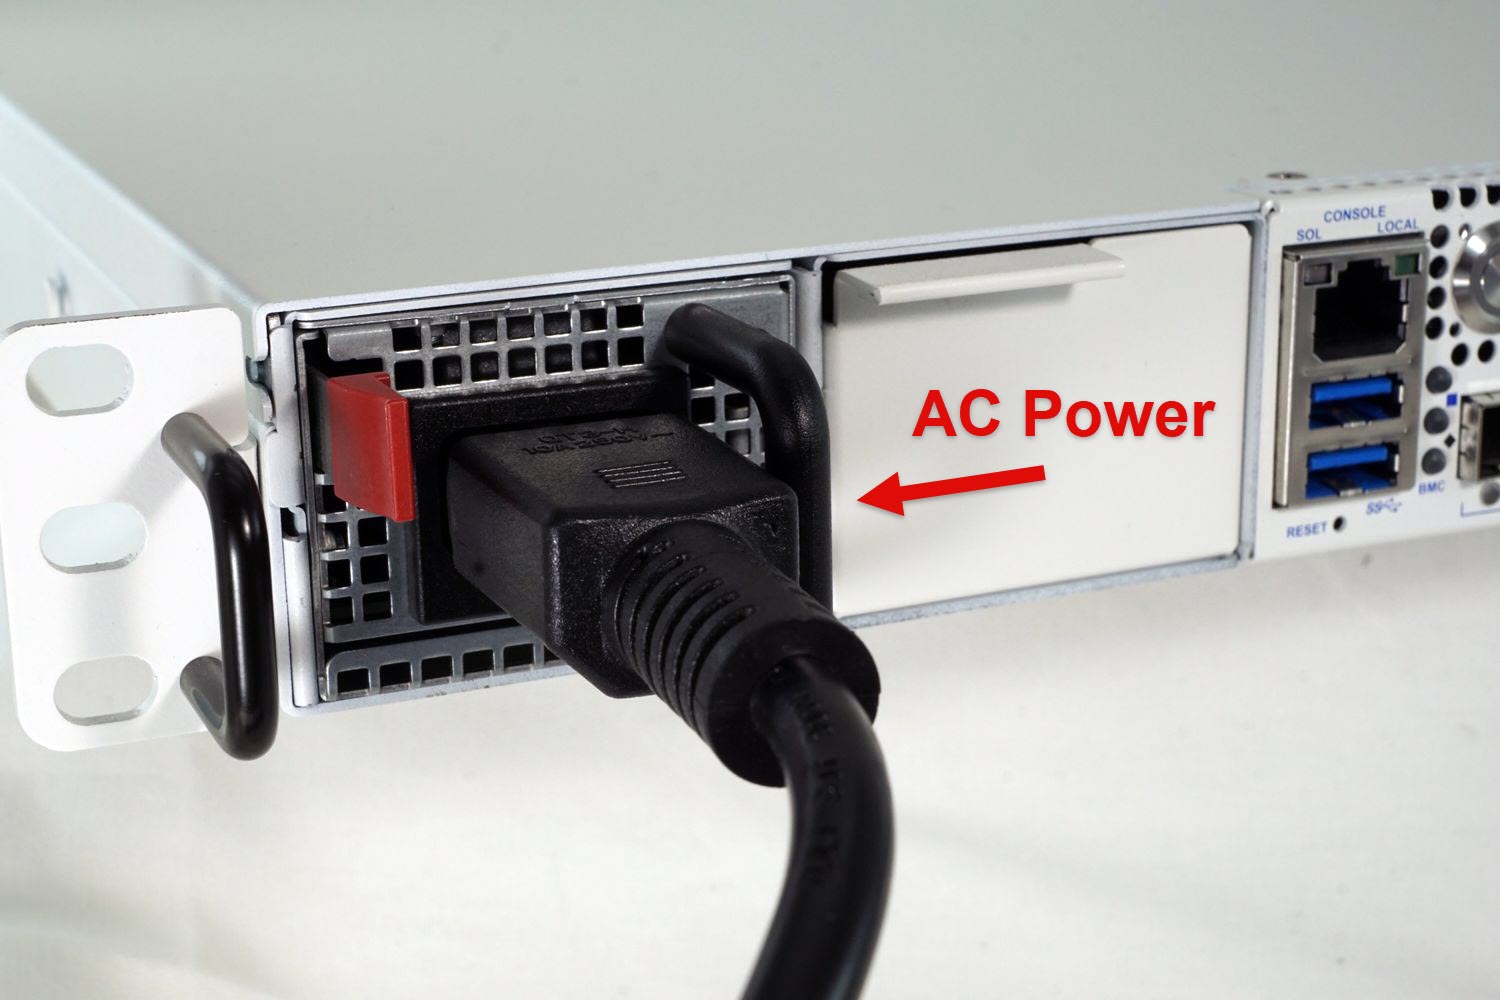
Connect Power
The Netgate 8300 ships with one or two power supplies depending on the specific model or purchased add-ons. Connect power to all installed power supplies before powering on the unit.
Note
Though the device can function with only a single power supply connected, the best practice is to always connect power to both power supplies.
After connecting power, turn on the power switch located on the rear of the unit.
What next?
To connect to the GUI and configure the firewall in a browser, continue on to Initial Configuration.
To connect to the console and make adjustments before connecting to the GUI, see Connecting to the Console Port.
Warning
The default IP Address on the LAN subnet on the Netgate firewall is
192.168.1.1/24. The same subnet cannot be used on both WAN and LAN,
so if the default IP address on the ISP-supplied modem is also
192.168.1.1/24, disconnect the WAN interface until the LAN interface
on the firewall has been renumbered to a different subnet (like
192.168.2.1/24) to avoid an IP Address conflict.
To change an interface IP address, choose option 2 from the Console Menu and walk through the steps to change it, or from the GUI, go through the Setup Wizard (opens at first boot, also found at System > Setup Wizard) and change the IP address on Step 5. Complete the Wizard and save the changes.
Warning
This device includes an intrusion detection sensor which operates even when the device is without power.
Opening the case on this device triggers an intrusion alarm which is logged by the BMC and is visible in the IPMI sensors. This alarm must be reset manually as described in Re-arm the Chassis Intrusion Switch.
When the intrusion alarm is active the fans run at a fixed speed of around 8500 RPM. Resetting the intrusion sensor alarm returns the fans to their profiled speed.