Launching an Instance in a VPC
In the Amazon EC2 Management Console, launch a new instance of the Netgate® pfSense® Plus software firewall and VPN appliance.
This process is the same as the one for launching an EC2 (non-VPC) instance, up until the Network Settings in order to specify the instance should be created in the VPC.
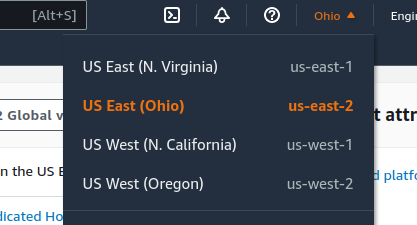
Select the region in which the instance will run
Click the current Region name near the upper right corner of the page
Select a new region if necessary
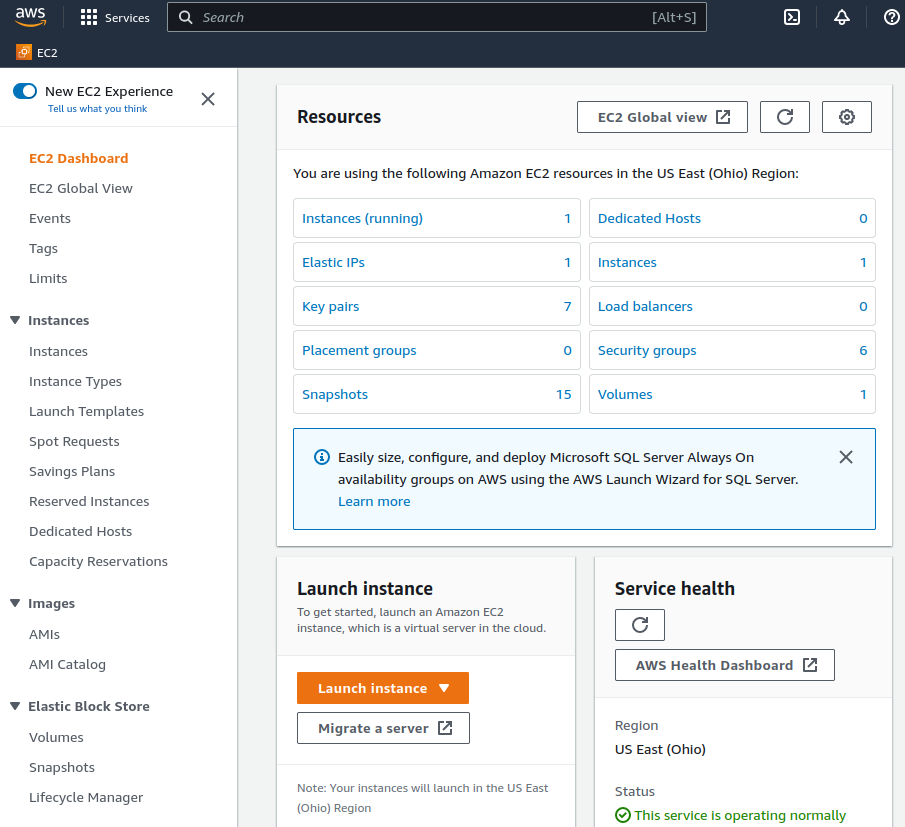
Enter the Launch Instance Wizard
Click the Launch Instance button to open the Launch Instance menu
This button is in the Launch Instance section which is located under the Resources section of the EC2 dashboard.
Click Launch Instance from the menu
Give the new instance a Name, such as
pfSenseOptionally, click Add Additional Tags to create more tags which can be used to identify and locate this instance.
Type
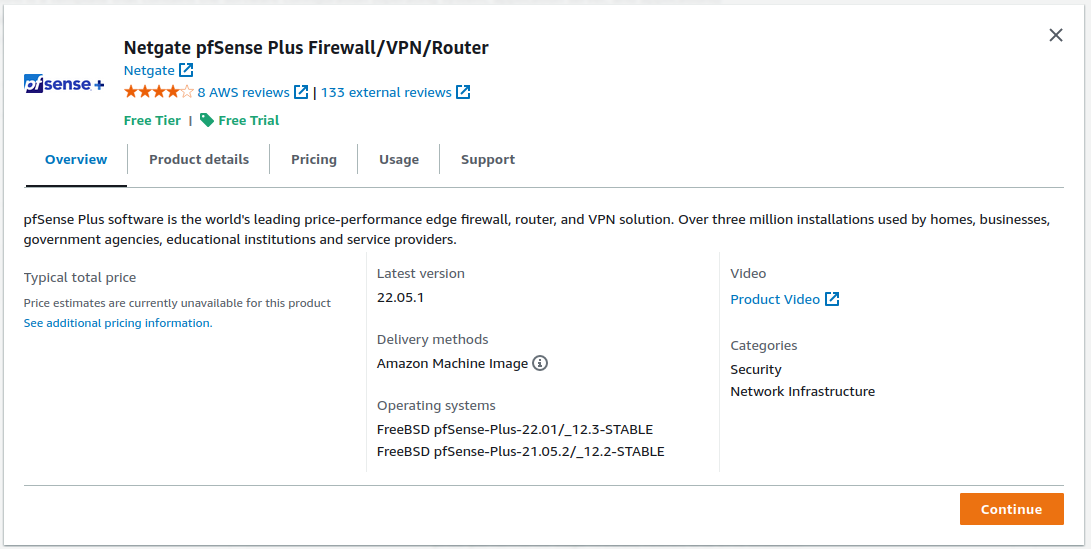
Netgate pfSense Plusin the search box and pressEnter.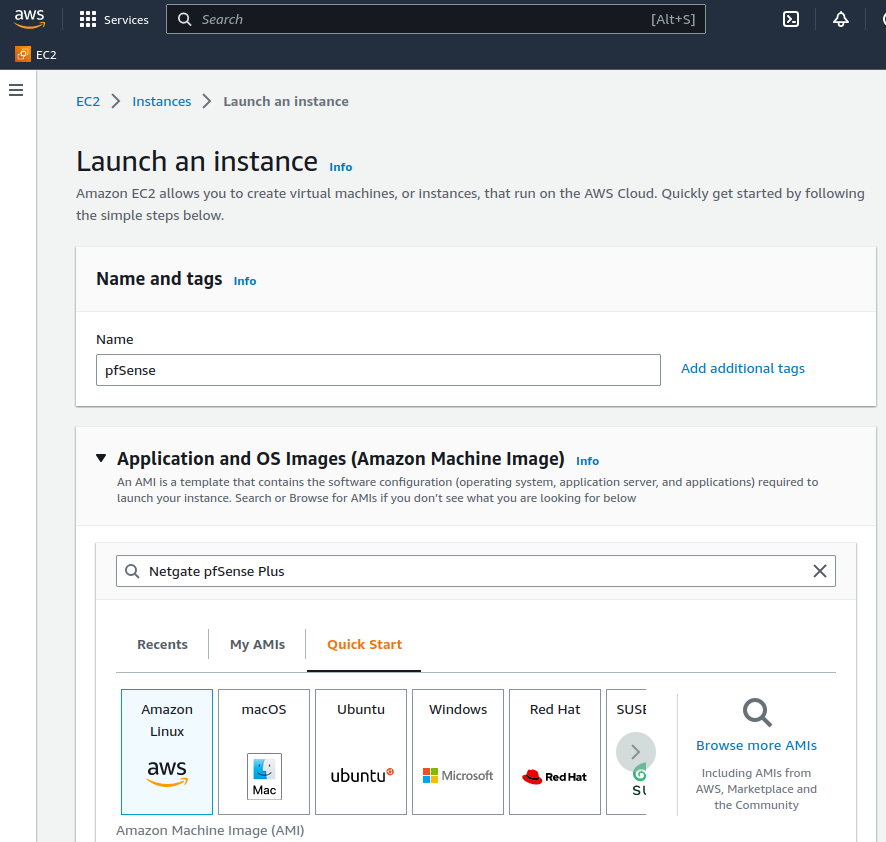
Select AWS Marketplace AMIs if it is not automatically highlighted
Click the Select button for the Netgate pfSense Plus Firewall/VPN/Router listing in the search result that corresponds to the desired type of instance. This could be either the amd64 AWS product or the arm64/Graviton AWS product depending on the needs of this deployment.
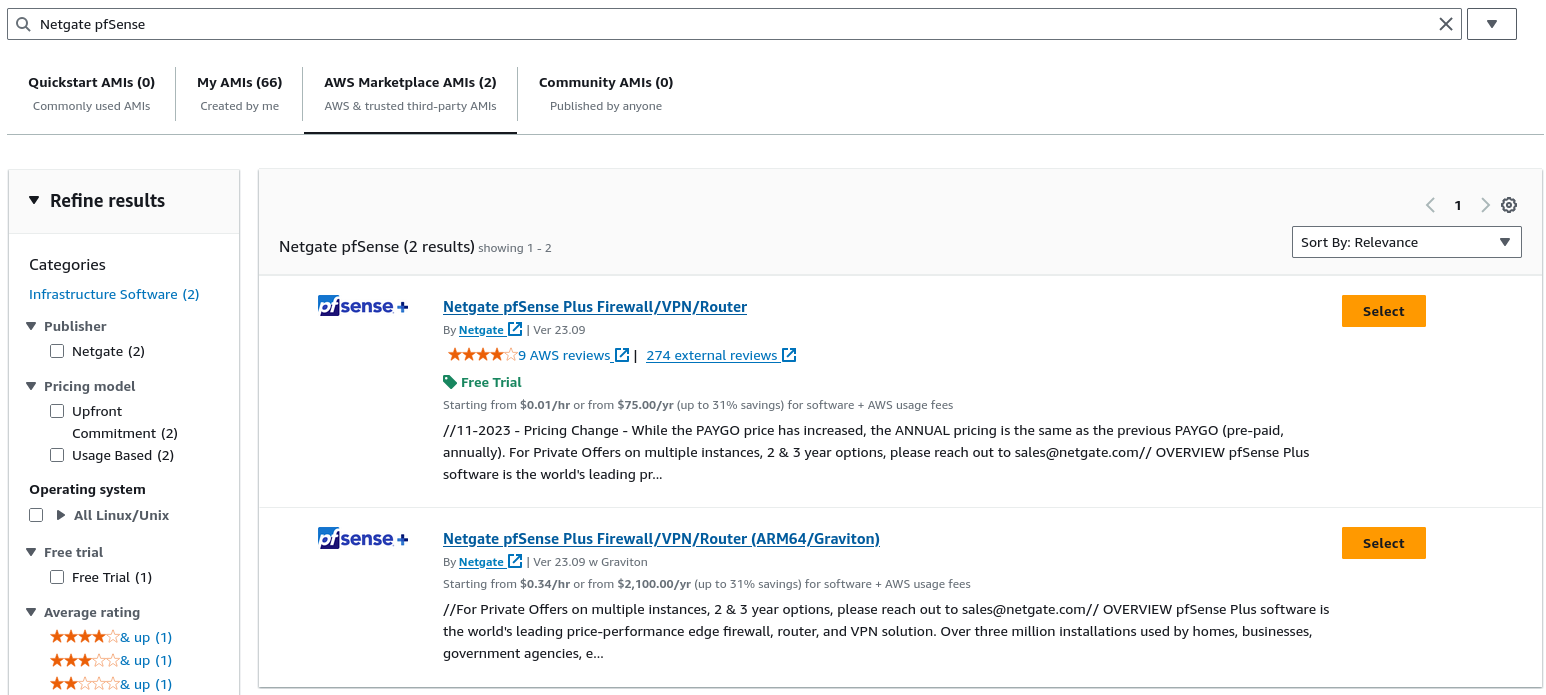
Review pricing and other helpful information, then click Continue.
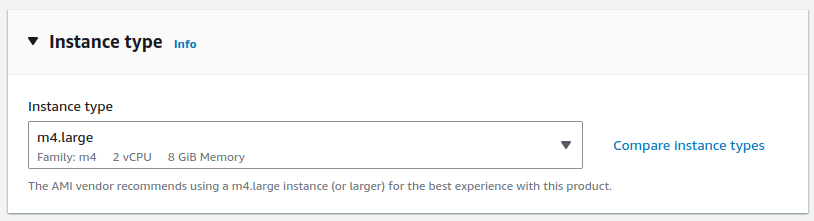
Choose an Instance Type from the drop-down
See also
For guidance on which instance type to choose, see Choosing Instance Type and Sizing.
Configure an SSH Key Pair
The Key Pair section of the form sets the SSH key pair used by an SSH client when it connects to the TNSR instance for management.
For an existing key pair:
Click Key pair name
Search for and select an existing key pair entry
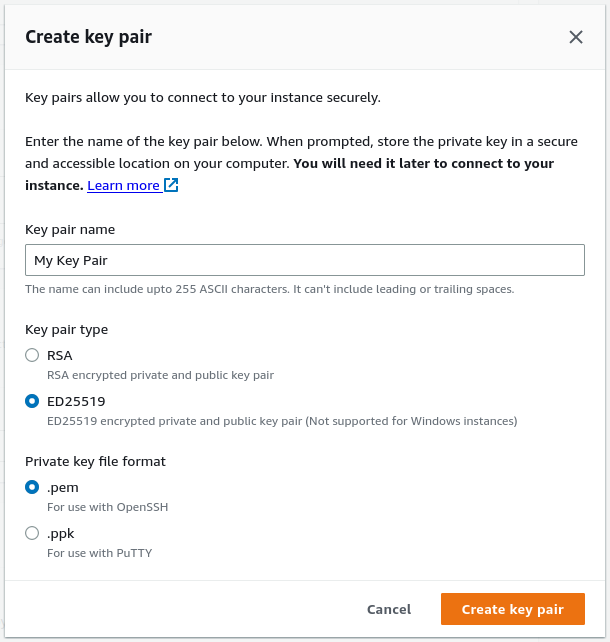
To create a new key pair:
Click Create new Key Pair
Enter a Key pair name, such as TNSR SSH Key
Select a Key Pair Type and Private Key Format
The chosen type and format must be compatible with whichever local SSH client will be used by TNSR administrators
Click the Create key pair
Select a location to save the key pair locally
Click Edit under Network Settings to allow making changes for the next few steps.

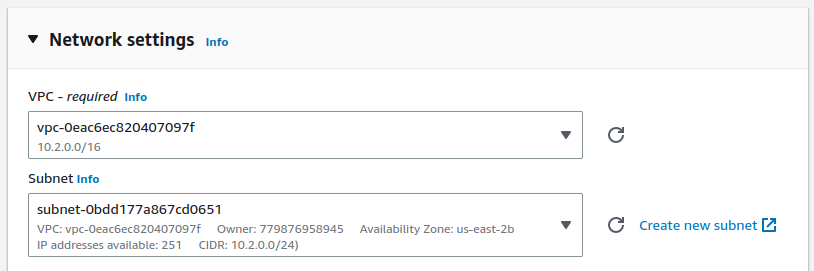
Configure the Network Settings
Select the VPC
Select the public Subnet (e.g.
10.2.0.0/24)
Configure Security Groups
Select a security group to launch the instance with. This controls which traffic AWS allows to reach the instance.
If there is an existing security group which includes this access:
Click Select an existing security group
Select the group(s) to use.
If there is no existing group:
Click Create security group
Optionally, change the Security group name and Description
Add/Remove/Change individual rules as necessary to allow only the traffic required by the instance.
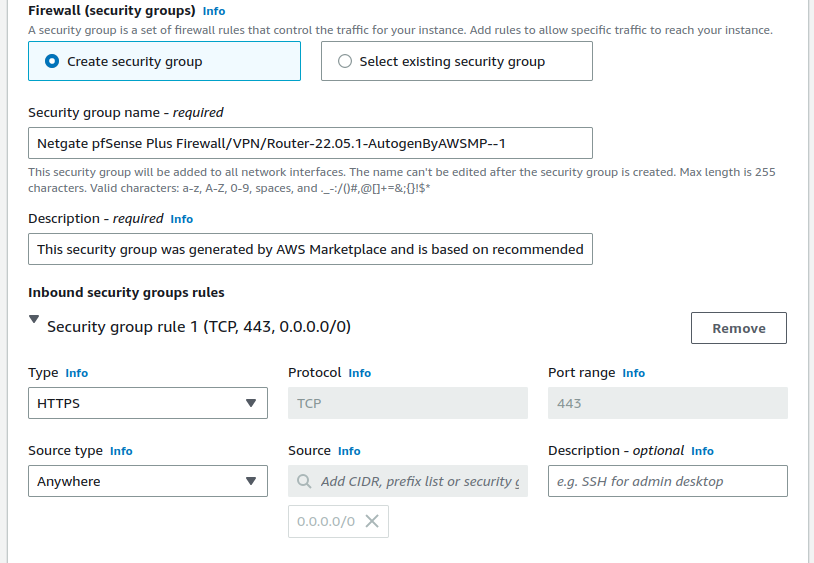
By default, the instance suggests a configuration to allow access to the firewall management ports (TCP/80, TCP/443, TCP/22) but there are several other common things which may need to be passed.
Security group rules may be configured by selecting pre-defined Types or by entering custom values.
The best practice settings for the security group rules should allow at least the following traffic:
HTTPS (TCP port
443) from0.0.0.0/0This is the port that the management GUI listens on.
SSH (TCP port
22) from0.0.0.0/0This port can be used to connect to a command prompt with an ssh client.
Custom UDP, Port
1194from0.0.0.0/0OpenVPN - The OpenVPN server that is configured by default is bound to this port.
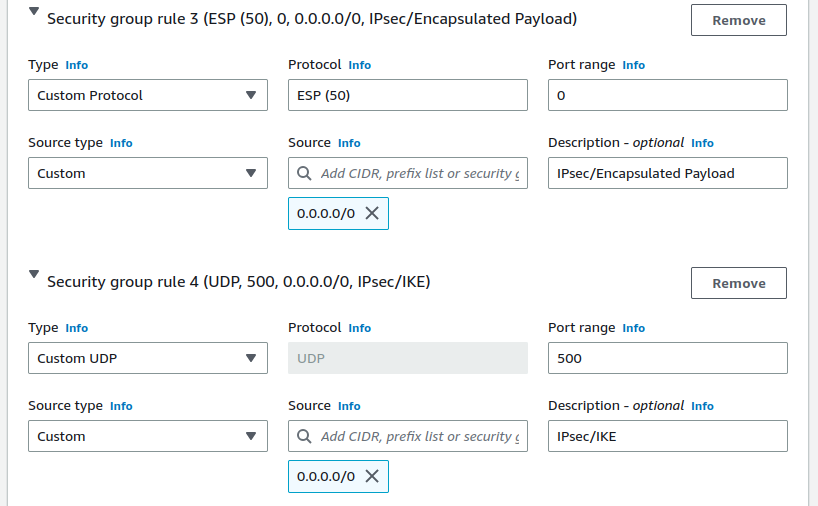
Custom UDP, Port
500from0.0.0.0/0IKE for IPsec VPN.
Custom Protocol,
ESP(50)Encapsulated IPsec traffic
Custom UDP, Port
4500from0.0.0.0/0IPsec/NAT-T for IPsec VPN.
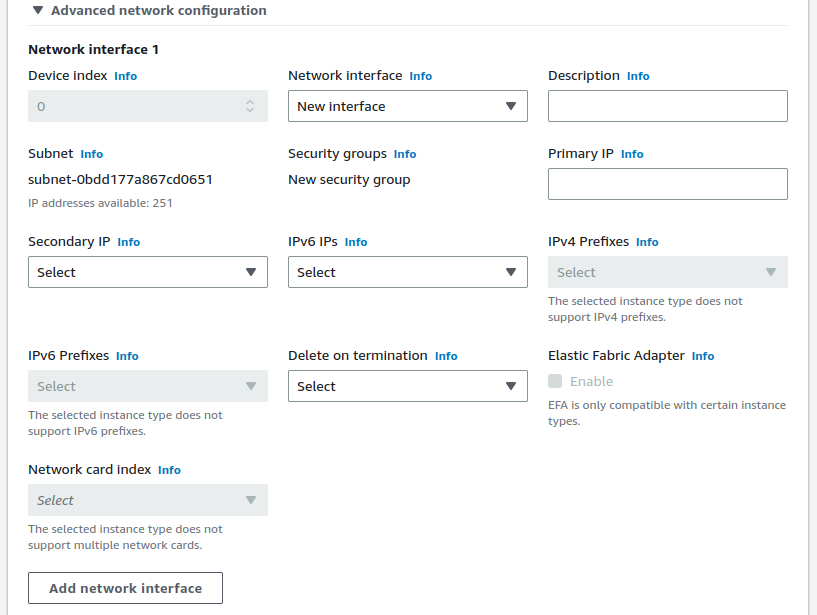
Add the LAN interface
Scroll down to Advanced network configuration
Click Advanced network configuration to expand the section
This section contains a single interface by default, which corresponds to the WAN / public subnet.
Click Add network interface
Select the private subnet that was created (e.g.
10.2.1.0/24)Enter an IP address from the private subnet in the Primary IP field
Keep in mind that the first 3 or 4 IP addresses are reserved. For this example, use
10.2.1.5.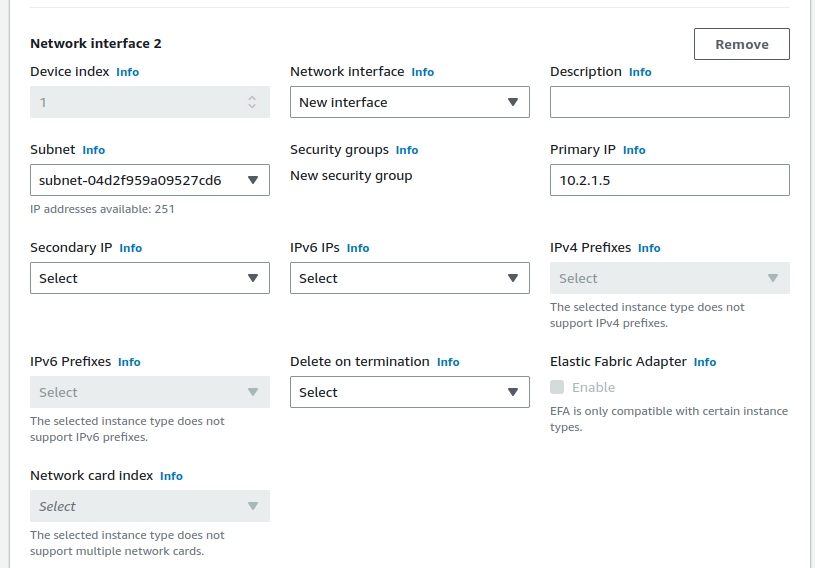
Configure storage
If this instance will require more than the default
8GiB disk, increase the value in the Configure Storage section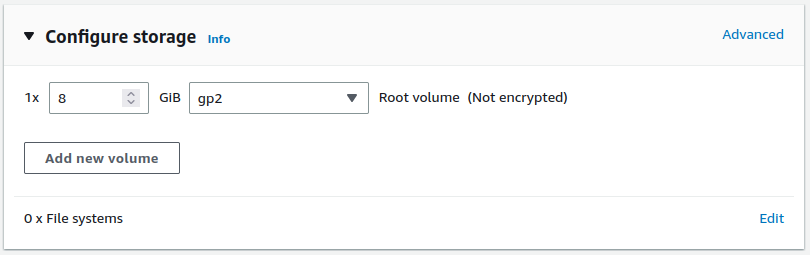
Configure Advanced details
There are a couple optional parameters which can influence how the instance will start the first time.
Click to expand the Advanced Details section
Set parameters as text in the User Data field.
The available options are:
- password:
Setting a value via a directive like
password=abcdefgwill set the password for the administrative account to the specified value –abcdefgin this example. If no value is set here, a random password will be assigned in order to keep administrative access from being exposed to the internet with a default password.Note
A password configured using this method cannot contain the characters
:or=, which are reserved for use as delimiters by the script which handles importing these values.- mgmtnet:
Setting a value via a directive like
mgmtnet=10.0.1.0/24will restrict management access (HTTP, HTTPS, SSH) to the specified network –10.0.1.0/24in this example. This will cause the firewall rule on the instance (not on Amazons access lists, but on the Netgate appliance’s own firewall) to restrict management traffic for the instance to the specified source network. The default behavior is to allow management from any host.
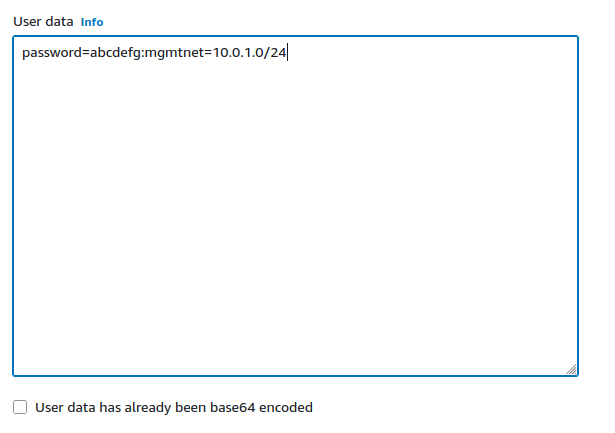
These directives can be set by placing them on a single line in the User Data field and separating them with colons. Specify both parameters, by typing a statement similar to:
password=abcdefg:mgmtnet=10.0.1.0/24
Note
If setting a password using the password parameter listed above, the password is retrieved by the instance via an unencrypted HTTP request when the system is configured the first time it boots. The request is made to an Amazon Web Services-operated server on the local LAN that stores metadata about each instance running. The data for an instance is only made available to that instance, but is available to be queried from the instance without providing any authentication credentials.
It is advised to change the admin password via the pfSense® Plus GUI after the instance comes up, or choose not to set the password at all and let a random password be set.
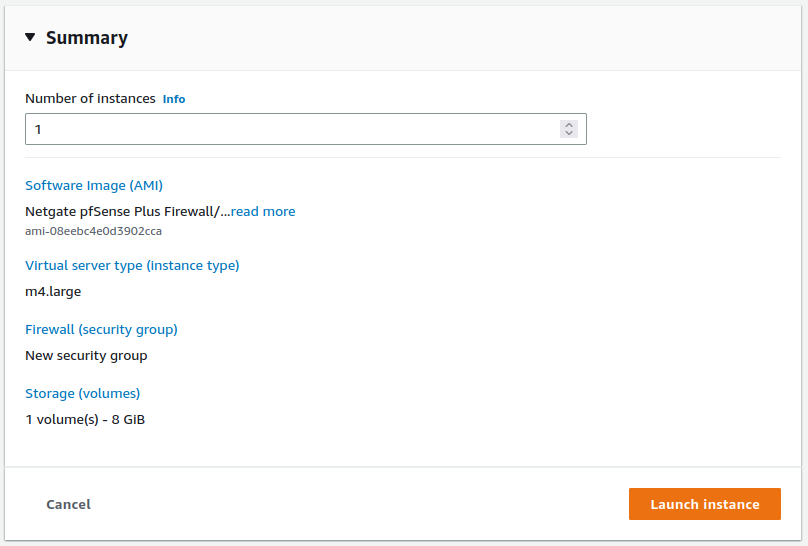
Verify the settings selected in earlier steps and review any errors or recommendations displayed by AWS
Click Launch instance in the Summary box on the right side
Allocate an Elastic IP address
To reach the instance from the Internet, associate an Elastic IP with the WAN interface of the instance.
For each interface that needs a public Elastic IP Address, allocate one by following the instructions at https://docs.aws.amazon.com/AWSEC2/latest/UserGuide/elastic-ip-addresses-eip.html#using-instance-addressing-eips-allocating
Before associating an Elastic IP Address to a Network Interface, make a note of the ID of the Network Interface to use. To find the Network Interface ID:
Navigate to https://console.aws.amazon.com/ec2/
Click Instances
Click the checkbox next to the pfSense Plus instance to select it
Look at the bottom of the page, under the Networking tab to see Network Interfaces
Click on the interface names to display information about the Network Interface
Determine which interface is which by their private IP address, which will match either the public (WAN) or private (LAN) subnet.
Write down the Interface ID for the WAN interface
After allocating the Elastic IP Address and finding the Network Interface ID for WAN, associate the Elastic IP Address to the Network Interfaces by following the instructions at https://docs.aws.amazon.com/AWSEC2/latest/UserGuide/using-eni.html#associate_eip
Disable Source/Destination address checking
To allow the firewall to route traffic from the private subnet through the public interface of the instance, the Source/Dest Address Check on the private interfaces needs to be disabled:
Navigate to https://console.aws.amazon.com/ec2/
Click Instances
Click the checkbox next to the pfSense Plus instance to select it
Look at the bottom of the page, under the Networking tab to see Network Interfaces
Click on the LAN interface name to filter the view to only that interface
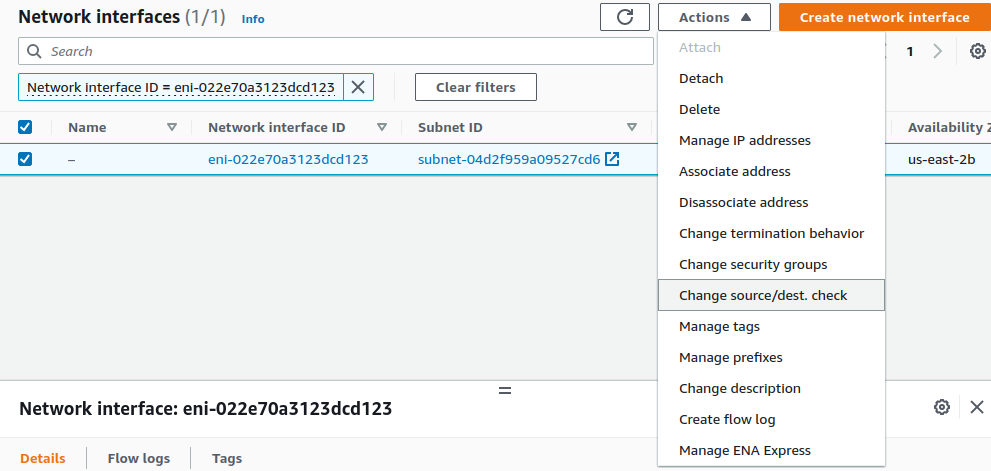
Click the checkbox to the left of the interface
Click Actions at the top of the page
Select Change Source/Desk Check from the popup menu
Uncheck Enable
Click Save
Non-local traffic from the private subnet should now be sent through the private/LAN interface on the Netgate appliance instance.