Launching an Instance with a Single Network Interface
An instance of Netgate® pfSense® Plus software for Azure that is created with a single network interface card (NIC) can be used as a VPN endpoint to allow access into an Azure Virtual Network (VNet). The single NIC pfSense® Plus virtual machine (VM) only creates a WAN interface, but still provides a public and private IP address within Azure.
In the Azure Management Portal, launch a new instance of the Netgate pfSense® Plus Firewall/VPN/Router appliance.
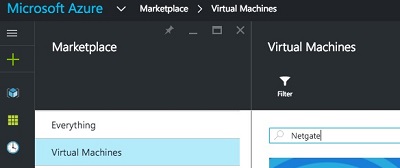
From the Azure portal Dashboard, click on Marketplace

Search for and select the Netgate Appliance for Azure
Set the name of the instance as well as username, password, resource group, and region.
The username entered will be created as a valid pfSense® Plus account upon boot and will be able to log into the GUI. Additionally, the admin user will also have its password set to the given value.
Warning
The username typically used to administer pfSense® Plus is
admin, butadminis a reserved name that is not allowed to be set by the Azure provisioning wizard. Also for cloud security, it is considered best practice to limit access for therootuser, sorootis locked by default.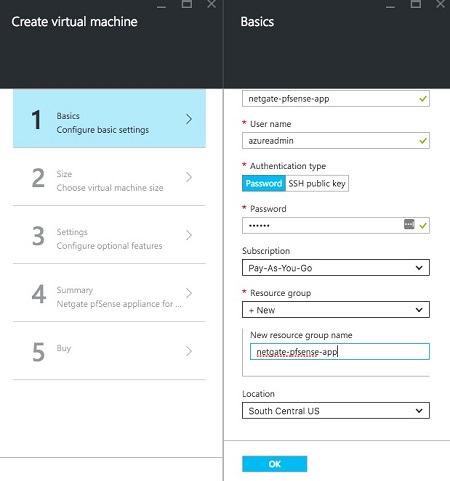
Choose the instance size.
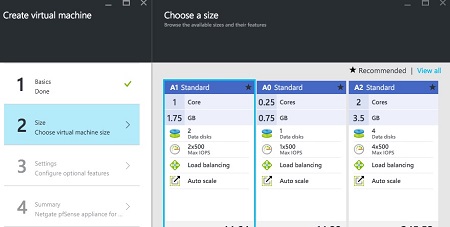
Note
A0 instances sizes are not compatible as they lack sufficient RAM for certain key functions to work, such as upgrades.
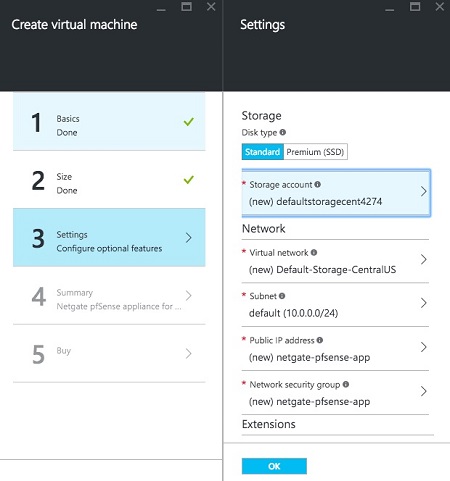
Choose the disc type, and network settings (virtual network, subnet, public IP address, network security group).
To manage the Netgate pfSense® Plus appliance, ensure that the security group contains rules to allow ports
22(SSH) and443(HTTPS) to access the command line and GUI. To allow other traffic, add additional endpoints.For IPsec, allow UDP port
500(IKE) and UDP port4500(NAT-T).For OpenVPN, allow UDP port
1194.Click on Network security group and make additions as needed.
Confirm the selections on the Summary page and click OK.
Note the price on the purchase page and click Purchase.
Once the VM launches and the Azure portal shows that it has come up, the web interface will be accessible. Use the password set during the provisioning process and the
adminuser. The appliance should now be accessible.