FreeBSD 10.2
Retrieve
FreeBSD-10.2-RELEASE-amd64-memstick.imgfrom the FreeBSD FTP Site.Write the image to a USB memstick.
See also
- Writing Flash Drives
Writing an OS installation image to flash media
Connect to the console port of the RCC-VE using a mini-USB cable attached to another system.
See also
- Connecting to Console Port
Connecting to the console port. Cable is required.
Connect a network cable that is attached to the local LAN to one of the ethernet ports.
Place the memstick in one of the USB ports and boot the system.
After a minute the FreeBSD loader menu will be displayed which contains options to Boot Multi User, Boot Single User, Escape to loader prompt, Reboot, select a non-default kernel or configure boot options. Press
3to reach the loader prompt.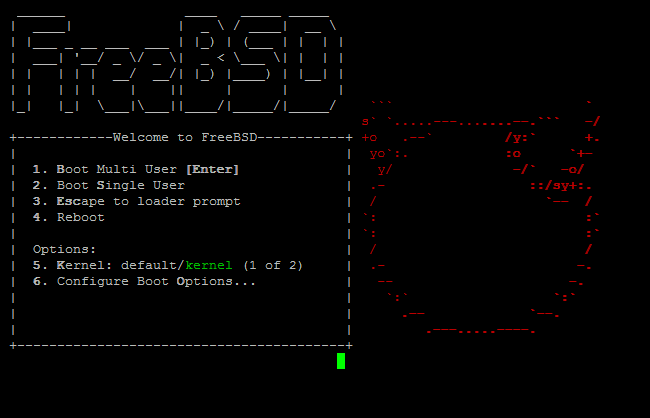
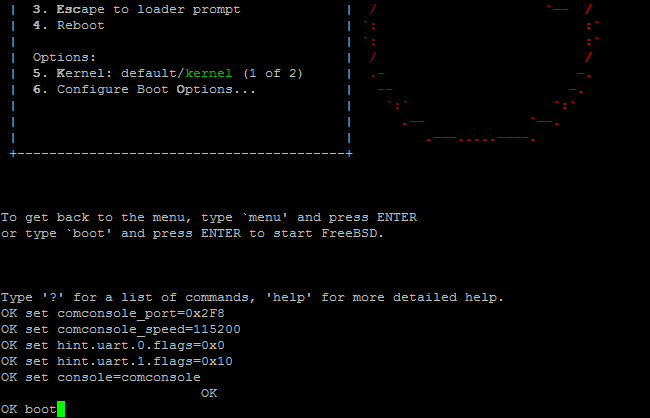
The loader “OK” prompt will be displayed. At the prompt type each of the following commands in the order listed. Press
Enterafter each command:set comconsole_port=0x2F8 set comconsole_speed=115200 set hint.uart.0.flags=0x0 set hint.uart.1.flags=0x10 set console=comconsole boot
The kernel will start to load. Some boot output will be displayed and then a prompt will ask for the terminal type. Enter the terminal type which best corresponds to the program used to connect to the console, or press
Enterif it is unknown. The installer will start to run after the terminal type is entered.Select
Installfrom first installer screen and then a series of screens will be displayed asking about system/network settings, disk provisioning, which components to install, and other items relevant to the installation. Configure the system appropriately for the needs of this server.When configuring network settings and interfaces, on 4 port models the ports will correspond to the interface names igb0, igb1, igb2, igb3 from left to right. On 6 port models, the ports will correspond to the interface names igb1, igb0, igb2, igb3, igb4, igb5 from left to right.
When the installer screen labeled “Final Configuration” is reached, select the option to Exit (described as Apply configuration and exit installer), then press
Enter.A box labeled “Manual Configuration” will offer the chance to launch a shell to make manual configurations before the system reboots. Select
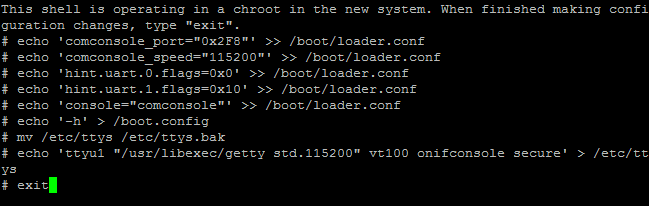
Yesand pressEnter.A shell prompt will be displayed, showing as a
#. At the prompt type each of the following commands. PressEnterafter each:echo 'comconsole_port="0x2F8"' >> /boot/loader.conf echo 'comconsole_speed="115200"' >> /boot/loader.conf echo 'hint.uart.0.flags=0x0' >> /boot/loader.conf echo 'hint.uart.1.flags=0x10' >> /boot/loader.conf echo 'console="comconsole"' >> /boot/loader.conf echo '-h' > /boot.config mv /etc/ttys /etc/ttys.bak echo 'ttyu1 "/usr/libexec/getty std.115200" vt100 onifconsole secure' > /etc/ttys exit
A box labeled “Complete” will be displayed and offer the choice to Reboot into the installed system or access the Live CD. Select
Rebootand pressEnter. The system will reboot.Remove the USB drive from the USB port. FreeBSD will start up automatically. If the USB drive remains attached, the system will boot into the installer again because the system firmware is configured so that a device plugged into the USB port will be booted with a higher priority.