CentOS Rescue Install
If the CentOS Linux operating system that was installed on a system purchased from Netgate is corrupted or otherwise needs to be reinstalled, the following instructions can be followed to initiate reinstallation over the Internet.
The first set of instructions indicate how to use a USB drive to boot to an image that will automatically initiate an installation. There is also a procedure listed for manually initiating an installation by typing commands on the iPXE command prompt that can be used on an RCC-VE or an APU.
Installation using a USB memstick
Make sure the server is powered off.
Depending on the particular model of server being reinstalled, either connect a monitor and USB keyboard or access the server using the serial console port.
If using a monitor and a keyboard, connect the monitor cable to the VGA or HDMI port and connect the keyboard to one of the USB ports on the front of the device.
When using the serial console port, attach the proper cabling to the serial
port. On the C2758 or APU this is a null modem cable (or the proper combination
of cabling and null modem adapter) connected to the DB-9 serial port on the
front of the server. On an RCC-VE this would be a USB cable with a mini-USB
connector. Connect the other end of the cable to another system (serial-to-USB
adapter for the C2758/APU, USB type A port for the RCC-VE). Use a terminal
program on the other system to connect to the system console through the serial
port. PuTTY is a free application that can be used for this purpose that will
work on Windows, Linux or macOS. Other choices include minicom (Linux), dterm
(Linux), screen (Linux, macOS), or cu (macOS). The speed should be set to
115200 baud, data bits to 8, parity to none, stop bits to 1.
Retrieve the iPXE rescue image from http://install.netgate.com/rescue/CentOS7/ipxe.usb. Save the image to a USB memstick.
See also
- Writing Flash Drives
Writing an OS installation image to flash media
Insert the memstick in one of the USB ports on the server and power the server on. The server should automatically boot from the memstick. A screen will display a warning that the OS is about to be reinstalled.

After the warning message is displayed for 5 seconds, a menu will display that
has choices for which type of server being reinstalled. Highlight the correct
type of server and press enter.

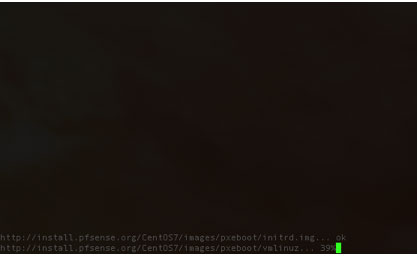
The required files to launch a CentOS 7 install will be retrieved over the internet.
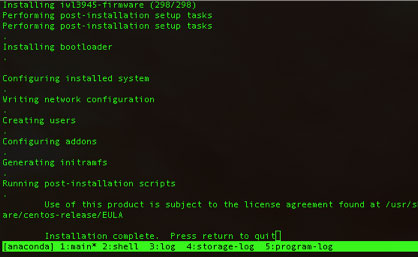
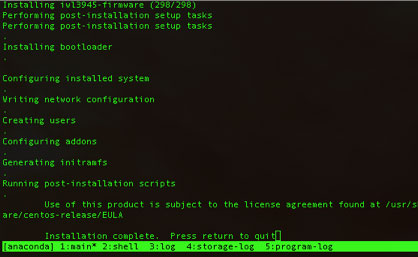
The installation process will complete fully without any further need for input.
The amount of time this takes is dependent on the speed of the internet
connection and the type of server being reinstalled. On a C2758 with a gigabit
internet link, it may take as little as 10 minutes. On an APU with a 2 Mbps DSL
connection, it may be more than an hour. When installation has completed, a
message will be displayed prompting to press return to quit. Press return.
The system will reboot. CentOS 7 should automatically load when it resets.
Installation from the iPXE command prompt
Make sure the server is powered off.
Attach the proper cabling to the serial port. On the APU this would be a null modem cable (or the proper combination of cabling and null modem adapter) to the DB-9 serial port on the front of the server. On an RCC-VE this would be a USB cable with a mini-USB connector. Connect the other end of the cable to another system (serial-to-USB adapter for the APU, USB type A port for the RCC-VE).
Use a terminal program on the other system to connect to the system console
through the serial port. PuTTY is a free application that can be used for this
purpose that will work on Windows, Linux or macOS. Other choices include minicom
(Linux), dterm (Linux), screen (Linux, macOS), or cu (macOS). The speed
should be set to 115200 baud, data bits to 8, parity to none, stop bits
to 1.
Attach an ethernet cable to one of the network ports. On an APU, use the leftmost ethernet port (labeled “OPT1”). On a 4 port RCC-VE, use the leftmost ethernet port (labeled “ETH0”). On a 6 port RCC-VE, use the third leftmost ethernet port (labeled “ETH2”). Connect the other end of the cable to a local LAN segment that has connectivity to the Internet.
Attach the power cable to the system power port. The system should power on, and it should start to print output indicating the system is starting up in the terminal program.
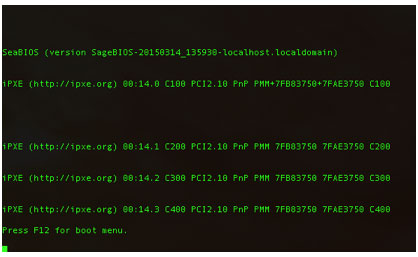
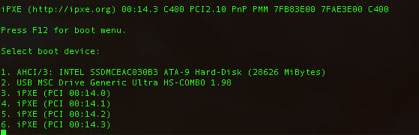
Now initiate iPXE. If no bootable media is installed in the system, iPXE may
automatically start. Otherwise, press F12 to reach the boot menu when the
console prints the message “Press F12 for boot menu” and select the number
associated with iPXE when the menu is displayed. On the APU there will only be
one choice for iPXE, on the RCC-VE there will be 4 choices for the 4 onboard
ports. Select the first iPXE listed on the RCC-VE. Type the correct number and
press Enter.
iPXE should start up. Press ctrl-B to get a command prompt. There is a
message indicating this displayed on the screen, but only for a few seconds
before iPXE automatically starts trying to use DHCP for configuration. Press
ctrl-B immediately to get to the prompt.
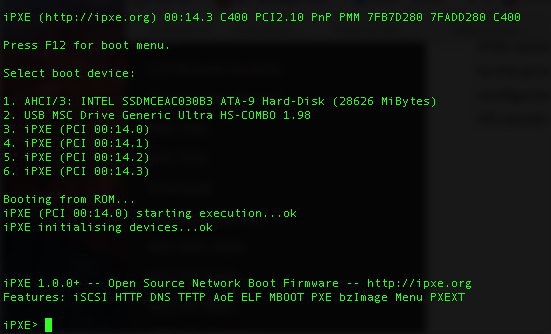
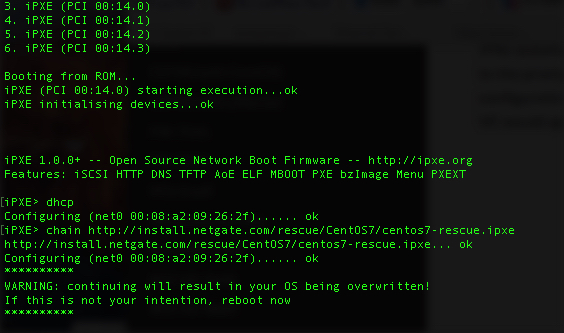
At the iPXE command prompt, first type dhcp then press Enter. This will
attempt to configure the port with an IP address using DHCP. If this succeeds,
the screen will have a message saying ok and return to the prompt. Now type
chain http://install.netgate.com/rescue/CentOS7/centos7-rescue.ipxe then
press Enter. iPXE will download the script from that URL. A warning will
appear that the OS is about to be reinstalled.
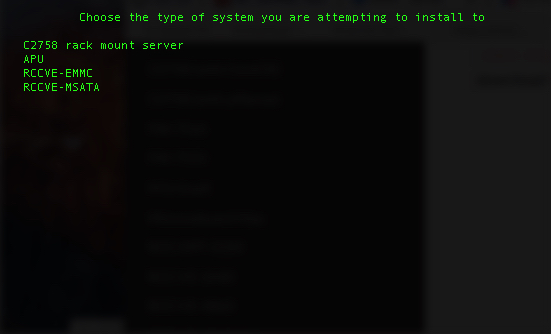
After the warning message is displayed for 5 seconds, a menu will display that
has choices for the type of server being reinstalled. Highlight the correct type
of server and press Enter. There are 2 entries for the RCC-VE which contain
the type of storage used as the target. If the unit has an mSATA drive
installed, and it should be the target, select RCCVE-MSATA. Otherwise, select
RCCVE-EMMC to install to the onboard EMMC drive.
The required files to launch a CentOS 7 install will be retrieved over the
internet. The installation process will complete fully without any further need
for input. When installation has completed, a message will be displayed
prompting to press return to quit. Press return.