Installing TNSR Using Software RAID
This document describes the process of configuring the TNSR installer to use
multiple disks via Linux software RAID. Ubuntu implements Linux Software RAID
devices through the md (Multiple Devices) device driver.
Follow the Installation Process until the Configure Storage step
Select Custom Storage Layout
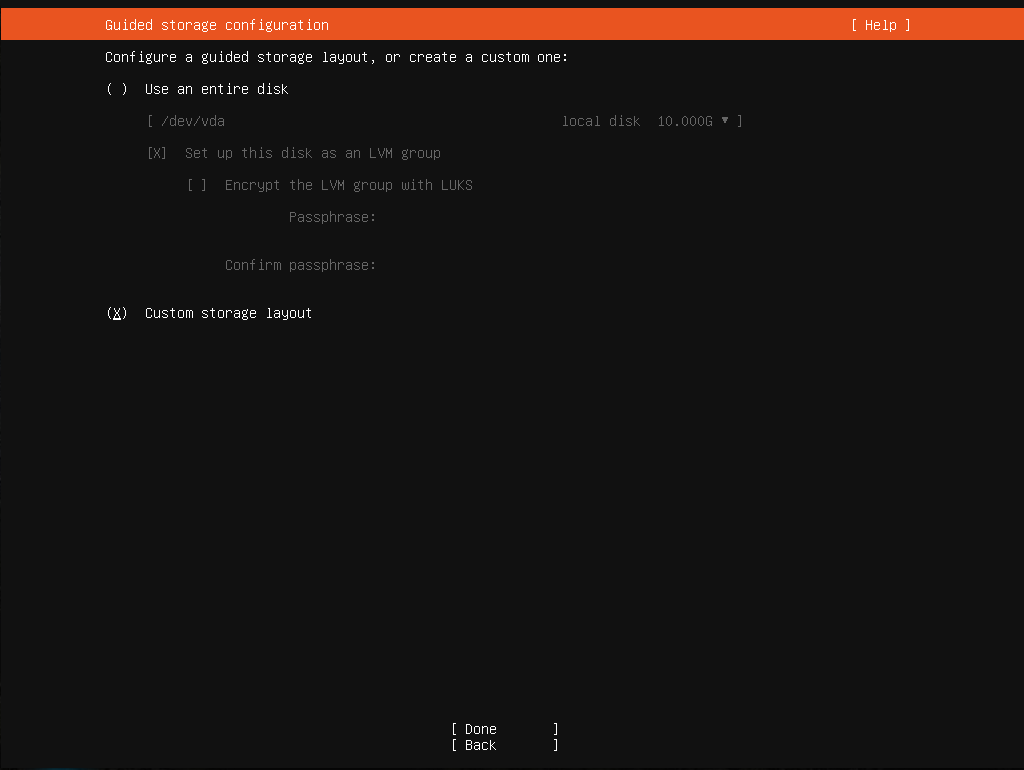
Custom Storage Layout
Select the first disk and Use As Boot Device
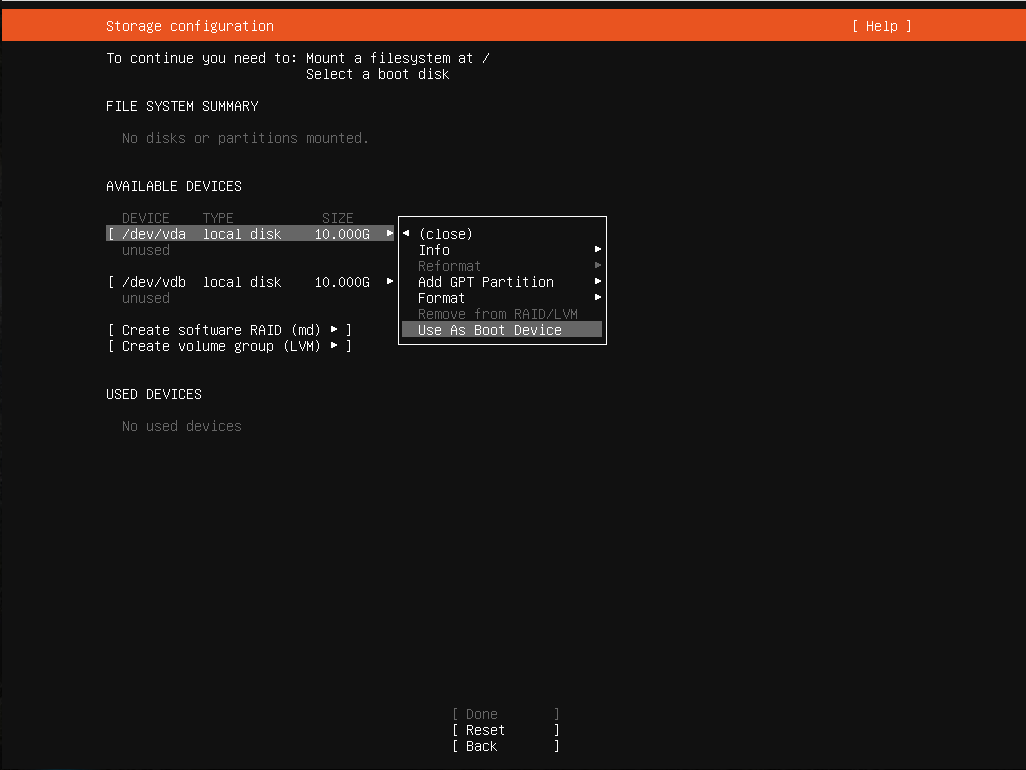
Use As Boot Device
Select the first disk and Add GPT Partition

Add GPT Partition
Create a new unformatted partition
Leave Size blank to use the full disk
Set Format to Leave Unformatted
Select Create
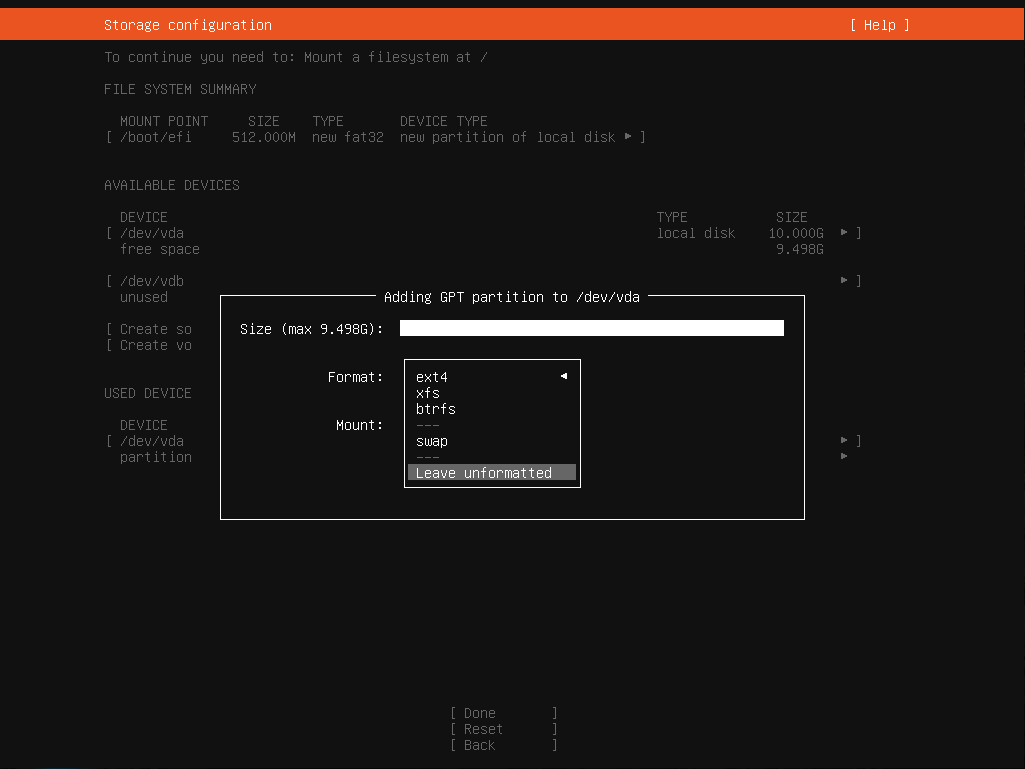
Create Unformatted Partition
Repeat the previous three steps for the second disk (use as boot device, add GPT partition, create a new unformatted partition)
At this point the disks will each have a new partition and either an EFI partition or a BIOS grub spacer:
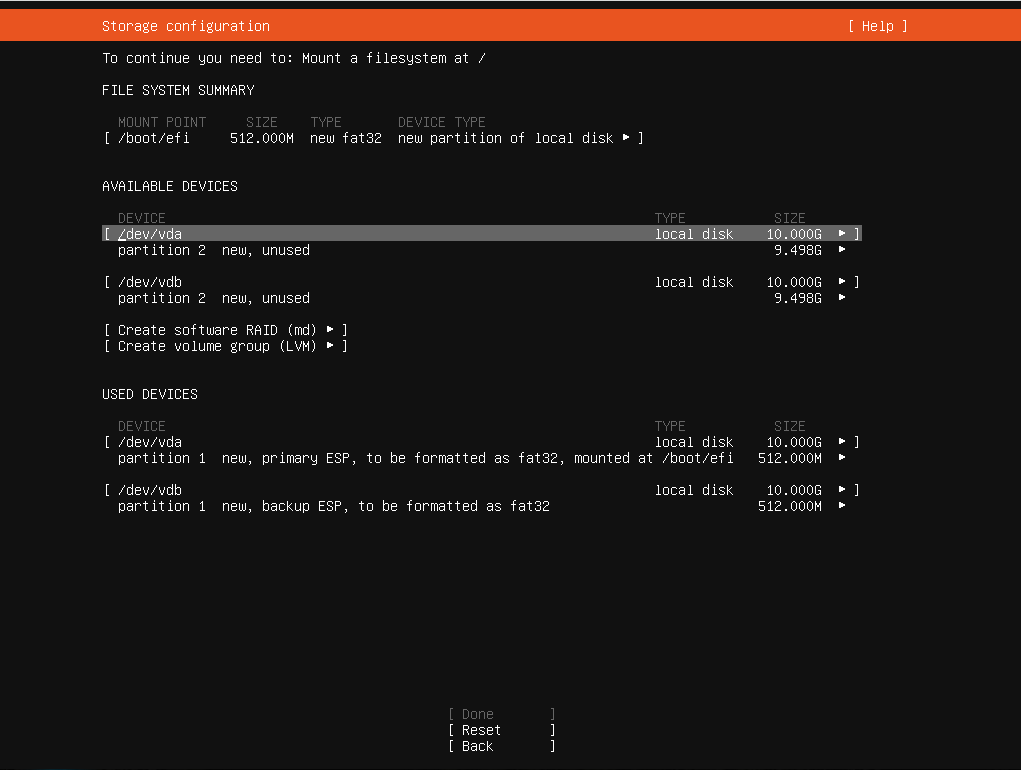
Basic Partition Layout
Select Create software raid (md)
Set RAID Level to 1 (mirrored)
Select partition 2 on each disk
Select Create
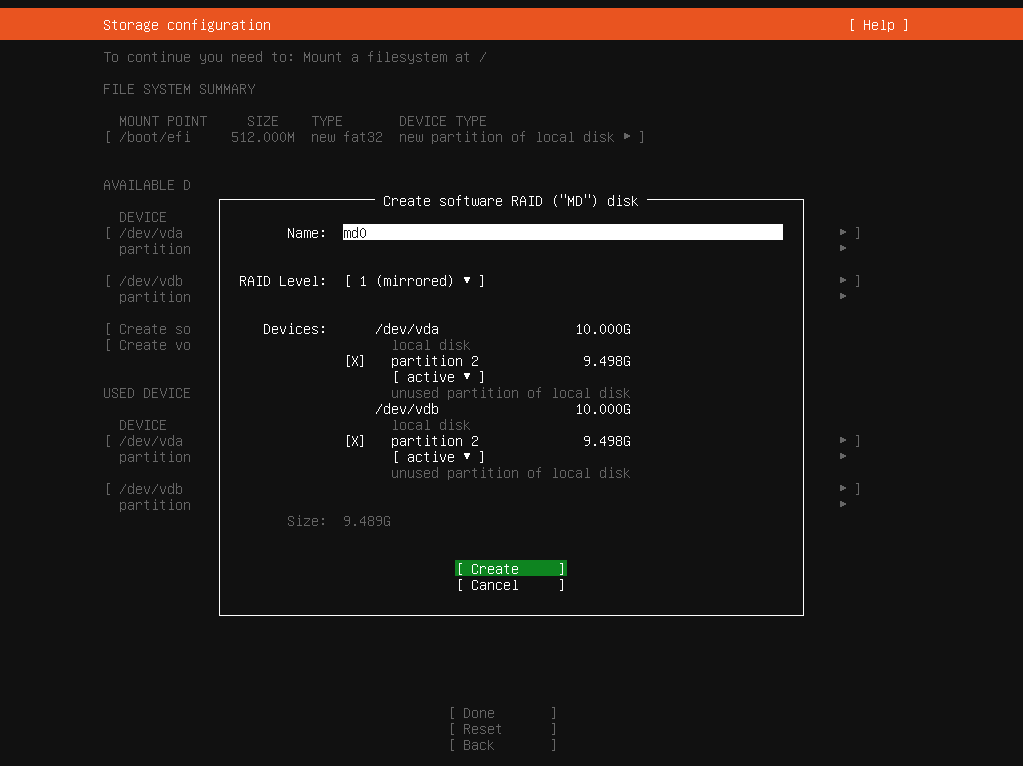
RAID (MD) Disk Configuration
The result will look like RAID Device, Ready for Use:
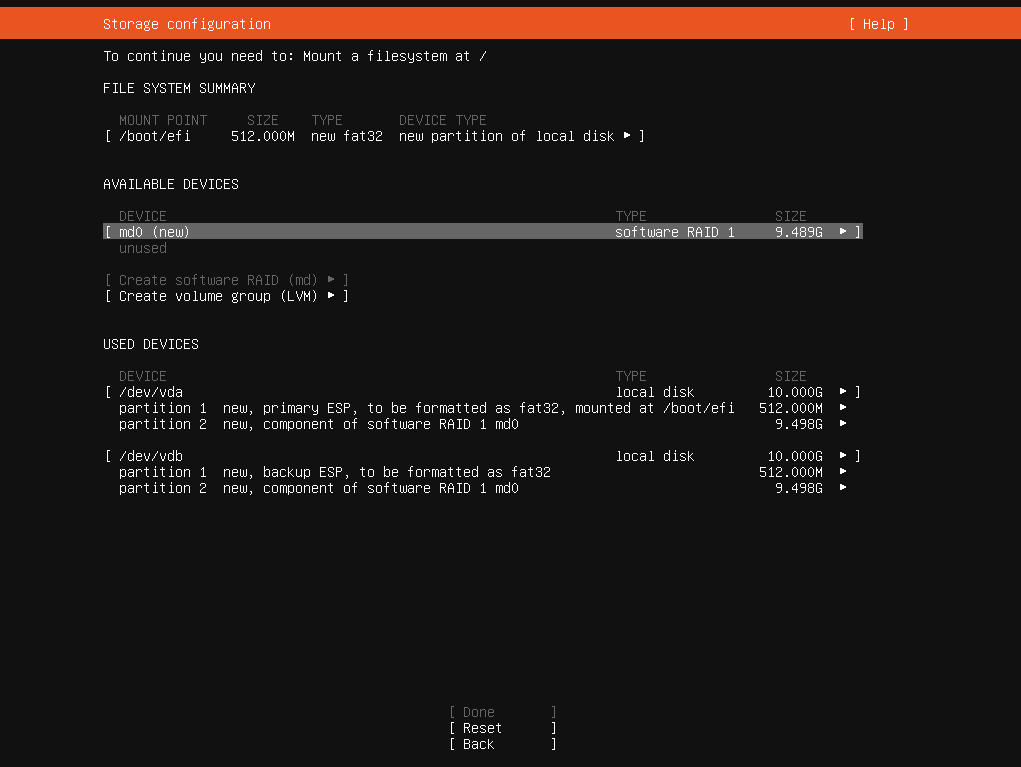
RAID Device, Ready for Use
Create a swap partition
Select md0 and Add GPT Partition
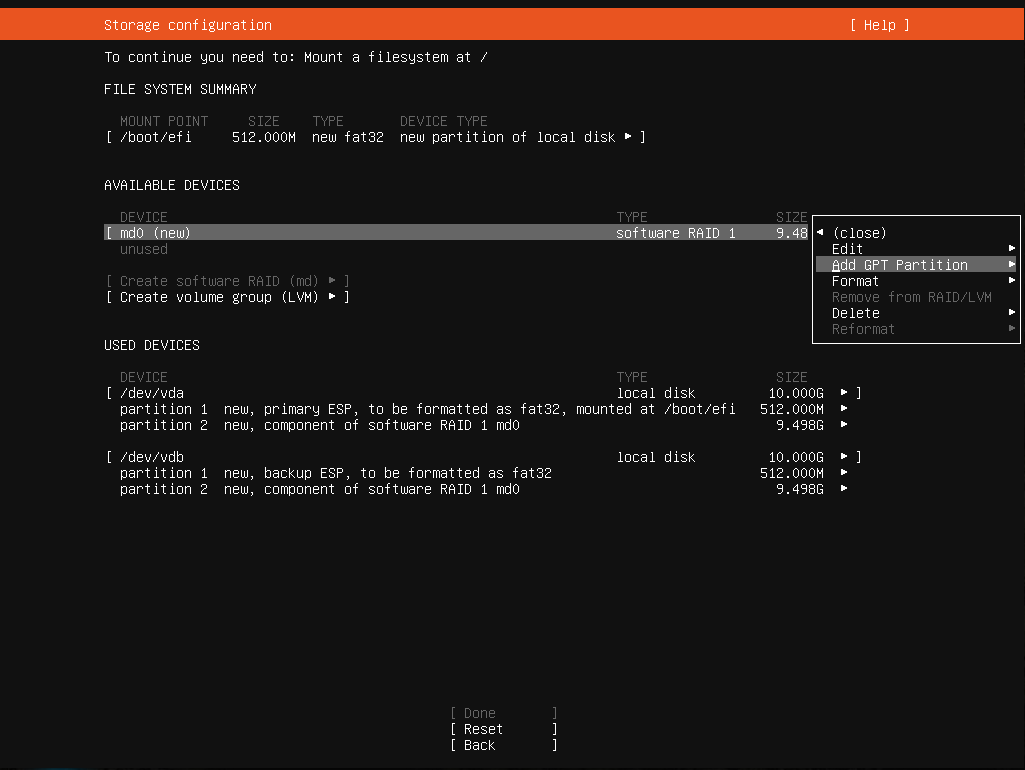
Add GPT Partition on
md0¶Set Size to the desired size for a swap partition (e.g.
2G,4G, etc., based on RAM size and available disk space)Set Format to Swap
Click Create
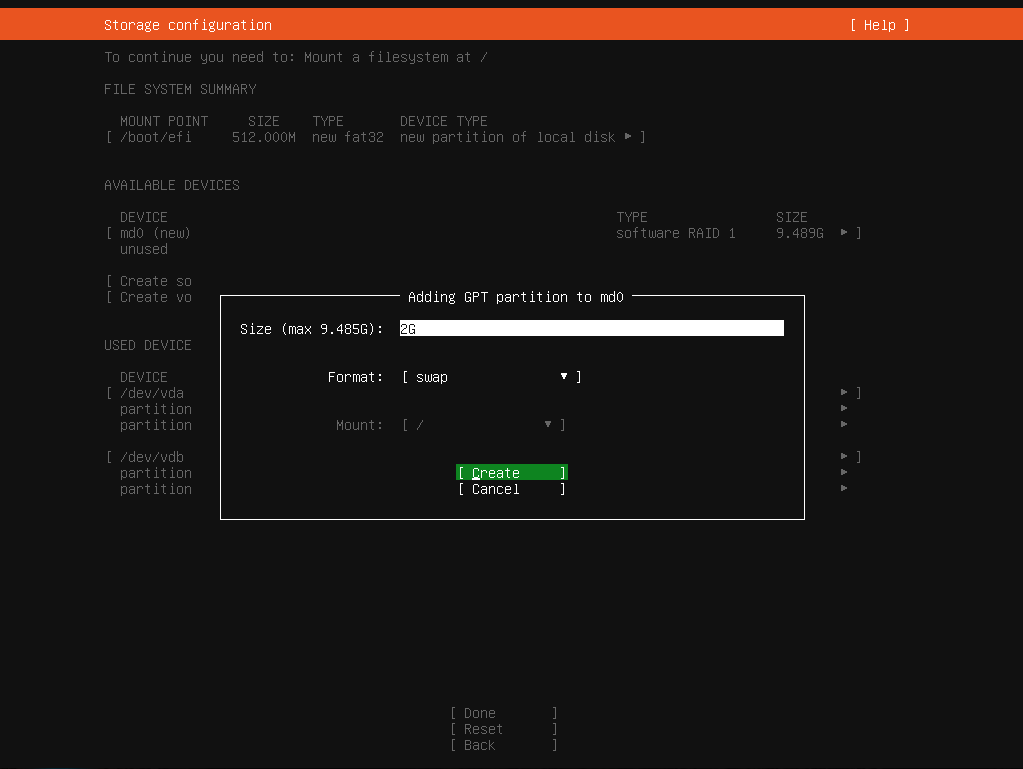
Create Swap Partition
Create root partition
Select md0 and Add GPT Partition
Leave Size blank to use all remaining disk space
Set Format to an appropriate filesystem type (e.g. ext4)
Set Mount to /
Select Create
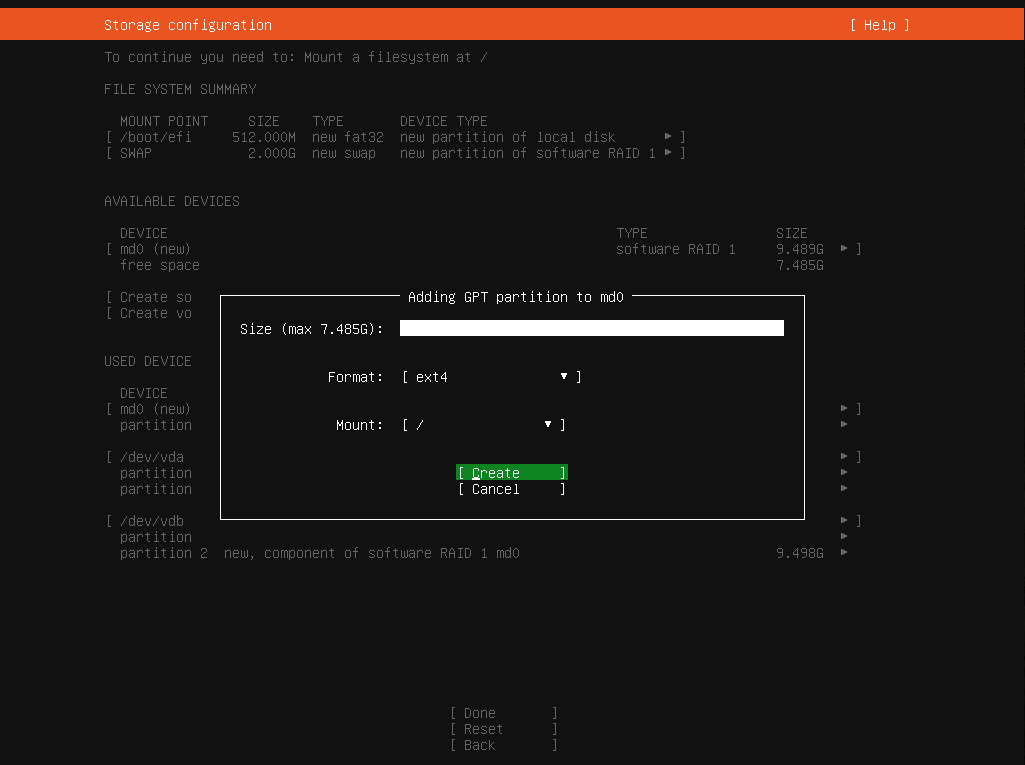
Create Root Partition
The final disk layout will look like Final Disk Layout:
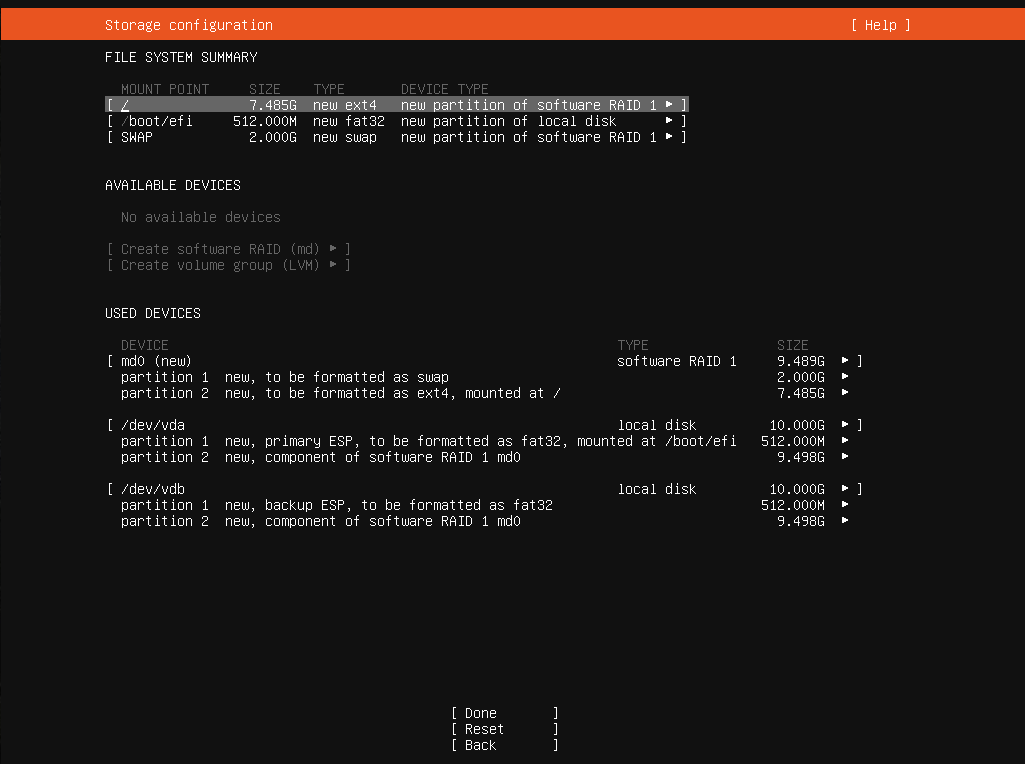
Final Disk Layout
Select Done
Select Continue to format and install
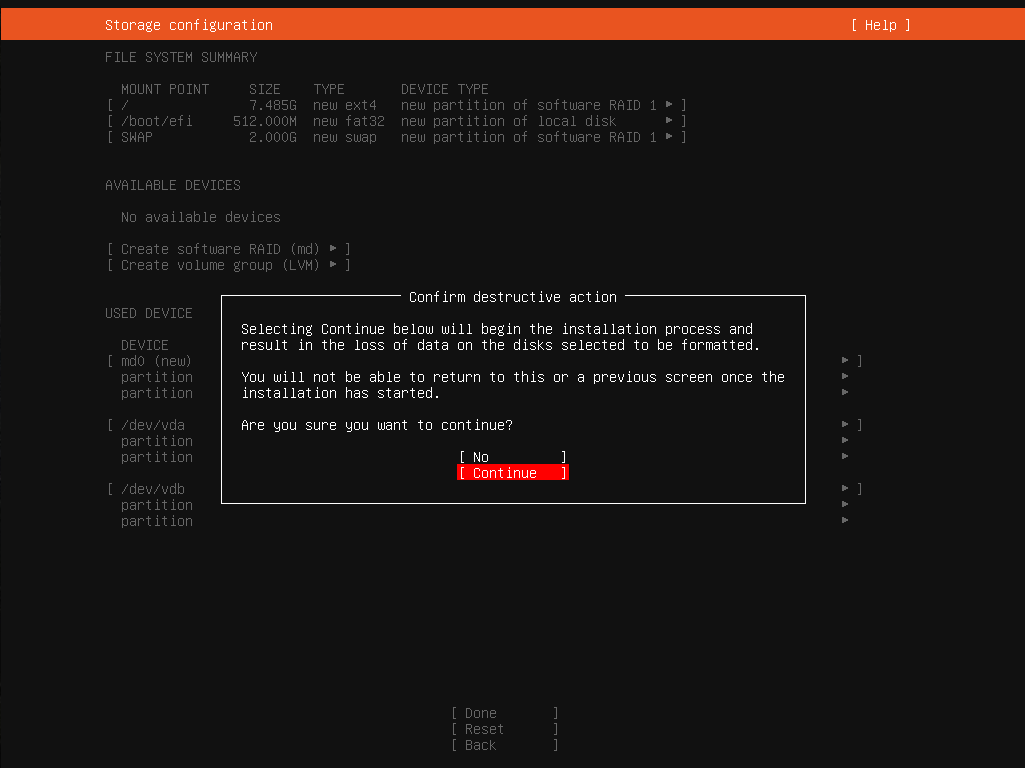
Confirm Installation
Return to Installation Process and continue following the remaining installation instructions.