Getting Started
The basic firewall configuration begins with connecting the Netgate® appliance to the Internet. The Netgate appliance should be unplugged at this time.
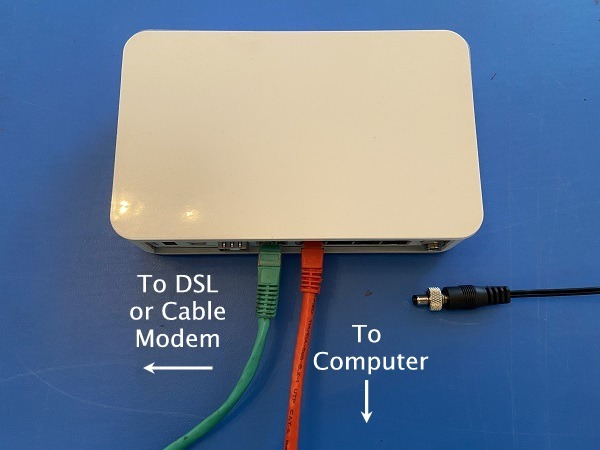
Connect one end of an Ethernet cable to the WAN port (shown in the Input and Output Ports section) of the Netgate appliance. The other end of the same cable should be inserted into a LAN port on the ISP Customer Premise Equipment (CPE) device, such as a cable or fiber router. If the CPE device provided by the ISP has multiple LAN ports, any LAN port should work in most circumstances.
Next, connect one end of a second Ethernet cable to the LAN port (shown in the Input and Output Ports section) of the Netgate appliance. Connect the other end to the computer.
What next?
To connect to the GUI and configure the firewall in a browser, continue on to Initial Configuration.
To connect to the console and make adjustments before connecting to the GUI, see Connecting to the USB Console.
Warning
The default IP Address on the LAN subnet on the Netgate firewall is
192.168.1.1/24. The same subnet cannot be used on both WAN and LAN,
so if the default IP address on the ISP-supplied modem is also
192.168.1.1/24, disconnect the WAN interface until the LAN interface
on the firewall has been renumbered to a different subnet (like
192.168.2.1/24) to avoid an IP Address conflict.
To change an interface IP address, choose option 2 from the Console Menu and walk through the steps to change it, or from the GUI, go through the Setup Wizard (opens at first boot, also found at System > Setup Wizard) and change the IP address on Step 5. Complete the Wizard and save the changes.