Installing pfSense CE on an MBT-2220 and MBT-4220
Download the installer
Download the latest pfSense® CE software AMD64 (64-BIT) installer image and select the VGA option.
Prepare installation media
Write the install image to a USB flash-drive or CD/DVD. The installation media must be at least 700MB in size.
Note
MinnowBoard devices shipped after September 28, 2018, come with a USB key already prepared to install pfSense software. Go directly to Install pfSense CE below.

Included USB Key for pfSense Installation
Install pfSense CE software
Install pfSense CE software in the standard way for a VGA console device:
Insert the installation media. If using the USB key provided by Netgate, the blue pfSense project logo should face up. Ensure that the USB key is completely inserted.
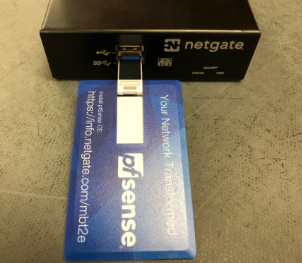
Blue pfSense Logo Faces Up
Note
The best practice is to put the installation media (USB key) in the bottom USB slot (USB 3.0).
Insert a USB keyboard.
Connect the HDMI port to a powered on monitor.
Power on the device.
Access the boot manager and choose to boot from the USB drive.
Follow the prompts to install pfSense software.
Warning
When reinstalling, use UFS, not ZFS. These devices cannot currently boot ZFS volumes when also loading the necessary video drivers.
Add necessary HDMI settings
Note
These steps are only necessary if the device upgraded pfSense software from an earlier version. If it has a fresh installation of pfSense software version 2.4.4 or above as outlined in the preceding section, this is not necessary.
To enable HDMI “hot plug”, the graphics driver must be loaded. This procedure is automated in the 2.4.4-RELEASE installer, but can be performed manually on devices upgraded from older versions.
Note
“Hot plugging” allows HDMI output to work when a monitor is connected at any time, otherwise HDMI output will not work unless a monitor is connected while the device boots.
Warning
If the device is currently installed with ZFS, do not make these changes or the device will not boot successfully. These devices cannot currently boot ZFS volumes when also loading the necessary video drivers.
If the video drivers must be loaded, reinstall the device using UFS, not ZFS.
Add the following to
/boot/loader.conf.localmanually through the shell or through the GUI, by navigating to Diagnostics > Edit File:i915kms_load=YES drm.i915.enable_unsupported=1 kern.vt.fb.modes.VGA-1=d kern.vt.fb.default_mode="1024x768"
Reboot the device to apply the settings. Once applied, these changes will persist through reboots and upgrades.