mSATA Installation

The SG-4860/8860 1U have built-in onboard eMMC storage. Optionally, a mSATA drive could be installed as an upgrade or to bypass the onboard eMMC flash memory.

Warning

Before proceeding:

  1. Backup the configuration file, if possible.

  2. Unplug the system for at least 60 seconds to ensure all phantom power has dissipated.

  3. Anti-static protection must be used throughout this procedure.

  4. Any hardware damage incurred during this procedure is not covered by the hardware warranty.

Note

By default, the mSATA drive will be the first drive recognized by the Netgate® device. pfSense® Plus software must be reinstalled on the mSATA drive.

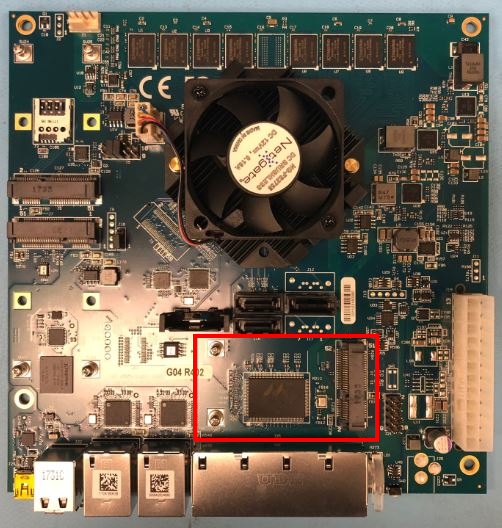
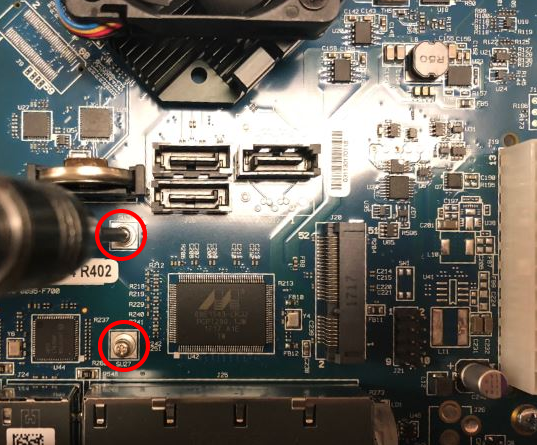
The mSATA slot is located on the top of the SG-4860/8860 1U system board. The mSATA slot is directly behind the Ethernet ports. There are two other similar ports on the top of the board, but they are mPCIe ports. The mSATA drives are not electrically compatible with mPCIe connectors.

../_images/sg-4860-8860-1u-sys-board-msata.png

SG-4860/8860 1U mSATA Location

  1. Remove the seven (7) lid screws and remove the lid.

    ../_images/sg-4860-8860-1u-lid-screws.jpg

    Lid Screws

    Note

    Some systems may only have six (6) lid screws.

  2. Unplug the Power Supply Connector from the system board, being careful not to flex the board.

    ../_images/sg-4860-8860-1u-ps-connector.png

    Power Supply Connector Location

    Warning

    Be sure to pull from the connector, not the wires.

  3. Unplug the red soft-power button from the system board.

    ../_images/sg-4860-8860-1u-soft-power-button.png

    Soft Power Button Wire

    Note

    When replacing this connector, it plugs onto pins 3 & 4.

  4. Remove the screws from the mSATA standoff.

    ../_images/sg-4860-8860-1u-remove-standoff-screws.png

    Remove the mSATA Standoff Screws

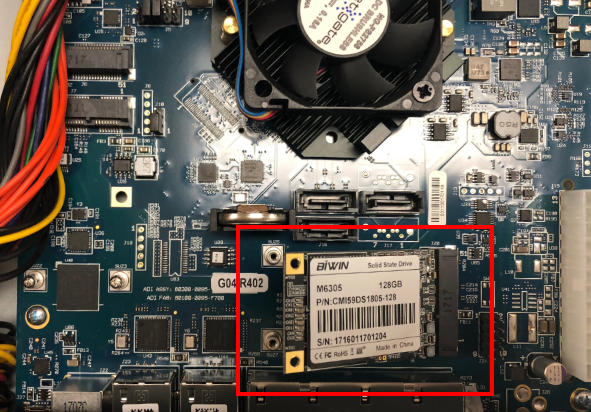
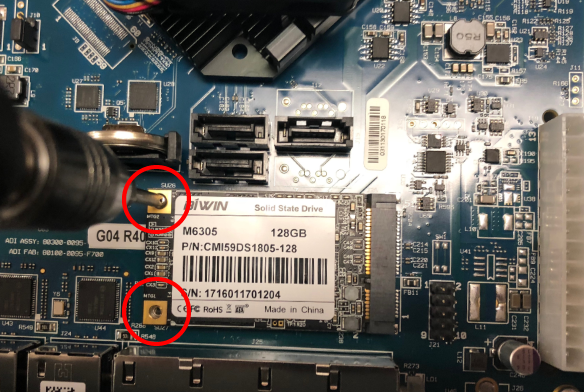
  5. Insert the gold leads of the mSATA drive into the slot at the angle shown.

    Note

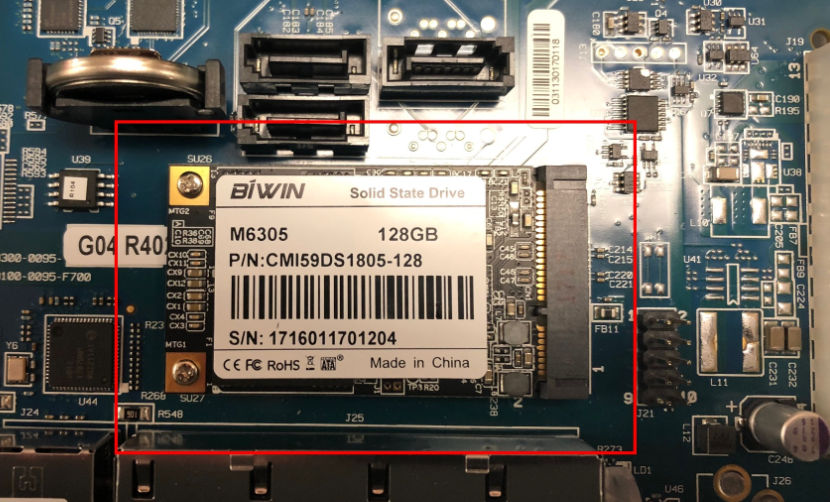
    Be sure the drive label is facing up and can be seen. The drive slot is keyed and the drive can only go in one way. Do not force the drive into the slot.

    ../_images/sg-4860-8860-1u-msata-insertion.png

    mSATA Drive Properly Inserted into the Slot

  6. Push the mSATA drive down until it is parallel with the system board and replace the screws to secure the mSATA drive in place.

    ../_images/sg-4860-8860-1u-msata-screws.png

    Secure the mSATA Drive

    ../_images/sg-4860-8860-1u-msata-installed.png

    mSATA Drive Installed

  7. Replace the red soft-power button on pins 3 & 4.

    ../_images/sg-4860-8860-1u-soft-power-button.png

    Soft Power Button Wire

  8. Replace the ATX power supply connector.

  9. Replace the lid and lid screws. Be sure the L-Bracket is not pinched by the lid.

    ../_images/sg-4860-8860-1u-attach-lid.jpg

    Proper Placement of the Lid and L-Bracket

  10. Reinstall the pfSense® Plus software on the new mSATA drive.

  11. Restore the configuration backup if one is available.

See also

For information on restoring from a previously saved configuration, see Backup and Restore.